13
Register your product warranty online at: www.BHFitnessUSA.com
Questions regarding warranty and parts call: 636.634.2217
TM
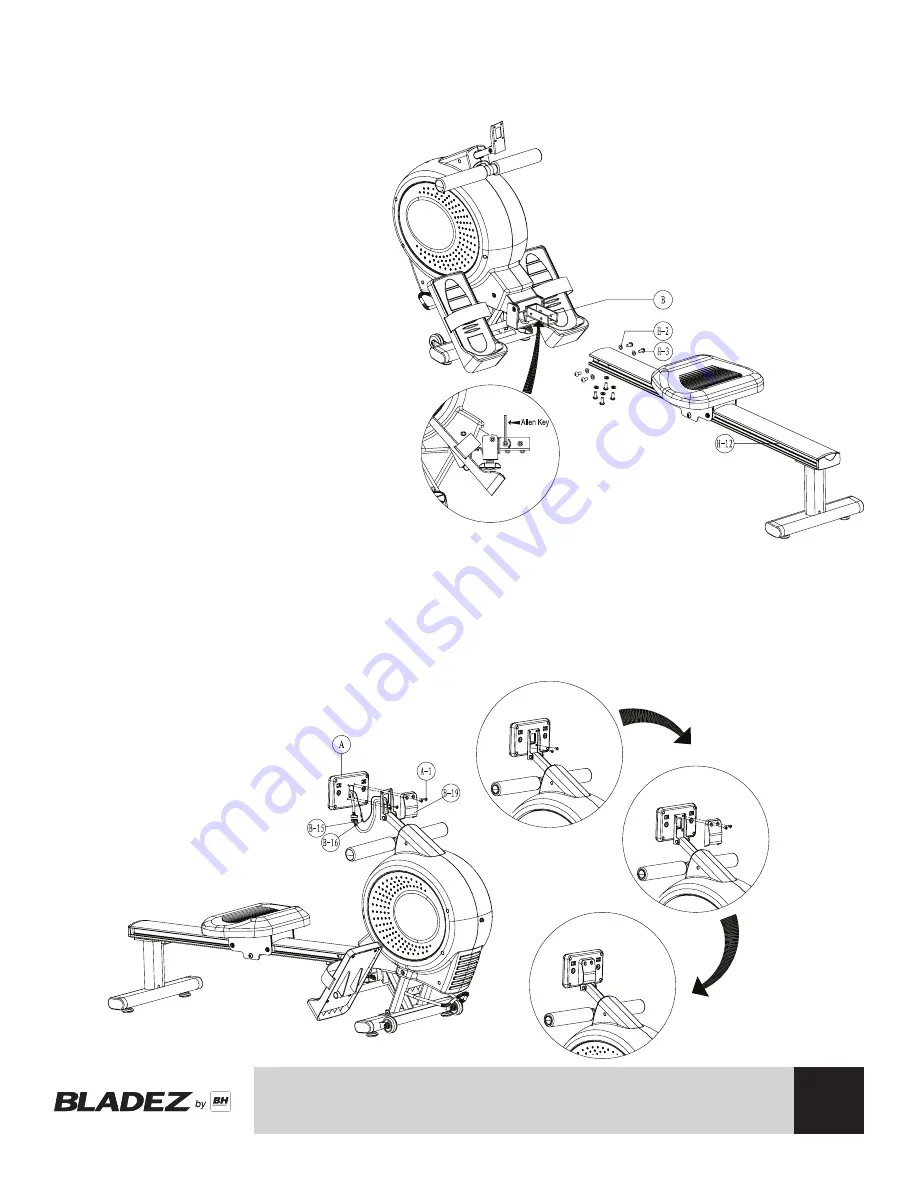
STEP 5
Please remove the M8xP1.25x20L
Screws (H-3) and Flat Washers (H-2)
on the Main Frame (B), then insert
the slide rail (H-12) to the main frame
(B) and attach using M8xP1.25x20L
Screws (H-3) and Flat Washers (H-2).
Remarks: Do not screw one set of
the M8xP1.25x20L Screws and Flat
washers too tightly at one time. It is
better to fix the eight sets firmly at
the same time to allow you to change
angles and to level easily.
STEP 6
Take out the Screws (A-1) from the back of the Computer (A). Connect the Computer Cable (B-15)
and Wireless Receiver Cable (B-16). Next attach the Computer (A) onto Console Bracket (B-1) with
the Screws (A-1) you took off of the Computer (A).
ASSEMBLY INSTRUCTIONS


