background image

7

USB/SD/MMC/MP3 Mode

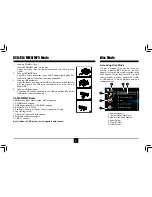
Accessing Disc Mode

If a disc is already in the disc slot but is not 

playing, press the 

SRC

 button on the front 

panel or on the remote control to switch to the 

DISC source. To play files from an SD or USB 

that is already inserted, choose the CARD 

or USB source. The disc playback screen is 

indicated below:

Disc Mode

1. Source Indicator

2. Current Track/Total Track

3. Name of the Song Display

4. Audio Folder

5. Picture Folder

6. Video Folder

2

4

5

6

1

3

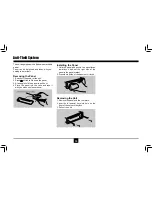
1.  Loading SD/MMC Card 


 Insert the SD/MMC card  into the slot.  


 The unit will play the music automatically and the LCD will show 

CARD.

2.  Take out SD/MMC Card 


 Push SRC button and switch to non CARD mode, slightly press SD/

MMC card, take out the card when it was popped out.

3.  Loading USB equipment


 Open the rubber cap, insert the USB into the connector and the unit 

play the music in the USB storer automatically, and the LCD will 

show USB.

4.  Take out USB equipment 


 Push the SRC button and switch to non USB mode, then take off the 

USB storer, close the rubber cap. 

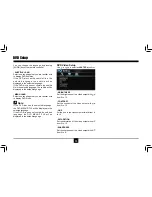
USB/SD/MMC Notes

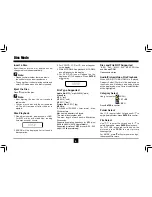
USB functions (flash memory type) MP3 music play.

1. SD/MMC card support.       

2. USB flash memory 2 in 1 (SD/MMC) support.  

3. Support FAT 16 & FAT 32

4. File name: 32 byte / dir name: 32 byte / tag name: 32 byte.  

5. Tag (id3 tag ver 2.0) 

    Title / artist / album: 32 byte support.  

6. Multi card reader not support.  

7. USB 1.1 support. 

Not all kinds of USB devices are compatible with the unit.


Summary of Contents for BT0318

Page 1: ...DVD VCD CD MP3 MP4 SD USB PLAYER WITH FM AM TUNER BT0318 Operating Instructions...

Page 2: ...lectrical system When replacing the fuse be sure to use one with an identical amperage rating Using a fuse with a higher amperage rating may cause serious damage to the unit Do not attempt to disassem...

Page 3: ...Disc slot 14 Remote sensor 15 Rotate the control to adjust volume level Audio mode select Press more than 2 seconds to enter into menu mode 16 Band Switch FM1 FM2 FM3 AM1 AM2 8 Short press to switch...

Page 4: ...5 Menu cursor 6 Enter 7 Program 8 Digit area 9 Short press to select audio menu and rotate the knob to adjust level Long press to enter into setting menu then each press changes the mode 10 Volume 11...

Page 5: ...tings tuner presets and the volume level will be retained in the unit s memory Clock Display Press DISP on the panel or on the remote control to display clock time and press DISP again to exit Clock S...

Page 6: ...OUD ON OFF When listening to music at low volumes this feature will selectively boost certain bass and treble frequencies BEEP ON OFF The beep tone feature allows the selection of an audible beep tone...

Page 7: ...uttons the unit will enter auto seeking During manual seeking when you press and hold the or buttons the unit will seek continuously Preset Mode Six numbered preset buttons store and recall stations f...

Page 8: ...RD 2 Take out SD MMC Card Push SRC button and switch to non CARD mode slightly press SD MMC card take out the card when it was popped out 3 Loading USB equipment Open the rubber cap insert the USB int...

Page 9: ...4 avi MPEG 2 vob MPEG 1 dat Picture file JPEG jpg MP3 file ISO 9660 or ISO 9660 Joliet format Max 30 characters Max nested directory is 8 levels The max album number is 99 The max length of each track...

Page 10: ...ode list may not play correctly Electronic Shock Protection 10 seconds for CD DA CDA 45 seconds for MP3 recorded at 44 1kHz 128kbps 90 seconds for WMA recorded at 44 1kHz 128kbps Bit Rates The unit su...

Page 11: ...e RPT icon will appear on the display For VCD CD Display appears RPT ONE RPT ALL RPT OFF For DVD Display appears RPT CHAPTER RPT TITLE RPT OFF For File disc Display appears RPT ONE RPT DIR RPT ALL RPT...

Page 12: ...apter and time display on top of the screen Current item is highlighted Use to select desired item Use digit button to select number Press ENTER to confirm Program Press PROG to enter program list Use...

Page 13: ...1 KID SAFE 2 G 3 PG 4 PG13 5 PG R 6 R 7 NC 17 8 ADULT The rating of the disc is from 1 to 8 1 with the most limits when playing 8 with the least limits when playing Original setting 8 Note The rating...

Page 14: ...t you are familiar with to display DVD menu Note If the DVD disc has the selected language the DVD MENU TITLE will be displayed in the selected language If the DVD disc does not contain the selected l...

Page 15: ...14 Electrical Connections Wiring Diagram...

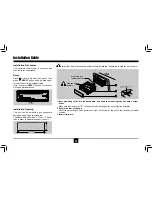
Page 16: ...le hold the panel to pull it out 4 Place the panel into the case and take it with you when you leave the car Installing the Panel 1 Hold the panel and ensure the panel faces toward you and set the rig...

Page 17: ...o the car body by rubber cushion 3 Insert trim plate Installation Procedures First complete the electrical connections and then check for correctness Reset Press button to flip down the panel Then pre...

Page 18: ...c is dirty or damaged Clean disc or change another disc Disc sound skips tone quality is low Disc is dirty or damaged Clean CD or change another CD Sound skips due to vibration Mounting angle is over...

Page 19: ...tery CR2025 1 4 1 1 1 2 1 1 1 1 Specifications Note Specifications and the design are subject to change without notice due to improvements General Power supply Maximum power output Continuous power ou...

Page 20: ...CLASS 1 LASER PRODUCT P N 127075005555...

Reviews: