4. Press the trigger button, the display screen freezes, showing the
thermal image at the moment, the thermal image will be surrounded by
white boxes.
5. After acquiring the image, press the
OK
button to save the acquired
thermal image. The thermal image is stored in the internal memory of the
instrument in the form of images. The thermal image can be viewed via
USB. Press the return button to continue scanning the target area or
object.
6. In the process of scanning the area or object where the lens is aligned,
press the
OK
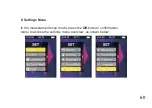
button to access the menu options. In the menu options
you can set various parameters and view meter information (see 8.
Setup menu). Press the back / on button to exit the menu.
48
Summary of Contents for 017600710
Page 1: ...1760TMC 600 1...
Page 36: ...Dopo aver inserito l opzione G SENSOR l interfaccia la seguente 36...
Page 388: ...388...


