background image

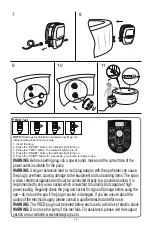
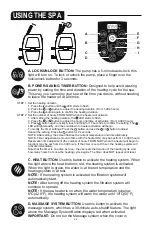
A. LOCK/UNLOCK BUTTON:

 The pump has a 5-minute auto-lock, this 

light will turn on. To lock or unlock the pump, place a finger over the 

lock/unlock button for 3 seconds.

C. HEAT BUTTON: 

Use this button to activate the heating system. When 

the light above the heat button is red, the heating system is activated. 

When the light is green, the water is at the set temperature and the 

heating system is at rest.

NOTE:

 If the heating system is activated the filtration system will 

automatically start.

NOTE:

 After turning off the heating system the filtration system will 

continue to operate.

NOTE:

 If the spa heater is on when the water temperature is below 

6ºC(42.8°F), the heating system will warm the water until 10ºC(50°F) 

automatically.

B. POWER-SAVING TIMER BUTTON:

 Designed to help avoid wasting 

power by setting the time and duration of the heating cycle for the spa.

This way, you can enjoy your spa at the time you desire, without needing 

to leave the heater on at all times.

A

B

C
D

G

E

F

H

I

D. MASSAGE SYSTEM BUTTON:

 Use this button to activate the 

massage system, which has a 30-minute auto-shutoff feature. The light 

above the Massage System Button displays red when activated.

IMPORTANT:

 Do not run the Massage system when the cover is 

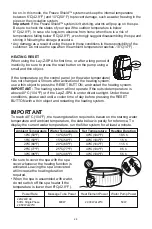
STEP 1: Set the heating duration

1. Press the     button unit the     LED starts to flash.

2. Press the     or     button to adjust the heating duration (From 1-999 hours).

3. Press the     button again to confirm the heating duration.

STEP 2: Set the number of hours FROM NOW when the heater will activate

1. After setting the heating duration, the     LED starts to flash.

2. Press the     or     button to adjust the hours until time of activation (From 0-999 hours).

3. Press     button again or simply touch nothing for 10 seconds to confirm the setting. The       

LED will light steadily, and the countdown to heater activation will begin.

To modify the timer settings: Press the     button and use the     or     button to adjust.

Cancel the setting: Press the     button for 2 seconds.

NOTE: After setting, the screen flashes the current temperature and time alternately.

NOTE: Timer adjustment (amount of time with the heater ON) may be set from 1 to 999 hours; 

Reservation time adjustment (the number of hours FROM NOW when the heater will begin to 

function) may be set from 0 to 999 hours. If the timer is set at 0 hour, the heating system will 

activate immediately.

Note that the timer is one time per use - the user sets the duration of the heating cycle, and 

how many hours from now the heating cycle begins. The timer does NOT repeat until reset.

USING THE SPA

attached. Air can accumulate inside the spa and cause irreparable 

damage to the cover and bodily harm.

NOTE:

 Heat and massage system work together to create a warm 

massage experience.

26

Summary of Contents for LAY-Z-SPA 60001

Page 1: ...OWNER S MANUAL ...

Page 2: ...2 ...

Page 3: ...AINTENANCE pg 029 DISASSEMBLY AND STORAGE pg 031 TROUBLESHOOTING pg 033 ERROR CODES pg 034 FOR INSTRUCTION VIDEOS PLEASE VISIT BESTWAYCORP COM SUPPORT CONTENTS WE SUGGEST NOT TO RETURN THE PRODUCT TO THE STORE QUESTIONS PROBLEMS MISSING PARTS For FAQ Manuals Videos Or spare Parts Please Visit bestwaycorp com support V i s i t w w w bestwaycorp com suppo r t f o r h e l p 3 ...

Page 4: ...r to avoid a hazard To reduce the risk of electric shock do not use extension cord to connect unit to electric supply provide a properly located outlet No part of the appliance is to be located above the bath during use Parts containing live parts except parts supplied with safety extra low voltage not exceeding 12V must be inaccessible to a person in spa pool Parts incorporating electrical compon...

Page 5: ...g or unplug the appliance if hand is wet Always unplug the appliance before cleaning or other maintenance if leave it unattended on holidays When the appliance will be not used for a long time such as in the winter the spa or pool set should be disassembled and stored indoor For safety reason only use the accessories provided or approved by the spa manufacturer Do not to place the spa on slippery ...

Page 6: ...le for their safety Children should be supervised to ensure that they do not play with the appliance For market other than EU Water attracts children always attach a spa cover after each use Do not bury cord Locate cord to minimize abuse from lawn mowers hedge trimmers and other equipment DANGER Risk of Accidental Drowning especially children under 5 years Caution shall be exercised to prevent una...

Page 7: ...gh potential for causing fetal damage during the early months of pregnancy pregnant or possibly pregnant women should limit spa water temperature to 38 C 100 F C Before entering a spa the user should measure the water temperature with an accurate thermometer since the tolerance of water temperature regulating device varies D The use of alcohol drugs or medication before or during spa use may lead ...

Page 8: ...annot cover all risks and dangers in all cases Always use caution common sense and good judgment when enjoying any water activity Retain this information for future use In addition the following information can be supplied depending on the spa type Non Swimmers safety Continuous active and vigilant supervision of weak swimmers and non swimmers especially in exercise spas by a competent adult is re...

Page 9: ...spa When covers are used remove them completely from the water surface before entering the spa Protect spa occupants from water related illnesses by advising them to keep water treated and practicing good hygiene Consult the water treatment guidelines in the user s manual Store chemicals out of the reach of children Use the signage provided on the spa or within 2 000 mm of the spa in a prominent v...

Page 10: ...e spa must never be operated unless the spa is filled with water Immediately leave spa if the user feels uncomfortable or sleepy Never add water to chemicals Always add chemicals to water to avoid strong fumes or violent reactions that may result in hazardous chemical spray Regarding the information pertaining to cleaning maintenance of water and disposal of water please see section MAINTENANCE Re...

Page 11: ...tion where it cannot be damaged or cause damage Check the set water temperature and consider lowering it for the times when the spa will typically not be in use Depending on external conditions consider turning off the heater entirely if not using the spa for an extended period of time where the spa provides this option but still maintains residual disinfection pH values It is recommended to use a...

Page 12: ...ver does not come into contact with the ground A cover lifter is strongly recommended for spas in rental settings IMPORTANT Because of the combined weight of the Lay Z Spa water and users it is extremely important that the base where the Lay Z Spa is installed is smooth flat level and capable of uniformly supporting the weight for the entire time the Lay Z Spa is installed not on the carpet or oth...

Page 13: ...r porous materials that promote or harbour moisture and bacteria or that could be affected by water treatment chemicals used in the spa Empty the spa before remove it from the chamber or building 2 Outdoor Installation During filling draining or when in use water may flow out of the spa Therefore the Lay Z Spa should be installed near a floor drain Do not leave the spa s surface exposed to direct ...

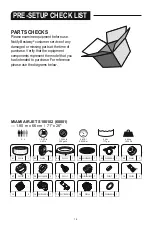
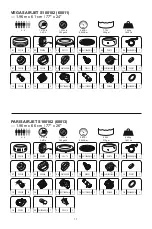
Page 14: ...ded to purchase For reference please use the diagrams below MIAMI AIRJET S100102 60001 1 80 m x 66 cm 71 x 26 2 04 54123GASS17 1 10 F4C009B 02ASS17 1 16 P05346 1 06 P05343 1 12 P05320 6 03 P05159 1 09 P05347 1 15 P61727ASS18 1 01 P05134 1 07 P05345 1 13 2 02 P05328 1 08 P6575ASS16 2 14 P61726ASS18 1 05 P6931ASS16 1 11 P00217 1 17 P6609ASS16 1 2 4 1 5 2ºC h 3 4ºF h 1 325 L h 350 gal h 0 8PSI 0 055B...

Page 15: ...14 P61726ASS18 1 05 P6931ASS16 1 11 P00217 1 17 P6609ASS16 1 2 2 4 1 5 2ºC h 3 4ºF h 1 325 L h 350 gal h 0 8PSI 0 055Bar 669 L 177 gal 696 kg 1 534 Lb 04 54123GASS17 1 10 F4C009B 02ASS17 1 16 P05346 1 06 P05343 1 12 P05320 6 03 P05161 1 09 P05347 1 15 P61727ASS18 1 01 P05137 1 07 P05345 1 13 2 02 P05328 1 08 P6575ASS16 2 14 P61726ASS18 1 05 P6931ASS16 1 11 P00217 1 17 P6609ASS16 1 2 2 4 1 5 2ºC h ...

Page 16: ...S16 1 11 P00217 1 17 P6609ASS16 1 18 P05529 1 19 P61232ASS16 1 20 P05519 1 2 2 4 1 5 2ºC h 3 4ºF h 1 325 L h 350 gal h 0 8PSI 0 055Bar 669 L 177 gal 696 kg 1 534 Lb 04 54123GASS17 1 10 F4C009B 02ASS17 1 16 58492 1 06 P05343 1 12 P05320 6 03 P05165 1 09 P05347 1 15 P61727ASS18 1 01 P05143 1 07 P05345 1 13 2 02 P05328 1 08 P6575ASS16 2 14 P61726ASS18 1 05 P6931ASS16 1 11 P00217 1 17 P05346 1 18 P660...

Page 17: ... 02ASS17 1 17 P05346 1 18 P6609ASS16 1 21 P05519 1 19 P05513 1 20 P61232ASS16 1 2 4 6 1 5 2ºC h 3 4ºF h 1 325 L h 350 gal h 0 8PSI 0 055Bar 806 L 213 gal 840 kg 1 851 Lb 04 54112GASS15 1 10 P05347 1 16 P61727ASS18 1 06 P6931ASS16 1 12 P00217 1 03 P05171 1 09 P6575ASS16 2 15 P61726ASS18 1 01 P05152 1 07 P05343 1 13 P05320 8 02 P05328 1 08 P05345 1 14 2 05 P05172 1 11 F4C009B 02ASS17 1 17 P05346 1 1...

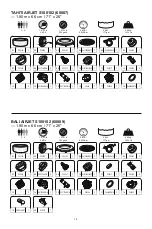
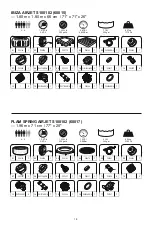
Page 18: ...Bar 916 L 242 gal 954 kg 2 103 Lb 04 P04125 1 10 F4C009B 02ASS17 1 16 P05346 1 06 P05343 1 12 P05320 8 03 P05178 1 09 P05347 1 15 P61727ASS18 1 01 P05156 1 07 P05345 1 13 2 02 P05328 1 08 P6575ASS16 2 14 P61726ASS18 1 05 P6931ASS16 1 11 P00217 1 17 P6609ASS16 1 4 6 1 5 2ºC h 3 4ºF h 1 325 L h 350 gal h 0 8PSI 0 055Bar 778 L 205 gal 807 kg 1 779 Lb IBIZA AIRJET S100102 60015 1 80 m x 1 80 m x 66 cm...

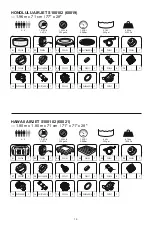
Page 19: ... 08Bar 840 L 222 gal 879 kg 1 938 Lb 04 54174GASS18 1 10 P00217 1 16 P6609ASS16 1 17 P05767 1 06 P05343 1 12 2 03 P05194 1 09 P05347 1 15 P05346 1 01 P05190 1 07 P05345 1 13 P61726ASS18 1 02 P05328 1 08 P6575ASS16 2 14 P61727ASS18 1 05 P05341 1 11 P05320 6 2 4 6 1 5 2ºC h 3 4ºF h 1 325 L h 350 gal h 1 2PSI 0 08Bar 916 L 242 gal 954 kg 2 103 Lb HONOLULU AIRJET S100102 60019 1 96 m x 71 cm 77 x 28 H...

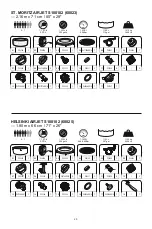
Page 20: ...PSI 0 48 0 69Bar 1123 L 297 gal 1155 kg 2 548 Lb 04 54175GASS18 1 10 P00217 1 16 P6609ASS16 1 17 P05767 1 06 P05343 1 12 2 03 P05200 1 09 P05347 1 15 P05346 1 01 P05196 1 07 P05345 1 13 P61726ASS18 1 02 P05328 1 08 P6575ASS16 2 14 P61727ASS18 1 05 P05341 1 11 P05320 8 2 5 7 1 1 5ºC h 2 3ºF h 1 325 L h 350 gal h 1 2PSI 0 08Bar 1190 L 314 gal 1210 kg 2 668 Lb ST MORITZ AIRJET S100102 60023 2 16 m x ...

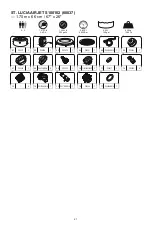
Page 21: ...5347 1 15 P61727ASS18 1 01 P05271 1 07 P05345 1 13 2 02 P05328 1 08 P6575ASS16 2 14 P61726ASS18 1 05 P6931ASS16 1 11 P00217 1 17 P6609ASS16 1 2 2 3 1 5 2ºC h 3 4ºF h 1 325 L h 350 gal h 0 8PSI 0 055Bar 605 L 160 gal 630 kg 1 389 Lb ST LUCIA AIRJET S100102 60037 1 70 m x 66 cm 67 x 26 21 ...

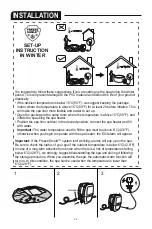
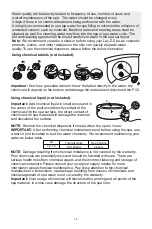
Page 22: ...sition connect the spa heater and fill with water Important The water temperature used to fill the spa must be above 6 C 42 8 F otherwise when you begin to operate with the spa heater the E03 alarm will appear Important If the Freeze Shield system isn t working alarms will pop up on the spa Be sure to check the status of your spa if the outdoor temperature is below 6 C 42 8 F In case of a long ter...

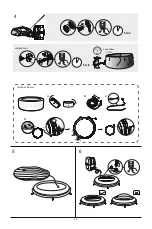
Page 23: ...5 6 2 2 PARIS BALI A B C D 4 HELSINKI 5 min 0 48 0 69Bar 7 10PSI 5 min 23 ...

Page 24: ...rheat causing damage to the equipment and surrounding items The spa is a class I electrical appliance and must be connected directly to a grounded socket It is recommended to only use a socket which is resistant to humidity and capable of high power loading Regularly check the plug and socket for signs of damage before using the spa do not use the spa if the plug or socket is damaged If you are un...

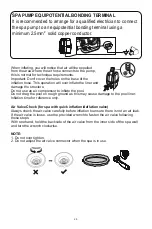
Page 25: ... PUMP EQUIPOTENTIAL BONDING TERMINAL It is recommended to arrange for a qualified electrician to connect the spa pump to an equipotential bonding terminal using a minimum 2 5mm2 solid copper conductor Air Valve Check for spa with quick inflation deflation valve Always check the air valve carefully before inflation to ensure there is not an air leak If the air valve is loose use the provided wrench...

Page 26: ...activated IMPORTANT Do not run the Massage system when the cover is STEP 1 Set the heating duration 1 Press the button unit the LED starts to flash 2 Press the or button to adjust the heating duration From 1 999 hours 3 Press the button again to confirm the heating duration STEP 2 Set the number of hours FROM NOW when the heater will activate 1 After setting the heating duration the LED starts to ...

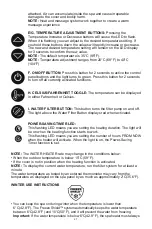
Page 27: ...LED to flash When it is flashing you can adjust to the desired temperature setting If you hold these buttons down the values will rapidly increase or decrease The new and desired temperature setting will remain on the LED display for 3 seconds to confirm the new value NOTE The default temperature is 35 C 95 F NOTE Temperature adjustment ranges from 20 C 68 F to 40 C 104 F F ON OFF BUTTON Press thi...

Page 28: ...mp using a small and thin object Reset If the temperature on the control panel or the water temperature has not changed 4 5 hours after activation of the heating system use a thin object to press the RESET BUTTON and restart the heating system IMPORTANT The heating system will not operate if the outside temperature is above 40ºC 104 ºF or if the Lay Z SPA is under direct sunlight Under these condi...

Page 29: ... prevent water from escaping then disconnect the pump screw on the cap P00217 to avoid water coming out from the air pipe P00217 P6575ASS16 C o n l o i n 5 Filter Set Filter Cartridge Water Maintenance Many pollutants in the water settle on surfaces below the water line These pollutants can cause bacterial algal or fungal growth It is recommended that spas are cleaned as regularly as necessary Aft...

Page 30: ...nt Over usage of chemical will discolored the printing and all points of the spa material in worse case damage the structure of the spa liner pH 7 4 7 6 Total Alkalinity 80 120ppm Free Chlorine 2 4ppm Using chemical tablets not included Using chemical liquid not included Water quality will be directly related to frequency of use number of users and overall maintenance of the spa The water should b...

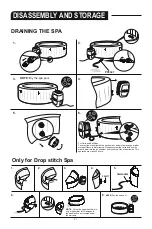
Page 31: ...se unscrew the valve and use the pipe to blow into the air chamber until you dry all the steam inside This operation may take 25 hours DISASSEMBLY AND STORAGE C o n l o i n 5 P05347 P00217 NOTE Lift up the spa when there is only a little water left Damages to the handles are not covered under the warranty P6932ASS16 NOTE Dry the spa pool 2 3 4 6 1 5 8 Only for Drop stitch Spa 31 ...

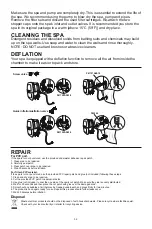
Page 32: ...e recycle where facilities exist Check with your local authority or retailer for recycling advice REPAIR For PVC part If the spa is torn or punctured use the provided underwater adhesive repair patch 1 Clean area to be repaired 2 Carefully peel patch 3 Press patch over area to be repaired 4 Wait 30 seconds before inflation For Tritech PVC material If the spa is torn or punctured use the provided P...

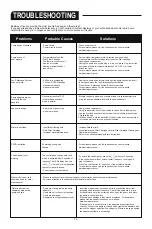
Page 33: ... instructions Water leaks from the adapters between the pump and spa Insert the stopper caps on the spa ports to prevent the water from escaping and disconnect the pump Check if the seals are in place If the seals are not in the correct position open the gears and place the seals in correct position If the seals are damaged they must be replaced For assistance please visit the support section on o...

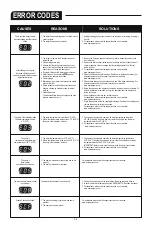
Page 34: ...rform the operation from the outside and inside of the spa Use a toothbrush to remove any stubborn debris For assistance please visit the support section on our website www bestwaycorp com 7 Check the washers inside the coupling for damage Unscrew the couplings and remove the washer for further inspection For assistance please visit the support section on our website www bestwaycorp com The pump s...

Page 35: ...35 ...
Page 36: ... Union vertreten von Prodotto distribuito e rappresentato nell Unione Europea da Bestway Europe S r l Via Resistenza 5 20098 San Giuliano Milanese Milano Italy Distributed in North America by Distribués en Amérique du Nord par Distribuido en Norteamérica por Bestway USA Inc 3411 E Harbour Drive Phoenix Arizona 85034 United States of America Tel 86 21 69135588 For U S and Canada Distributed in Lati...

Reviews: