background image

2

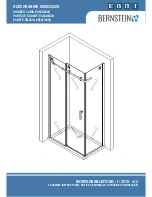
EX802/EX802S

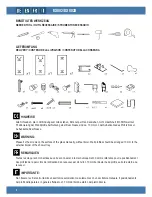
LIEFERUMFANG

DELIVERY / CONTENU DE LA LIVRAISON / CONTENUTO DELLA CONSEGNA

BENÖTIGTES WERKZEUG

NEEDED TOOL / OUTIL NÉCESSAIRE / STRUMENTO NECESSARIO

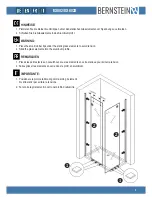
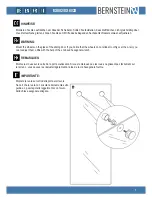
Alle Schrauben, die in Verbindung zum Glas stehen, bitte nur per Hand anziehen, nicht maschinell. Ein Richtwert zur 

Positionierung der Wandprofile bei Nutzung einer Duschtasse sind ca. 10 mm von der Außenkante des Profils bis zur 

Außenkante Duschtasse.

Please fix the screws on the surface of the glass manually, without borer. Wall profiles should be arranged 10 mm to the 

external border of the shower tray.

Toutes les vis qui sont conectées au verre sont à serer à la main uniquement. Comme référence pour le positionnement 

des profilés de la paroi lors de l’utilisation d’un receveur est d’environ 10 mm bord externe du profilé au bord externe du 

receveur.

Non fissare le viti al vetro tramite un avvitatore automatico ma solamente con un avvitatore manuale. Il posizionamento 

dei profili della parete è in genere effettuato a 10 mm dal bordo esterno del piatto doccia.

HINWEISE:

WARNING:

REMARQUES:

IMPORTANTE:

Summary of Contents for EX802

Page 1: ...DUSCHKABINE EX802 802S SHOWER CABIN EX802 802S PAROI DE DOUCHE EX802 802S PARETE DOCCIA EX802 802S MONTAGEANLEITUNG I 2018 v1 2 ASSEMBLY INSTRUCTIONS NOTICE DE MONTAGE ISTRUZIONI DI MONTAGGIO...

Page 2: ...on the surface of the glass manually without borer Wall profiles should be arranged 10 mm to the external border of the shower tray Toutes les vis qui sont conect es au verre sont serer la main uniqu...

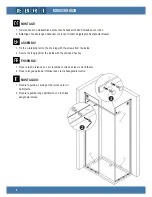
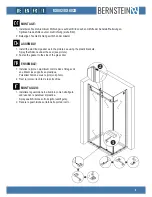
Page 3: ...pen 2 Drill the holes and screw the profile using the dowels and screws 1 Allineare il profilo con la livella come mostrato nell immagine e segnare i fori con una penna 2 Praticare i fori tassellare...

Page 4: ...Au enseite nach oben Arrows point upwards on the outside Les fl ches pointent vers le haut l ext rieur Le frecce puntano verso l alto all esterno Ohne Pfeile beidseitig verwendbar No arrow Usable on...

Page 5: ...oid tension 2 Slide the glass elements into the aluminum profile 1 Placez les petites l vres en caoutchouc sous les l ments en verre statique pour viter la tension 2 Faites glisser les l ments en verr...

Page 6: ...rews from the inside 2 Secure the long leg from the inside with the enclosed hex key 1 Fissare la guida a L sulla gamba corta con le viti dall interno 2 Fissare la gamba lunga dall interno con la chia...

Page 7: ...ide smoothly over the L rail you can readjust them a little with the help of the enclosed hexagonal wrench Montez les roues sur le verre de la porte coulissante Si vous remarquez que les roues ne glis...

Page 8: ...m being populated 5 Now attach the stopper to the L rail 1 Attaccare la striscia di alluminio sul fondo della porta di vetro 2 Metti la porta sulla pista di acciaio inossidabile 3 Attaccare le guarniz...

Page 9: ...see picture 2 Fasten the gasket to the side of the glass door 1 Installare la guarnizione in alluminio come nella figura vedi usando le parentesi di plastica Spray quello Silicone sotto il sigillo ve...

Page 10: ...et le profil mural 1 Place the gaskets between the glass and the wall profile 1 Posizionare le guarnizioni tra il vetro e il profilo della parete MONTAGE ASSEMBLY ENSEMBLE MONTAGGIO 1 Setzen Sie die...

Page 11: ...icone joints from the outside on the aluminum profiles and the solid glass elements 2 Posizionare i coperchi sulle guide in alluminio e avvitare la maniglia della porta 3 Estrarre i giunti in silicone...

Page 12: ...applied to updated version of the pro duct might not be mentioned inside this document In this case please just use the manual as a reference The company reserves modification rights Il seguente manu...

Reviews: