background image

12

Wi-Fi MODEL - Using the App

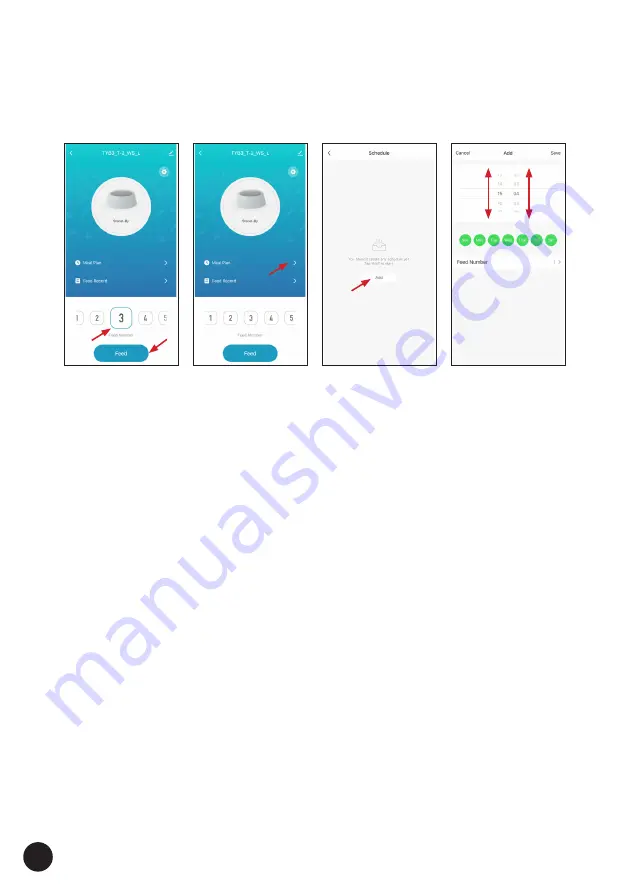
Fig. 19

Fig. 20

Fig. 21

Fig. 22

7. 

MANUAL FEEDING

 - If you want the feeder to dispense just the once,  

press on a "FEED NUMBER", choosing the portion size between 1 and 15. 
Then press the "FEED" button (Fig. 19). The feeder will dispense the 
corresponding amount of food.
8. 

SETTING AUTOMATIC FEEDING

 - Click on "MEAL PLAN" to create a schedule 

of when you want the feeder to dispense (Fig. 20). Click on "ADD" (Fig. 21) 
and then scroll up and down through the times to set a time (Fig. 22).  
Press on the corresponding day until it is highlighted in green. Only the days 
highlighted in green will be programmed (Fig. 23). Then set the portion size 
by clicking on "FEED NUMBER" (Fig. 24) and scroll up and down between  
1 and 15, then click "CONFIRM" (Fig. 25).

NOTE:

 Approximately, 1 portion equals about 15 cubic cm of food  

(approx. 7 grams), 2 portions equals 30 cubic cm of food (approx. 14 grams),  
3 portions equals 45 cubic cm of food (approx. 21 grams) and so on.  
Therefore you can easily calculate how much food you require for each dose.
9. Once you have created a schedule, this time will appear in the list with a 
selector shown alongside it, to enable or disable them in future (Fig. 26).
10. To delete a time schedule, press and swipe across the time to bring up 
the red "DELETE" box. Then press "DELETE" (Fig. 27).

Summary of Contents for Auto Fish Feeder

Page 1: ...struction Manual For Auto Model Wi Fi Controlled Model 301121 Auto Fish Feeder IMPORTANT Please read this instruction manual carefully before using this product Keep the manual safe for future referen...

Page 2: ...ysical sensory or mental capabilities or lack of experience and knowledge unless they have been given supervision or instruction concerning use of the appliance by a person responsible for their safet...

Page 3: ...dirt and debris DO NOT immerse in water Make sure the chamber is completely dry before filling with food Fit 3 x 1 5V D TYPE Batteries R20 D UM 1 not included into the battery compartment Pay attentio...

Page 4: ...to check that they all work properly Now position the unit at the side of your pond where food can be dispensed into the water If you want to fix the feeder into soft ground you can fit the 4 spikes...

Page 5: ...d The feeder will then next feed the following day at 8am and will follow the same cycle NOTE If you turn the power switch off at any point the cycle will be re set from the next time you turn it back...

Page 6: ...edly until no red lights are illuminated To set Meal 2 press TIMER button until the blue light above Meal 2 is illuminated Then press PORTION button until the red light above the correct portion is il...

Page 7: ...ton until MEAL 1 is illuminated blue Now press PORTION button until 2 portions are illuminated red Press TIMER button until MEAL 2 is illuminated blue Now press PORTION button until 2 portions are ill...

Page 8: ...to download the SMART LIFE SMART LIVING App onto a mobile device For first time connection and set up you will need to ensure the mobile and the feeder are connected to the internet by the same 2 4 Gh...

Page 9: ...l need to click on SIGN UP to register their details Fig 3 To register a new ID enter your email address tick the box to agree to the terms and conditions Then check your email inbox to get the verifi...

Page 10: ...e location if so click on the Only In Use button Now you will enter the Wi Fi Set Up interface Click on your Wi Fi name and enter the password Fig 11 and click on Next to enter Device Reset Switch on...

Page 11: ...phone s Wi Fi settings and select your original Wi Fi router s name The device will then show as being Added Successfully Fig 17 6 Once the device is CONNECTED the App screen shows an icon of a bowl...

Page 12: ...ted in green Only the days highlighted in green will be programmed Fig 23 Then set the portion size by clicking on FEED NUMBER Fig 24 and scroll up and down between 1 and 15 then click CONFIRM Fig 25...

Page 13: ...display all the dates and times when you actually set the programs Fig 28 12 Click the Settings Symbol to perform a Factory Reset Fig 29 13 Click on the Pencil icon to view the device information and...

Page 14: ...food topped up to maintain automatic feeding NOTE Do not leave the food inside the feeder for a long period of time as it may degrade and become unsafe for fish NOTE If food becomes moist it may clum...

Page 15: ...e fill the feeder Feeder does not power up or operate with new batteries Feeder may be faulty Return it to the place of purchase if under warranty Device is not connected to the App Check your interne...

Page 16: ...ble or held liable for any damages caused by defective components or materials of this product or for loss incurred by interruption of service or any consequential incidental damages and expenses aris...

Reviews: