


HIFI Stacking System J023 Instructions for Use
Please read and retain these instructions for future reference v002: 20/05/22
The Enterprise
Department
UK Head
Office, 11 Bridge Street, Bishop’s Stortford, CM23 2JU
Tel: 0844 4824400*, Fax: 01279 756595
www.coopersofstortford.co.uk
EU address: D.S.B. LD, 160 Bd. de Fourmies, 59100 Roubaix, France
Tel: (+44) 1279 701269
*UK Calls cost around 7 pence per minute plus your telephone company’s network access.
Please check with your telephone supplier.
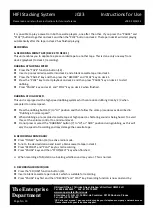
Page No. 5
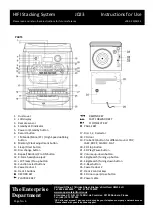
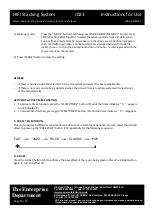
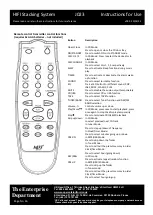
30.
USB socket
31.
Spindle adaptor
32.
Turntable speed selector/Auto stop switch
33.
Pick-up holder
34.
Speaker wire terminal
35.
FM wire antenna
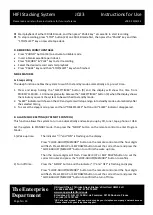
CONNECTION
1.
Connect the power cable (29) to the mains socket and
switch on the power switch at the front of unit.
When you first plug the unit into the mains, the unit will
go into standby mode.
2.
Connect the speaker wire to the speaker terminal (34)
located on the back of the unit. Make sure you are
connecting the right cable correctly to the speaker
terminal (34).
3.
The receiver has a build-in wire antenna which should
completely unravel and extended for best reception (35).
4.
Now connect the power cable (29) to the mains socket
and switch on the power switch at the front of the unit
(5). When you first plug the unit into the mains, the unit
will go into standby mode.
5.
Select “CD“
function. If the LCD display (2) is on with
backlighting, it means the power supply is normal. Now
the system is ready to play music.
SETTING THE CLOCK
In standby mode, p
ress the “
MEMORY/CLOCK ADJUSTMENT
” button (8
).
The first 2 hour digits will flash. Press SKIP UP (23) or SKIP DOWN (24) button to set the correct hour and
press
“
MEMORY/
CLOCK ADJUSTMENT” button (8
) to confirm.
Then, the last 2 minute digits will flash. Press SKIP UP (23) or SKIP DOWN (24) button to set the correct
minutes.
Press
“
MEMORY/
CLOCK ADJUSTMENT” button (8
) to store the correct time.
Press and hold the
“
S
TOP” button (20)
to change 12/24 hour clock display.
Note:
The pre-set time will be reset completely if the unit is disconnected from the mains power supply. It
is recommended to leave the system in standby mode for convenient usage.
LISTENING TO RADIO
MANUAL TUNING
Press “
TUNER/BAND
” button (14) and select the desired band
(MW (AM) or FM).
Tune to the required station by pressing the tuning “+” or “
-
”
button (23,24).
Adjust volume controls (22) to the desired volume level.


