13
ASSEMBLY
Adjust tension
Please refer to the Recommended Installation Chart
that is included specific brands of tractors.
Note:
Choose the appropriate belt among the ones
supplied.
However, the rotary tiller being a universal
mounting, a belt size other than the ones supplied
may be necessary.
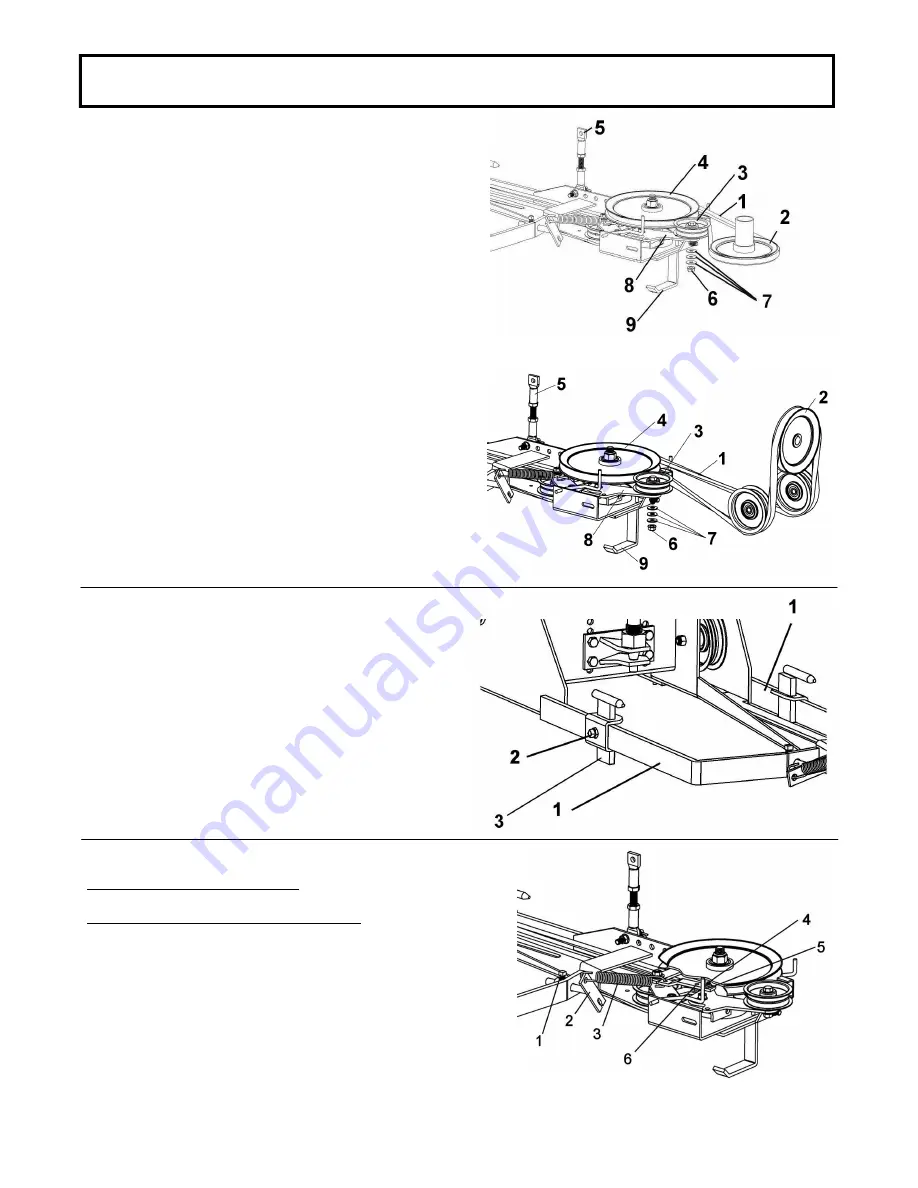
Install the primary belt (item 1) on the engine pulley
(item 2), flat pulley (item 3) and the pulley on the tiller
(item 4).
Lift or lower the front part of the rotary tiller with the
adjustable link (item 5) so that the belt is aligned with
the pulleys as shown.
NOTE:
If the belt is not aligned with the pulleys, remove
the nut (item 6) and add a few 3/8” flat washers (item 7)
between the flat pulley and the tension arm (item 8).
Make sure the belt is centered on the flat pulley.
Secure with the nut.
Tighten the nuts on the links very firmly.
Lift the support (item 9).
Make sure both sides of the rotary tiller’s frame (item 1)
are at the same height from the ground.
Tighten firmly the bolts that hold the mounting brackets
to the transaxle.
Tighten the square head set screws (item 2) very firmly
on the mounting pins (both sides of tractor).
TIP:
To make sure the frame is even, the bottom portion
(item 3) of the mounting pins must measure equally on
both sides. Tire pressure in both rear tractor tires must
be identical.
PRIMARY BELT ADJUSTMENT
Tractors with an electric clutch mechanism:
Adjust the tension on the primary belt by loosening the
square head set screw (item 1). Pull the tension rod
(item 2) to stretch the spring (item 3) by 3/4" to 1".
Tighten the square head screw securely.
NOTE:
If more tension is necessary, move the 1/4" x
3/4" (item 4) and the nut (item 5) into the second hole
(item 6) in the tension bar.
Install primary belt
Tighten the screws


