47
Installation
6003594_0 – 29.06.2017
EN
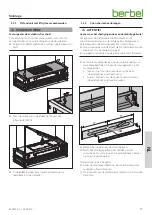
3.2.3
Prepare the ceiling lift hood
D
WARNING!
Risk of death due to electric shock!
Touching live parts can cause an electric shock, burns or
death.
☞
Ensure that the power supply is switched off and
remains so.
☞
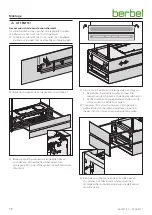
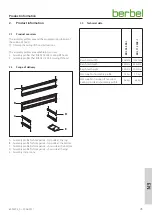
Use an SW 2.5 (Inbus) Allen key to unscrew the screws on
the cover.
☞
Remove the cover upwards. Pay attention to the support
cable and the mains cable.
3.2.4
Fit front panels
D
ATTENTION!
Danger of damage due to improper handling!
The assembly profiles, ceiling lift hood or front panels could
be damaged during assembly.
☞
Move the components slowly and carefully.
☞
Keep objects that could scratch the components far away
from it (e.g. tools, belt buckles).
☞
Do not place any objects on the ceiling lift hood.
☞
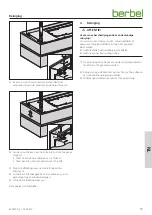
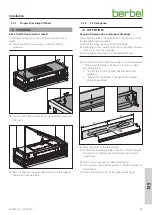
During all assembly steps ensure the correct arrangement
of the assembly profiles. The position is shown on the
assembly profile:
y
“top” for the top front panels (the bracket points
upwards).
y
“bottom” for the bottom front panels (the bracket
points downwards).
=
=
1.
2.
3.
☞
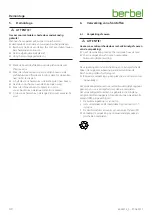
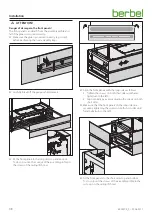
Mark the centre of the front panels.
☞
Position the assembly profile centrally on the front panel.
The punch-out (diamond) and the bracket aid correct
positioning.
Once the correct position has been determined:
☞
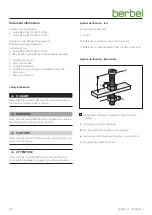
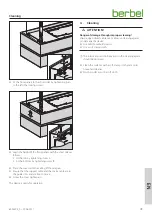
Glue or screw the assembly profiles to the front panels to
attach them.
Observe the instructions of the glue manufacturer.
Summary of Contents for Skyline Edge BDL 115 SKE-I
Page 52: ...6003594_0 29 06 2017 ...

