background image


13                                                                                                  INSTRUCTION MANUAL 


Mix the minced meat and combine all the ingredients in a bowl. The more meat and less flour, the 
better the taste and consistency. 
Grind the mixture three times. 
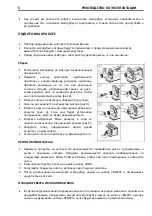
Disassemble the meat grinder by fully following steps 3-5 to remove the grate with the knife. 
Put the Kebbe forming attachment on the screw slot, entering the special connector (Fig. 8). 
Screw the meat grinder head mounting nut clockwise. Avoid tightening too tightly. 
Place the minced meat in a special slot. 
Shape the Kebabs as shown in the picture above and fry them. 
Bon appetite! 


COOKING SAUSAGE 
 

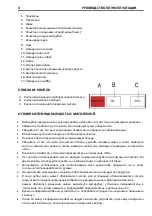
To prepare the sausage, perform the Assembly as shown in the figure below 


CLEANING AND MAINTENANCE 

DISASSEMBLY 
 

1. Make sure that the engine has stopped completely. 
2. Disconnect the power cord. 
3. Perform the disassembly of the grinder, perform steps 1-6 in reverse order. 
4. To facilitate removal of the grille, position the screwdriver between the grill and the console, and 
remove the grille 
5. 5. Click the button fastening and turn the tuner in a clockwise direction, then remove the 
console. 
 

CLEANING 

 
1. Remove leftover meat or other products, and wash each part of the meat grinder in warm soapy 
water. 
2. if you use chlorine-containing cleaning agents, the color of aluminum parts may change. 
3. Do not wash the engine housing with water. It is recommended to use a damp soft cloth to clean 
the engine case. 
4. Do not use gasoline, acetone, solvents or similar aggressive solutions. 
5. After applying a knife and grating it is recommended to grease with vegetable oil. 
 

STORAGE 


Before storing, make sure that the appliance is disconnected from the power supply. 


Follow all the requirements in the CLEANING and MAINTENANCE section. keep the device in a 
cool, dry place. 


Summary of Contents for BN-211

Page 1: ...РУКОВОДСТВО ПО ЭКСПЛУАТАЦИИ МЯСОРУБКА ЭЛЕКТРИЧЕСКАЯ BN 211 Просьба внимательно ознакомиться с прилагаемой инструкцией по эксплуатации прибора перед использованием ...

Page 2: ...ключить и вынуть вилку сетевого шнура из розетки Устанавливайте устройство на ровной устойчивой поверхности вдали от источников тепла открытого пламени влаги и прямых солнечных лучей Запрещается устанавливать устройство на горячей поверхности или в непосредствен ной близости от неё например рядом с газовой или электрической плитой либо около нагретой духовки или варочной поверхности Аккуратно обра...

Page 3: ...дей с ограниченными возможностями УСТРОЙСТВО ПРЕДНАЗНАЧЕНО ТОЛЬКО ДЛЯ БЫТОВОГО ИСПОЛЬЗОВАНИЯ В ЖИЛЫХ ПОМЕЩЕНИЯХ ЗАПРЕЩАЕТСЯ КОММЕРЧЕСКОЕ ИСПОЛЬЗОВАНИЕ И ИСПОЛЬЗОВАНИЕ УСТРОЙСТВА В ПРОИЗВОДСТВЕННЫХ ЗОНАХ И РАБОЧИХ ПОМЕЩЕНИЯХ ВНИМАНИЕ Перед началом рубки мяса обязательно убедитесь в том что все кости и излишки жира удалены Запрещается проталкивать продукты какими либо посторонними предметами или пал...

Page 4: ...м что мясо полностью оттаяло удалите излишки жира и кости порежьте мясо на кубики или полоски такого размера чтобы они свободно проходили в отверстие лотка Включите устройство установив переключатель в положение ON Не торопясь проталкивайте мясо в раструб головки мясорубки при помощи толкателя Во время работы используйте толкатель который входит в комплект поставки Запрещается использовать для про...

Page 5: ...ис 3 Вставьте нож на паз шнека режущими кромками к решетке рис 4 Если нож будет установлен неправильно мясо не будет перемалываться Вставьте выбранную Вами решетку в след за ножом на паз шнека в специальный разъем рис 5 Закрутите гайку придерживая одной рукой решетку с ножом рис 6 Установите лоток на приставку и зафиксируйте его ПРИГОТОВЛЕНИЕ ФАРША 1 Нарежьте продукты на кусочки Не рекомендуется п...

Page 6: ...стого цвета и добавить в фарш вместе со специями солью и мукой СПОСОБ ПРИГОТОВЛЕНИЯ Перемешайте фарш и соедините все компоненты в миске Чем больше мяса и меньше муки тем лучше будет вкус и консистенция Перемелите смесь три раза Произведите разборку мясорубки полностью выполняя шаги 3 5 чтобы удалить решетку с ножом Наденьте насадку для формовки Кеббе на паз шнека попав в специальный разъем рис 8 З...

Page 7: ... 4 Запрещается использование бензина ацетона растворителя или подобных агрессивных растворов 5 После применения нож и решетки рекомендуется смазывать растительным маслом ХРАНЕНИЕ Перед хранением убедитесь что прибор отключен от электросети Выполните все требования раздела ОЧИСТКА И УХОД прибор в сухом прохладном месте ВНИМАНИЕ Поставщик оставляет за собой право менять внешний вид и комплектацию пр...

Page 8: ... измельчения крупный 1 шт Диск для измельчения средний 5мм 1 шт Диск для измельчения мелкий 3мм 1 шт Насадка для сосисок 1 шт Насадка для колбас 1 шт Насадка для купат 1 шт Насадка кеббе 1 шт Алюминиевый лоток 1 шт Толкатель для продуктов 1 шт Инструкция 1 шт ТЕХНИЧЕСКИЕ ХАРАКТЕРИСТИКИ BN 211 Мощность 4000 Вт Электропитание 220 240 В 50 Гц Производительность 2 кг мин Длина шнура 1 м ...

Page 9: ...a gas or electric stove near a heated oven or a cooking surface Handle the power cord with care prevent it from multiple twisting and straighten the power cord periodically Do not use the power cord for carrying the meat grinder Do not let the power cord hang from the edge of a table and make sure that the cord does not touch sharp furniture edges and hot surfaces When unplugging the unit from the...

Page 10: ...r liquids Do not try to process food with hard fiber for example ginger or horseradish in the meat grinder To avoid obstructions do not apply excessive force while pushing meat with the pusher 1 If any hard piece of food stops the feeder screw or cutting blade rotation immediately switch the unit off and use the screw reverse mode R reverse to remove the obstruction before starting again DESCRIPTI...

Page 11: ...ice must not exceed 10 minutes After 10 minutes of continuous operation turn off the device and allow it to cool for 15 20 minutes after which you can continue working As soon as you finish working turn off the meat grinder by setting the switch to the 0 position disconnect the meat grinder from the power supply and only then start disassembling it PREPARATION FOR WORK The device is intended for p...

Page 12: ... will be released from the products If even in this case the meat grinder does not work turn it off disassemble and clean the knife and grill If the screw shaft is blocked the protection is activated and the engine is switched off Pressing the RESET button disables the lock THE USE OF NOZZLES KIBBEH 1 The order of Assembly shown in figure 8 2 Turn on the meat grinder 3 Roll the dough into sausages...

Page 13: ...cord 3 Perform the disassembly of the grinder perform steps 1 6 in reverse order 4 To facilitate removal of the grille position the screwdriver between the grill and the console and remove the grille 5 5 Click the button fastening and turn the tuner in a clockwise direction then remove the console CLEANING 1 Remove leftover meat or other products and wash each part of the meat grinder in warm soap...

Page 14: ...to mandatory collection and subsequent disposal in accordance with the established procedure For more information about recycling this product contact your local municipality the household waste disposal service or the store where you purchased this product This product meets all the required European and Russian safety and hygiene standards DELIVERY SET Meat grinder 1 pc Knife 1 pc Large grinding...

Page 15: ..._____________________________________ ______________________________________________________________________ ______________________________________________________________________ ______________________________________________________________________ ______________________________________________________________________ ______________________________________________________________________ _______...

Page 16: ..._____________________________________ ______________________________________________________________________ ______________________________________________________________________ ______________________________________________________________________ ______________________________________________________________________ ______________________________________________________________________ _______...

Page 17: ..._____________________________________ ______________________________________________________________________ ______________________________________________________________________ ______________________________________________________________________ ______________________________________________________________________ ______________________________________________________________________ _______...

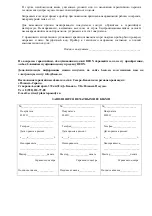
Page 18: ...и срока гарантии при самостоятельном вскрытии попытки вскрытия или ремонте прибора вне гарантийной мастерской при механических повреждениях в том числе полученных вследствие неправильной транспортировки при сильном загрязнении прибора как внешнем так и внутреннем ржавчине при механическом повреждении сетевого шнура или штепселя при неправильной эксплуатации использование нестандартных питающих сет...

Page 19: ...у info beon su Выполнение гарантийных обязательств в Северо Кавказском регионе производит Планета Сервис Ставропольский край 374 км ФАД Кавказ ТК Планета Посуды Тел 8 928 220 79 08 E mail service planetaposudy ru ЗАПОЛНЯЕТСЯ ПЕЧАТНЫМИ БУКВАМИ _________________________ Покупатель Ф И О ____________________ __________________________ Телефон___________________ Дата приема в ремонт ____ _____________...

Page 20: ...ЕС 2117 КНР Провинция Джедзьянг город Иву улица Чхоуджоу Норт Роуд Дзиньмао Билдинг 699 Сделано в КНР ПРЕДСТАВИТЕЛЬ В РФ ООО Техпром МЕСТО НАХОЖДЕНИЯ И ПОЧТОВЫЙ АДРЕС 117405 МО Варшавское шоссе 32 й км МКАД ТЦ Шелковый путь пав 125 ДЛЯ СПРАВОК Тел 7 495 178 00 06 E mail info beon su ...

Reviews: