background image

28 Menu 

operation 


User Mode 
Management
(Continued)

4.  Select 

Load Settings From

 and press 

OK

.

5.  Press 

/

 to select a picture mode that is closest to your need.

6.  Press 

OK

 and 

BACK

 to return to the 

PICTURE

 menu.

7.  Press 


to select the sub-menu items you want to change and adjust the values 

with 

/

. The adjustments define the selected user mode.

• 

Rename User Mode

Select to rename the customized picture modes (

User 1 

or 

User 2). 

The new 

name can be up to 9 characters including English letters (A-Z, a-z), digits (0-9), and 
space (_).
1.  Go to 

PICTURE

 > 

Picture Mode

.

2.  Press 

/

 to select 

User 1 

or 

User 2

.

3.  Press 


to highlight 

User Mode Management

, and press 

OK

. The 

User 

Mode Management

 page is displayed.

4.  Press 


to highlight 

Rename User Mode

 and press 

OK

. The 

Rename 

User Mode

 page is displayed.

5.  Use  / /

/

, and 

OK

 to set desired characters.

6.  When done, press 

BACK

 to save the changes and exit.

Brightness

The higher the value, the brighter the image. Adjust this control so the black areas 
of the image appear just as black and that detail in the dark areas is visible.

Contrast

The higher the value, the greater the contrast. Use this to set the peak white level 
after you have previously adjusted the Brightness setting to suit your selected input 
and viewing environment.

Color

Lower setting produces less saturated colors. If the setting is too high, colors on 
the image will be overpowering, which makes the image unrealistic.

Tint

The higher the value, the more greenish the picture becomes. The lower the value, 
the more reddish the picture becomes.

Sharpness

The higher the value, the sharper the picture becomes.

Advanced

• 

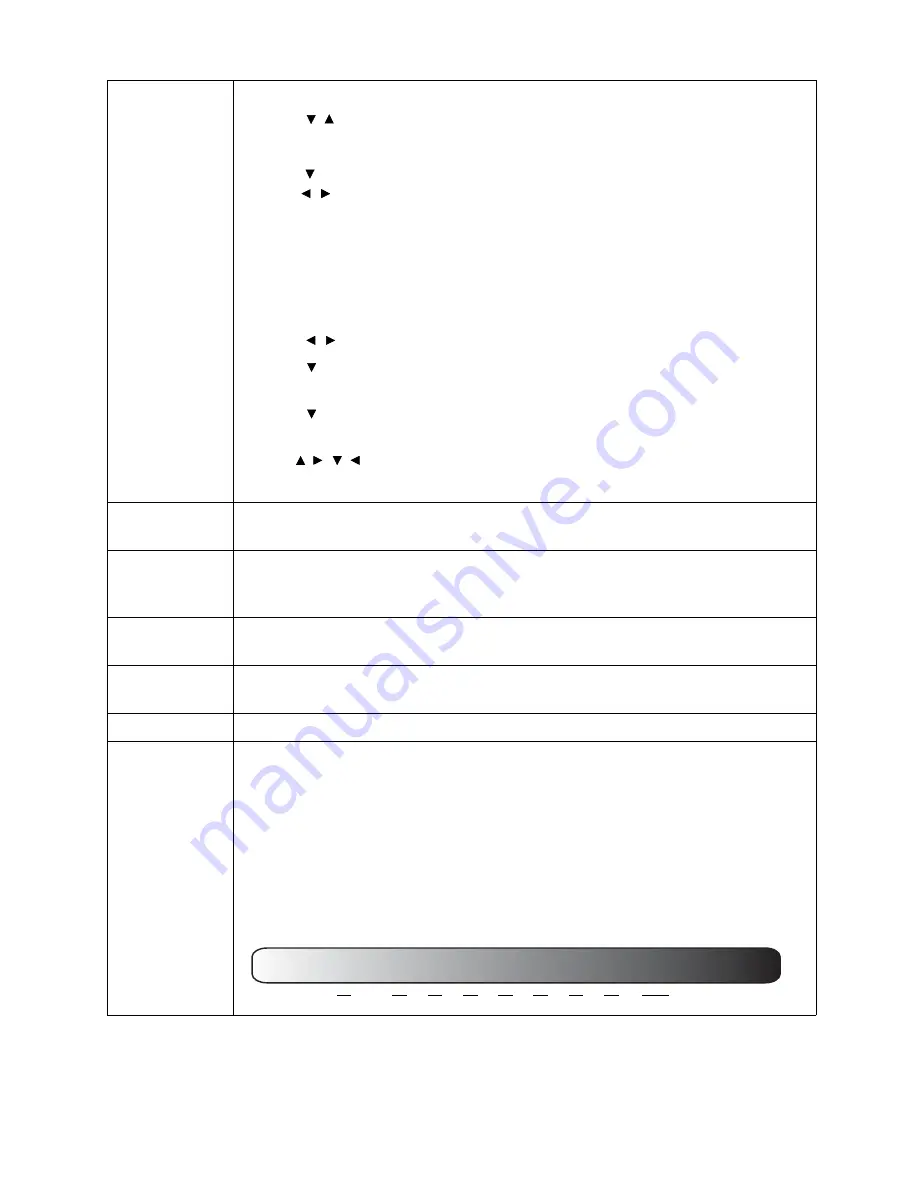
Gamma Selection

Gamma refers to the relationship between input source and picture brightness. 

• 

1.8/2.0/2.1/BenQ

: Select these values according to your preference.

• 

2.2

/

2.3

: Increases the average brightness of the picture. Best for a lit 

environment, meeting room or family room.

• 

2.4/2.5

: Best for viewing movies in a dark environment.

• 

2.6

: Best for viewing movies which are mostly composed of dark scenes.

High Brightness

Low Contrast

Low Brightness

High Contrast

1.8              2.0       2.1       2.2       2.3       2.4       2.5       2.6        BenQ

Summary of Contents for TK800M

Page 1: ...Digital Projector User Manual Home Entertainment Series I TK800M V 1 00 ...

Page 2: ...have other rights which vary from country to country For other information please visit www BenQ com Copyright Copyright 2019 by BenQ Corporation All rights reserved No part of this publication may be reproduced transmitted transcribed stored in a retrieval system or translated into any language or computer language in any form or by any means electronic mechanical magnetic optical chemical manual...

Page 3: ...the projected image 14 Connection 16 Operation 18 Starting up the projector 18 Using the menus 20 Securing the projector 21 Switching input signal 22 Shutting down the projector 23 Direct power off 23 Menu operation 24 Menu system 24 PICTURE menu 27 DISPLAY menu 31 INSTALLATION menu 32 SYSTEM SETUP BASIC menu 33 SYSTEM SETUP ADVANCED menu 34 INFORMATION menu 36 Maintenance 37 Care of the projector...

Page 4: ... approximately 45 minutes prior to removing the lamp assembly for replacement 5 In some countries the line voltage is NOT stable This projector is designed to operate safely within a mains voltage between 100 to 240 volts AC but could fail if power cuts or surges of 10 volts occur In areas where the mains voltage may fluctuate or cut out it is recommended that you connect your projector through a ...

Page 5: ...ector with a cloth or any other item Do not place inflammables near the projector If the ventilation holes are seriously obstructed overheating inside the projector may result in a fire 12 Always place the projector on a level horizontal surface during operation Do not use if tilted at an angle of more than 10 degrees left to right nor at angle of more than 15 degrees front to back Using the proje...

Page 6: ...e excessively high such as the inside of a car with all windows rolled up Locations where excessive humidity dust or cigarette smoke may contaminate optical components shorten the projector s life span and darken the image Locations near fire alarms Locations with an ambient temperature above 40 C 104 F Locations where the altitudes are higher than 3000 m 10000 feet Risk Group 2 1 According to the...

Page 7: ...ble for your region and may differ from those illustrated The warranty card is only supplied in some specific regions Please consult your dealer for detailed information 1 Spare lamp kit 2 Ceiling mount kit 3 BenQ QCast Mirror WDP02 4 BenQ 3D glasses Avoid leaving the remote control and batteries in an excessive heat or humid environment like the kitchen bathroom sauna sunroom or in a closed car R...

Page 8: ... signal input jack 11 HDMI input port Version 2 0 12 HDMI input port Version 1 4a 13 USB Mini B port for firmware upgrades 14 RS 232 control port Interfaces with a PC or home theater control automation system 15 USB Type A port 1 5 A power supply 16 12V DC output terminal Triggers external devices such as an electric screen or light control etc 17 AC power jack 18 Kensington anti theft lock slot 1...

Page 9: ...or 7 Arrow keys When the On Screen Display OSD menu is activated these keys are used as directional arrows to select the desired menu items and to make adjustments Keystone keys Display the keystone correction page Volume keys Decrease or increase the projector volume 8 SOURCE Displays the source selection bar 9 ECO BLANK Used to hide the screen picture Do not block the projection lens from projec...

Page 10: ... provided modes 14 DYNAMIC IRIS The function is not available with this model 15 Keystone correction key Displays the Keystone correction menu 16 HDR Displays the HDR menu 17 CINEMAMASTER DETAIL ENHANCER LUMI EXPERT The functions are not available with this model 18 Toggles projector audio between on and off 19 Volume keys Decrease or increase the projector volume 20 HDMI CEC compatible device con...

Page 11: ...ed on the table in front of the screen This is the most common way to position the projector for quick setup and portability 2 Front Ceiling Select this location with the projector suspended upside down from the ceiling in front of the screen Purchase the BenQ Projector Ceiling Mount Kit from your dealer to mount your projector on the ceiling 3 Rear Ceiling Select this location with the projector ...

Page 12: ...1524 747 1328 1992 2092 2192 75 70 1778 872 1550 2324 2441 2557 87 80 2032 996 1771 2657 2789 2922 100 90 2286 1121 1992 2989 3138 3287 112 100 2540 1245 2214 3321 3487 3653 125 110 2794 1370 2435 3653 3835 4018 137 120 3048 1494 2657 3985 4184 4383 149 130 3302 1619 2878 4317 4533 4749 162 140 3556 1743 3099 4649 4881 5114 174 150 3810 1868 3321 4981 5230 5479 187 160 4064 1992 3542 5313 5579 584...

Page 13: ...warranty doesn t cover any product damage caused by mounting the projector with a non BenQ brand projector mounting kit Consider the surrounding temperature where the projector is ceiling mounted If a heater is used the temperature around the ceiling may be higher than expected Read the user manual for the mounting kit about the range of torque Tightening with torque exceeding the recommended rang...

Page 14: ... the projected image becomes vertical trapezoidal To correct this see Correcting keystone on page 15 for details Auto adjusting the image In some cases you may need to optimize the picture quality To do this go to the DISPLAY PC Tuning menu and select Auto Within 3 seconds the built in Intelligent Auto Adjustment function will re adjust the values of Frequency and Clock to provide the best picture...

Page 15: ...r on the remote control 2 After the Keystone correction page appears press and hold the MODE key on the projector for 2 seconds to automatically correct the keystoning problem To manually correct this 1 Press on the projector or on the remote control 2 After the Keystone correction page appears press to correct keystoning at the top of the image Press to correct keystoning at the bottom of the ima...

Page 16: ...ailable on the projector vary with each projector model Many notebooks do not turn on their external video ports when connected to a projector Usually a key combo like FN function key with a monitor symbol turns the external display on off Press FN and the labeled function key simultaneously Refer to your notebook s documentation to find your notebook s key combination If the selected video image ...

Page 17: ...reo audio input if provided is mixed into a common mono audio output through the projector speaker s The built in speaker s will be muted when the AUDIO OUT jack is connected The projector is only capable of playing mixed mono audio even if a stereo audio input is connected If the selected video image is not displayed after the projector is turned on and the correct video source has been selected ...

Page 18: ... ring to adjust the image clearness 3 If this is the first time you turn on the projector the setup wizard appears to guide you through setting up the projector If you have already done this skip this step and move on to the next step Use the arrow keys on the projector or remote control to move through the menu items Use OK to confirm the selected menu item Step 1 Specify Projector Position For m...

Page 19: ...al accessories e g power cord to avoid possible dangers such as electric shock and fire If the projector is still hot from previous activity it will run the cooling fan for approximately 90 seconds before energizing the lamp The Setup Wizard screenshots are for reference only and may differ from the actual design If the frequency resolution of the input signal exceeds the projector s operating ran...

Page 20: ...mote control to move through the menu items Use OK on the projector or remote control to confirm the selected menu item The OSD screenshots below are for reference only and may differ from the actual design Main menu icon Current input signal Main menu Status Sub menu Press BACK to go to the previous page or to exit PICTURE Picture Mode User Mode Management Contrast Tint Sharpness Advanced Reset C...

Page 21: ...he password error message will appear and the INPUT CURRENT PASSWORD message follows If you absolutely do not remember the password you can use the password recall procedure See Entering the password recall procedure on page 21 If you enter an incorrect password 5 times in succession the projector will automatically shut down in a short time Entering the password recall procedure 1 Press and hold ...

Page 22: ...d Switching input signal The projector can be connected to multiple devices at the same time However it can only display one full screen at a time When starting up the projector automatically searches for the available signals Be sure the SYSTEM SETUP BASIC Auto Source menu is On if you want the projector to automatically search for the signals To select the source 1 Press SOURCE A source selectio...

Page 23: ...cord can be pulled out right after the projector is turned off To protect the lamp wait about 10 minutes before re starting the projector If you attempt to re start the projector the fans may run for a few minutes to cool down In such cases press POWER again to start the projector after the fans stop and the power indicator turns orange To protect the lamp the projector will not respond to any com...

Page 24: ... Load Settings From Rename User Mode Brightness 0 100 Contrast 0 100 Color 0 100 Tint 0 100 Sharpness 0 15 Advanced Gamma Selection 1 8 2 0 2 1 2 2 2 3 2 4 2 5 2 6 BenQ HDR Brightness 2 2 Color Temperature Preset Red Gain Green Gain Blue Gain Red Offset Green Offset Blue Offset Color Management Primary Color Hue Saturation Gain Color Gamut Auto BT 709 BT 2020 DCI P3 Noise Reduction Low Middle High...

Page 25: ...u Display Time Always On 5 sec 10 sec 15 sec 20 sec 25 sec 30 sec Reminder Message On Off Source Rename Auto Source On Off Sound Sound Mode Effect Mode User EQ Mute On Off Volume 0 30 Power On Off Ring Tone On Off Reset Audio Settings Reset Cancel SYSTEM SETUP ADVANCED Light Settings Reset Light Usage Timer Reset Cancel Light Usage Timer HDMI Settings HDMI Range Auto Full Limited CEC On Off Power ...

Page 26: ...26 Menu operation INFORMATION Source Picture Mode Resolution Color System Color Gamut Light Usage Time 3D Format Firmware Version ...

Page 27: ...nce Minimizes the acoustic noise It is suitable for the need of watching movies that requires an ultra quiet environment so that you won t be disturbed by the noise of the projector This mode is only available when the DISPLAY Silence menu is set at On User 1 User 2 Recalls the settings customized based on the current available picture modes See User Mode Management on page 27 3D Optimized to brin...

Page 28: ...the black areas of the image appear just as black and that detail in the dark areas is visible Contrast The higher the value the greater the contrast Use this to set the peak white level after you have previously adjusted the Brightness setting to suit your selected input and viewing environment Color Lower setting produces less saturated colors If the setting is too high colors on the image will ...

Page 29: ...gement provides six sets RGBCMY of colors to be adjusted When you select each color you can independently adjust its range and saturation according to your preference Primary Color Selects a color from among Red Yellow Green Cyan Blue or Magenta Hue Increase in the range will include colors consisted of more proportions of its two adjacent colors Please refer to the illustration for how the colors...

Page 30: ...nhancements to enable higher brightness while providing truer more vibrant colors in picture It enables a greater than 50 brightness increase in mid tone images which are common in video and natural scenes so the projector reproduces images in realistic and true colors If you prefer images with that quality select On When Off is selected the Color Temperature function is not available Light Mode S...

Page 31: ... transferred through your 3D compatible video devices and contents such as PlayStation consoles with 3D game discs 3D Blu ray players with 3D Blu ray discs and so on After you have connected the 3D video devices to the projector wear the BenQ 3D glasses and make sure the power is on to view 3D contents When watching 3D contents The image may seem misplaced however this is not a product malfunction...

Page 32: ...ght eye for more comfortable 3D viewing experience HDR The projector supports HDR imaging sources It can automatically detect the dynamic range of the source and optimize settings to reproduce contents under wide range of light conditions Meanwhile the Picture Mode cannot be adjusted after switching to HDR Silence When this function is enabled The acoustic noise will be minimized The display resol...

Page 33: ...n 0 C 30 C Operation under High Altitude Mode may cause a higher decibel operating noise level because of increased fan speed necessary to improve overall system cooling and performance If you use this projector under other extreme conditions excluding the above it may display auto shut down symptoms which is designed to protect your projector from over heating In cases like this you should switch...

Page 34: ...llowing preset sound modes are provided Standard Cinema Music Game Sport Football and User The User mode allows you to personalize the sound settings When selecting the User mode you may make manual adjustments with the User EQ function If the Mute function is activated adjusting Sound Mode will turn off the Mute function User EQ Selects desired frequency bands 100 Hz 300 Hz 1k Hz 3k Hz and 10k Hz...

Page 35: ...e 21 Key Lock With the control keys on the projector and remote control locked you can prevent your projector settings from being changed accidentally by children for example When the Key Lock is on no control keys on the projector will operate except POWER To release panel key lock press and hold the right key on the projector or remote control for 3 seconds If you turn off the projector without ...

Page 36: ... Resolution Shows the native resolution of the input signal Color System Shows input system format Color Gamut Shows the Color Gamut status Light Usage Time Shows the number of hours the lamp has been used 3D Format Displays the current 3D mode 3D Format is only available when 3D is enabled Firmware Version Shows the firmware version of your projector ...

Page 37: ... stubborn dirt or stains moisten a soft cloth with water and a neutral pH detergent Then wipe the case Storing the projector If you need to store the projector for an extended time please follow the instructions below Make sure the temperature and humidity of the storage area are within the recommended range for the projector Please refer to Specifications on page 44 or consult your dealer about t...

Page 38: ...uto Off go to SYSTEM SETUP BASIC Auto Off and press Timing of replacing the lamp When the Lamp indicator lights up red or a message appears suggesting it is time to replace the lamp please consult your dealer or go to http www BenQ com before installing a new lamp An old lamp may cause a malfunction in the projector and in some instances the lamp may explode For time used in each Light Mode shown ...

Page 39: ...ed See Getting to know the Light Usage Time on page 37 you may continue to operate the projector until the next hour lamp warning appears Press OK to dismiss the message It is strongly recommended that you replace the lamp at this age The lamp is a consumable item The lamp brightness diminishes with use This is normal lamp behavior You can replace the lamp whenever you notice that the brightness l...

Page 40: ...ies to fingers and damage to internal components use caution when removing lamp glass that has shattered into sharp pieces To reduce the risk of injuries to fingers and or compromising image quality by touching the lens do not touch the empty lamp compartment when the lamp is removed This lamp contains mercury Consult your local hazardous waste regulations to dispose of this lamp in a proper manne...

Page 41: ...Settings and press OK The LIGHT SETTINGS page appears Highlight Reset Light Usage Timer and press OK A warning message is displayed asking if you want to reset the lamp timer Highlight Reset and press OK The lamp time will be reset to 0 Pulling it too quickly may cause the lamp to break and scatter broken glass in the projector Do not place the lamp in locations where water might splash on it chil...

Page 42: ...or is not closed Burn in ON Burn in OFF Lamp events Lamp light source error in normal operation Lamp light source is not lit up Thermal events Fan 1 error the actual fan speed is outside the desired speed Fan 2 error the actual fan speed is outside the desired speed Fan 3 error the actual fan speed is outside the desired speed Temperature 1 error over limited temperature Off Orange On Green On Red...

Page 43: ...t signal device Check the connection The input signal has not been correctly selected Select the correct input signal with the SOURCE key Blurred image Cause Remedy The projection lens is not correctly focused Adjust the focus of the lens using the focus ring The projector and the screen are not aligned properly Adjust the projection angle and direction as well as the height of the projector if ne...

Page 44: ...er supply USB Type A x 1 1 5 A power supply Mini B x 1 RS 232 serial control 9 pin x 1 IR receiver x 2 Input terminals Computer input RGB input D Sub 15 pin female x 1 Video signal input Digital HDMI 1 4a HDCP 1 4 x 1 HDMI 2 0 HDCP 2 2 x 1 Audio in Mini Jack x 1 Environmental Requirements Operating temperature 0 C 40 C at sea level Storage temperature 20 C 60 C at sea level Operating Storage relat...

Page 45: ...45 Specifications Dimensions 353 mm W x 135 mm H x 272 mm D Unit mm 353 272 135 ...

Page 46: ...776 79 5 1280 x 800 WXGA_60 59 810 49 702 83 500 WXGA_75 74 934 62 795 106 500 WXGA_85 84 880 71 554 122 500 WXGA_120 Reduce Blanking 119 909 101 563 146 25 1280 x 1024 SXGA_60 60 020 63 981 108 000 SXGA_75 75 025 79 976 135 000 SXGA_85 85 024 91 146 157 500 1280 x 960 1280 x 960_60 60 000 60 000 108 1280 x 960_85 85 002 85 938 148 500 1360 x 768 1360 x 768_60 60 015 47 712 85 500 1440 x 900 WXGA ...

Page 47: ...280 x 720_60 60 45 000 74 250 v v 1280 x 768 1280 x 768_60 59 870 47 776 79 5 v v 1280 x 800 WXGA_60 59 810 49 702 83 500 v v WXGA_75 74 934 62 795 106 500 WXGA_85 84 880 71 554 122 500 WXGA_120 Reduce Blanking 119 909 101 563 146 25 v 1280 x 1024 SXGA_60 60 020 63 981 108 000 v v SXGA_75 75 025 79 976 135 000 1280 x 960 1280 x 960_60 60 000 60 000 108 v v 1280 x 960_85 85 002 85 938 148 500 1360 ...

Page 48: ...31 25 50 27 720 50p 1280 x 720 37 5 50 74 25 v v v 720 60p 1280 x 720 45 00 60 74 25 v v v 1080 24P 1920 x 1080 27 24 74 25 v v v 1080 25P 1920 x 1080 28 13 25 74 25 1080 30P 1920 x 1080 33 75 30 74 25 1080 50i 1920 x 1080 28 13 50 74 25 v 1080 60i 1920 x 1080 33 75 60 74 25 v 1080 50P 1920 x 1080 56 25 50 148 5 v v 1080 60P 1920 x 1080 67 5 60 148 5 v v 2160 24P 3840 x 2160 Only HDMI 2 0 support ...

Reviews: