Operation
34
Optimizing the image
To optimize the image, use the buttons on the projector or remote control to adjust the
image settings directly, or to change the settings on the On-Screen Display (OSD) menus.
For the operation of OSD menus, refer to
"Using the menus" on page 42
.
The following instructions are optional. You do not need to follow every step. It depends on
the image quality you desire.
Correcting keystone
Keystoning refers to the situation where the projected image is noticeably wider at either the
top or bottom. It occurs when the projector is not perpendicular to the screen.
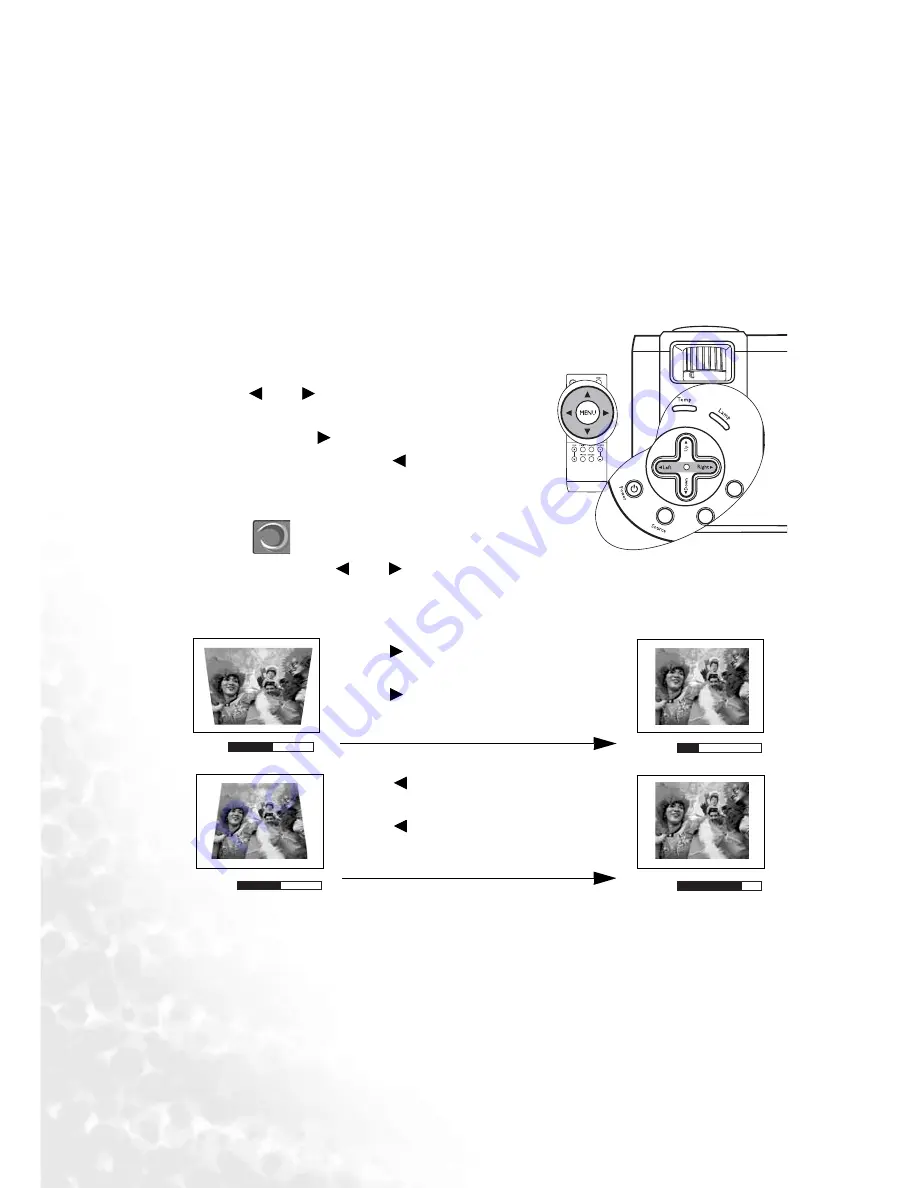
To correct this, besides adjusting the projection angel
of the projector, you will need to manually correct it
following ONE of these steps.
•
Press
Left/
Right on the projector or
remote control to display the status bar labelled
Keystone. Press
Right to correct keystoning at
the top of the image. Press
Left to correct
keystoning at the bottom of the image.
•
Press MENU on the projector or remote control.
Go to
Display > Keystone and adjust the
values by pressing
Left/
Right on the
projector or remote control.
For example,
0
Keystone
-6
Keystone
0
Keystone
+6
Keystone
1. Press
Right
on the projector or remote
control or
2. Press
Right
on the projector or remote
control when you are in the Display >
Keystone menu.
1. Press
Left
on the projector or remote
control or
2. Press
Left on the projector or remote
control when you are in the Display >
Keystone menu.


