Connection
16
Connection
When connecting a signal source to the projector, be sure to:
1.
Turn all equipment off before making any connections.
2.
Use the correct signal cables for each source.
3.
Ensure the cables are firmly inserted.
In the connections shown below, some cables may not be included with the
projector (see
"Shipping contents" on page 6
). They are commercially available
from electronics stores.
Connecting a computer or monitor
Connecting a computer
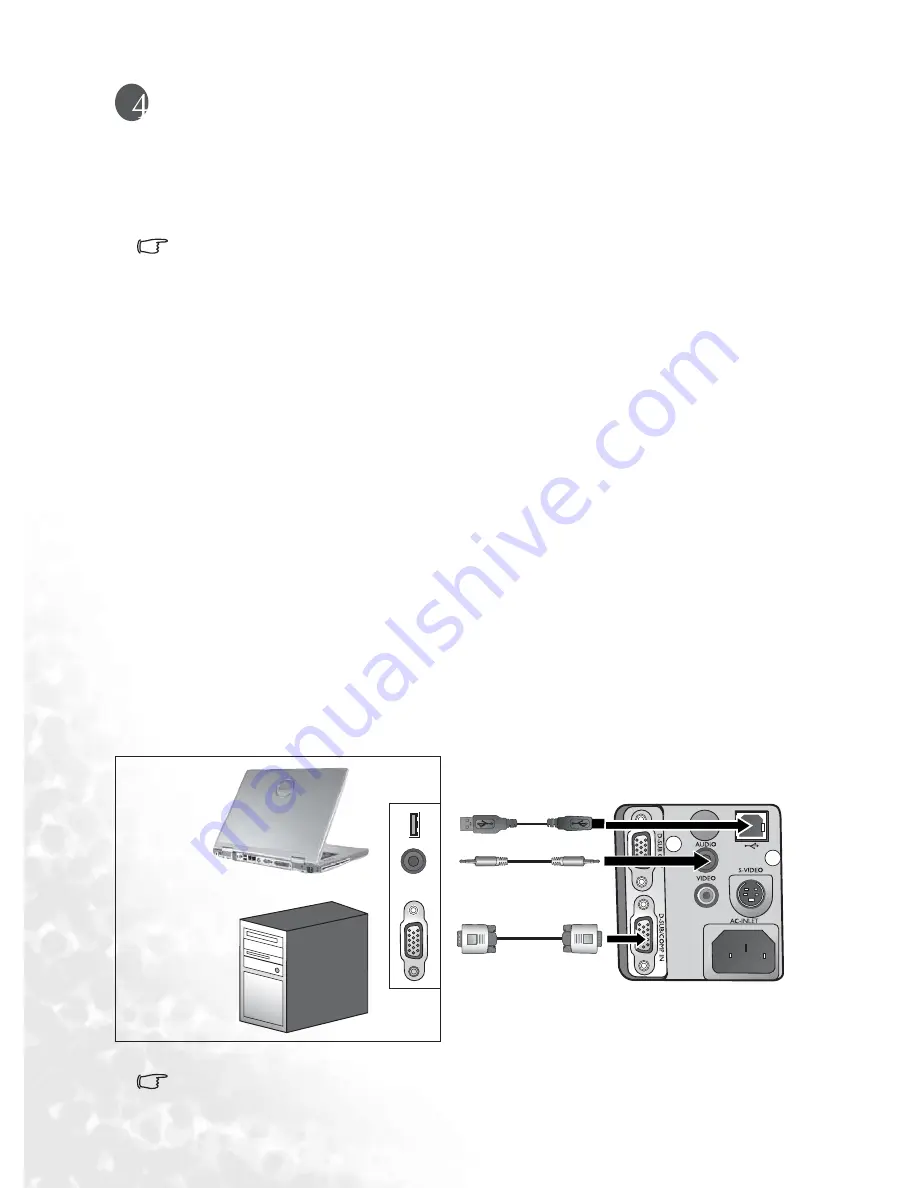
The projector provides a VGA input socket that allows you to connect it to a laptop or
desktop computer.
Additionally, you can also connect the projector to a computer via the USB cable so you can
perform paging operations of the application on the PC or notebook. (see
"Remote paging
operations" on page 27
).
To connect the projector to a laptop or desktop computer:
1.
Take the supplied VGA cable and connect one end to the VGA output socket of the
computer.
2.
Connect the other end of the VGA cable to the D-SUB/COMP IN signal input socket
on the projector.
3.
(Optional) Take the supplied USB cable and connect the flat end to the USB port of
the computer, and the square end to the USB socket on the projector.
4.
Take the supplied Audio cable (a) and connect one end of the cable to the audio
output socket of the computer, and the other end to the Audio socket of the projector.
The final connection path should be like that shown in the following diagram:
•
A Mac adapter (an optional accessory) is needed if you are connecting legacy version
(www.apple.com/usen/legacy/legacy_list.html) Macintosh computers.
USB cable
Audio cable
VGA cable
Laptop or
desktop
computer


