24
Technicians working with the caliper installed on
vehicle:
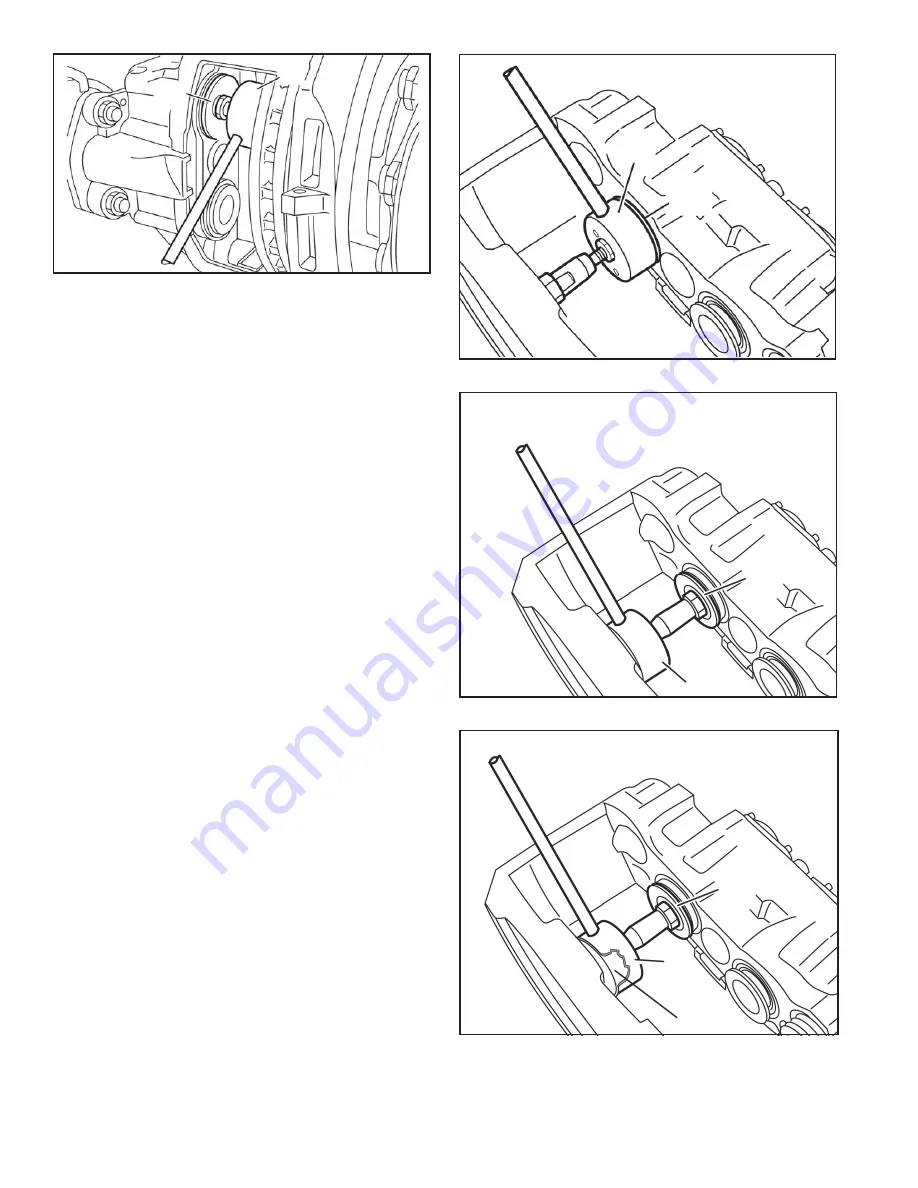
• Install the boots using the press-in tool (B) with the short
press-in extension (T3) for positioning and pressing
into place - see Figure 43.
• Position a tappet assembly (13) onto each tappet
bushing. Using press-in tool (B) in a reversed
orientation with the press-in extension (T3) towards
the threaded tube, install each tappet onto its tappet
bushing - see Figure 45.
Technicians working with the caliper not installed on
vehicle:
• Install the boots using the press-in tool (B) with the
long press-in extension (T3 + T4) for positioning and
pressing into place - see Figure 43.
• Position a tappet (13) onto each tappet bushing. Using
press-in tool (B) in a reversed orientation with the press-
in extension (T3 + T4) towards the threaded tube, install
each tappet onto its tappet bushing - see Figure 45.
After assembly, check that the tappet (13) is free to turn
in both directions.
Note: When installing the tappet for Bendix
®
ADB 22X
™
,
ADB 225
™
, and SK7
™
disc brakes, use the supplemental
ring (T24), inserted into the tool (T2) - see Figure 48 - to
assist the installation, since the caliper’s back plate is too
thin using only Tool (B) to achieve the correct position.
B
13
FIGURE 45 - ON VEHICLE TAPPET INSTALLATION
13
B
FIGURE 47 - OFF VEHICLE TAPPET INSTALLATION
13
B
T24
FIGURE 48 - OFF VEHICLE - USE OF EXTRA TOOL FOR
SOME STYLES
B
13
FIGURE 46 - OFF VEHICLE BOOT INSTALLATION


