- 16 -
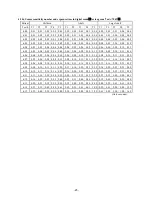
within the prescribed range, XX specified in (2)-
③
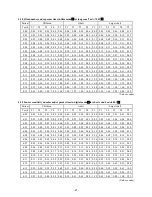
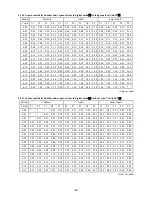
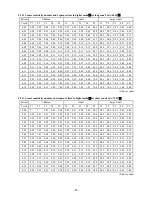
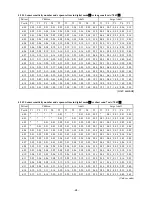
is stored as the preheating power setting value for 60
kV/4 mA, and you will be directed to the adjustment of 60 kV/7 mA. If it falls outside the range, a new “h”
value is displayed, and exposure at 60 kV/4 mA shall be conducted again. If the exposure at “h.1F”, or the
highest value, is conducted but falls outside the range, “1F” is stored, and you will also be directed to the
adjustment of 60 kV/7 mA. The interval before the next exposure is 10 seconds. During this period, the
ready light goes off and the “h” value as the condition for the next exposure, the tube current light, and the
tube voltage light blink.
②
When the adjustment of 60 kV/7 mA is completed, move to 70 kV/4 mA and then to 70 kV/7 mA.
③
When the adjustment of 70 kV/7 mA is completed, an alarm sounds and “Fin” is displayed on the
seven-segment LED. At this moment, the four “h” values are written to EEPROM. Therefore, if you power
off before “Fin” is displayed or move to another setting mode, the “h” value will not be updated.
3.7 Setting the automatic lock
(1) To enter this mode
Hold down the T3 and T4 buttons for approximately three seconds.
(2) The status when you enter the mode
①
The ready light blinks. The lights for teeth, patient, cone, tube voltage, tube current, exposure, film, and
digital mode are off.
②
The seven-segment LED displays “AL.X”. X represents the automatic lock status number held at the time
(0 or 1).
(3)Operation and display
①
Press the
△
or
▽
button and the seven segment LED displays “AL.0” and “AL.1” in turn. “AL”
represents “automatic lock,” and the following numbers have the meanings as described below:
0: If it sits idle for approximately eight minutes while the power is on, it automatically enters the
energy-saving mode.
1: If it sits idle for approximately eight minutes while the power is on, it automatically enters the lock
mode.
②
Select the value you want and press the patient selection button for approximately one second. An alarm
sounds and the automatic lock setting is stored. Factory default is “AL.0”.
3.8 Setting the standard density value for each tooth
(1)To enter the mode
Hold down the T1 and T5 buttons for approximately three seconds.
(2)The status when you enter the mode
①
The ready light blinks. The lights for patient, cone, tube voltage, tube current, exposure, film, and digital
mode are off.
②
T1 of the teeth light is on.
③
The seven-segment LED displays “b.XX”. XX represents the standard value for T1 density held at the
time.
(3) Operation and display
①
Press the
△
or
▽
button to increase/decrease the standard density value displayed on the seven-segment
LED.
②
Select the value you want and then press another teeth button. Then, the standard density value of the
teeth is displayed on the seven-segment LED. Change the value to the one you want as well. The change
will be temporarily held until you exit this setting mode.
③
Press the patient selection button for approximately one second after completing the change of all standard
density values. An alarm sounds and the values are stored.
3.9
Viewing the setting
(1) To enter this mode
Hold down the T5 buttons and the cone button for approximately three seconds.
(2) The status when you enter the mode
①
The ready light blinks. The lights for teeth, patient, cone, tube voltage, tube current, exposure, film, and


