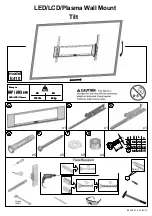
INSTALL THE WALL MOUNT (WM) — STEP 2
After the Wall Mount is on the wall, use a level to make sure the Wall Mount is vertically level. Using a
drill and the 5/32" (or 4mm) size drill bit, drill a third hole 2.5" (64mm) deep through the
Securing Hole
"C", and then install the final Lag Bolt. Finally, tighten all Lag Bolts completely.
POSER LE SUPPORT MURAL (WM) — ÉTAPE 2
Une fois que le support mural est sur le mur, utiliser un niveau pour vérifier qu'il est bien vertical. À l'aide
d'une perceuse et d'un foret de 5/32 po (ou 4 mm), percer un troisième trou de 64 mm (2,5 po) de profond
à travers le trou de blocage « C » puis visser le dernier tire-fond. Pour finir, serrer complètement tous les
tire-fond.
INSTALE EL SOPORTE DE PARED (WM): PASO 2
Una vez que el soporte está sobre la pared, use un nivel para asegurarse que está verticalmente nivelado.
Utilizando un taladro y la broca de 5/32" (4 mm), perfore un tercer orificio de 2,5" (64 mm) de profundidad
a través del orificio de fijación (C), y luego coloque el último tirafondo (T). Para finalizar, ajuste por
completo todos los tirafondos.
INSTALLAZIONE DEL SUPPORTO A PARETE (WM) —
SECONDO PASSO
Dopo aver fissato il supporto alla parete, utilizzare la livella per verificare che il supporto sia parallelo al
suolo. Con il trapano e una punta da 4 mm, trapanare un terzo foro profondo 64 mm nel punto segnato
come foro d'aggancio "C", quindi fare alloggiare l'ultimo bullone. Infine, serrare completamente tutti i
bulloni.
INSTALLATION DER WANDBEFESTIGUNG (WM) .
SCHRITT 2
Nachdem die Wandbefestigung an der Wand angebracht wurde, stellen Sie mit Hilfe Ihres
Nivellierinstruments sicher, dass sie vertikal verläuft. Mit einem Bohrer und einer 4 mm großen
Bohrerspitze wird ein drittes 64 mm tiefes Loch durch das Sicherungsloch "C" gebohrt und dann der letzte
Ankerbolzen installiert. Zum Abschluss werden alle Ankerbolzen vollständig festgezogen.
УСТАНОВИТЕ НАСТЕННЫЙ КРОНШТЕЙН (WM) — ШАГ 2
Когда кронштейн уже на стене, с помощью уровня проверьте установку кронштейна по
вертикали. Используя дрель и сверло 5/32" (или 4 мм), просверлите третье отверстие глубиной
2.5" (64 мм) через крепежное отверстие "C", а затем ввинтите последний шуруп. После этого
полностью затяните все шурупы.
24
Summary of Contents for 7420
Page 21: ...21 B A ...


