19
CARE AND MAINTENANCE
18
CARE AND MAINTENANCE
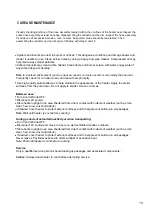
Spiders and insects can nest in burner or orifices. This dangerous condition can damage heater and
render it unsafe for use. Clean burner holes by using a heavy-duty pipe cleaner. Compressed air may
help clear away smaller particles.
Carbon deposits may create a fire hazard. Clean dome and burner screen with warm soapy water if
any carbon deposits develop.
Note:
In a salt-air environment (such as near an ocean), corrosion occurs more quickly than normal.
Frequently check for corroded areas and repair them promptly.
Use high-quality automobile wax to help maintain the appearance of the heater. Apply to exterior
surfaces from the pole down. Do not apply to emitter screen or domes.
Between uses:
Turn Control Knob OFF.
Disconnect LP source.
Store heater upright in an area sheltered from direct contact with inclement weather (such as rain,
sleet, hail, snow, dust and debris).
If desired, cover heater to protect exterior surfaces and to help prevent build-up in air passages.
Note:
Wait until heater is cool before covering.
During periods of extended inactivity or when transporting:
Turn Control Knob OFF.
Disconnect LP source and move to a secure, well-ventilated location outdoors.
Store heater upright in an area sheltered from direct contact with inclement weather (such as rain,
sleet, hail, snow, dust and debris).
If desired, cover heater to protect exterior surfaces and to help prevent build-up in air passages.
Never leave LP cylinder exposed to direct sunlight or excessive heat.
Note: Wait until heater is cool before covering.
Service
Only a qualified service person should repair gas passages and associated components.
Caution
: Always allow heater to cool before attempting service.
Visually checking portions of the hose assembly located within the confines of the heater post. Inspect
the
entire hose assembly at least annually, disassembling the reflector and burner. Inspect the hose
assembly
for evidence of excessive abrasion, cuts, or wear. Suspected areas should be leak tested.
Then
assembling the reflector and burner again following with step
9
and 1
4
.


