background image

34

Configuring Additional Computers Using Belkin NetSetup Software

Now that the first computer has been configured we are ready to configure the
other PCs on your network.
1. You should now be working

with the next computer. Click
Start, Programs, Belkin SOHO
Networking, and then Belkin
NetSetup to launch the easy-to-
use computer configurator the
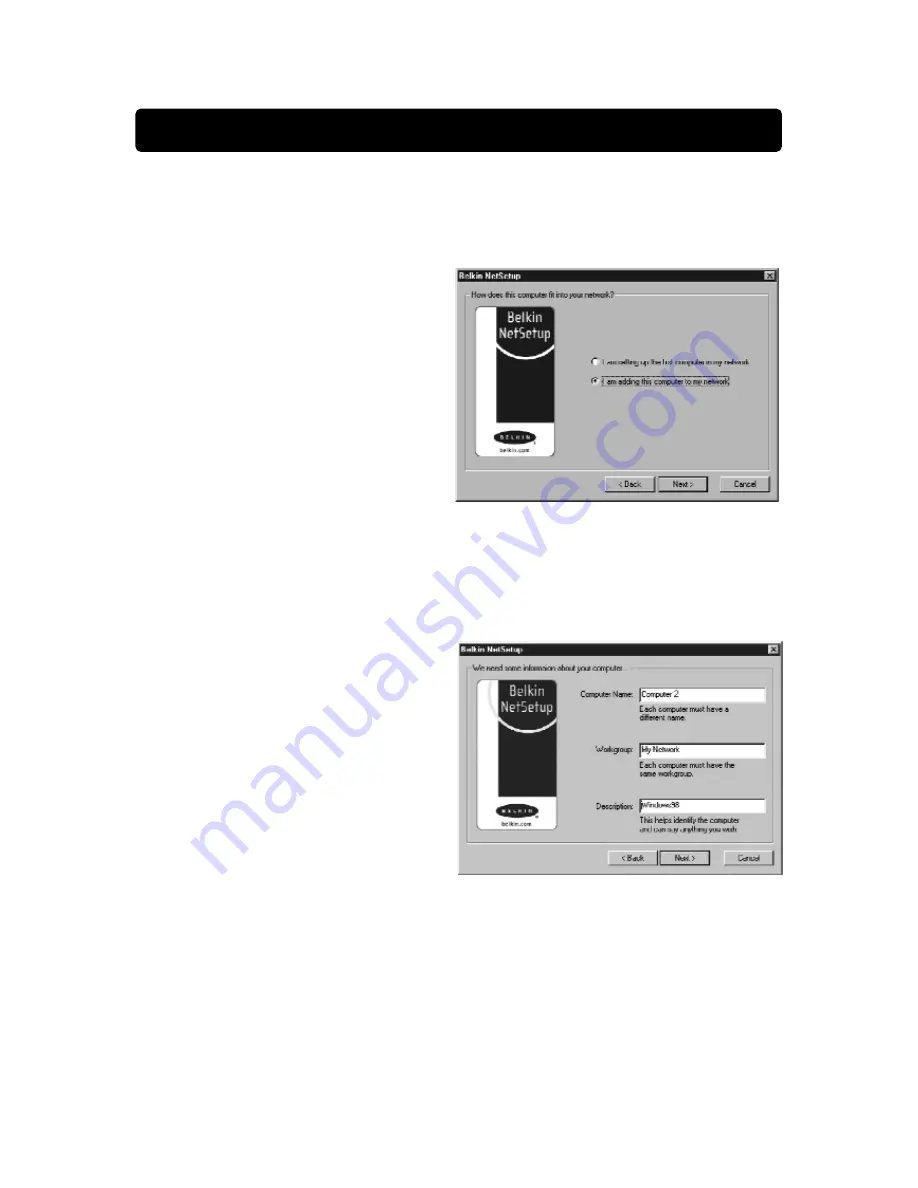
following screen will appear:

2. Select "I am adding this

computer to my network".
Click "Next".

3. Windows will now prompt you to insert the newly created client setup disk

into the PC’s floppy drive. Insert the disk you labeled "Belkin Networking"
into the floppy drive and click OK. The following screen will appear:

4. In the "Computer Name" field,

type a name for the computer
such as "Computer 2".
Remember, the name must be
different from that of the other
computers on the network.

5. The "Workgroup" field should be

filled in with the workgroup
name you entered on the
previous computer. Do not
change this setting. 

6. Type in a description such as "Windows 98". This can be anything you want

and does not have to be different from or the same as the description of any
other computer on the network. You may also leave this field blank.

Summary of Contents for F5D6000

Page 1: ...F5D6020 F5D6000 Wireless Notebook Network Card Wireless Desktop Network Adapter User Manual ...

Page 2: ... Network Card Drivers for Windows 98 Me 17 18 Installing the Notebook Network Card Drivers for Windows 2000 19 20 Installing the Notebook Network Card Drivers for Windows NT 21 22 Installing Belkin 11Mbps Wireless Setup Utility 23 Using the Belkin 11Mbps Wireless Setup Utility 24 30 Installing the Belkin SOHO Networking Software for Windows 98 Me 31 Configuring Your Windows 98 Me Computer Using Be...

Page 3: ...etworking that frees you from using cables with your home or office network The Wireless Network Card Adapter serves as a way for your PCs to communicate on a wireless network Features Compatible with PCMCIA and PCI specifications Provides LED indicators for monitoring network traffic Contents of Package One Wireless Notebook Network Card or One Wireless Desktop Network Adapter One CD ROM User Gui...

Page 4: ...re using the Optional PCI adapter go to the section on page 3 titled Installing the Wireless Notebook Network Adapter using the Optional PCI Adapter 2 Use in a laptop with PCMCIA slot If your are installing your card directly into a laptop computer skip to the section on page 14 titled Installing the Notebook Network Card in your Notebook PC ...

Page 5: ...le wear a grounded wrist strap or anti static gloves Note Dry weather conditions or walking across a carpeted floor may cause you to acquire an electrostatic charge 2 Turn off the power to the PC and unplug the power cord from the electrical outlet 3 Remove the cover to the PC Please refer to your computer s Owner s Manual for instructions on how to remove the cover 4 Find any available PCI expans...

Page 6: ... into the PCI adapter before installing the software drivers 8 Replace the cover to the PC and connect the power cord to the electrical outlet Be sure to re connect other cables that may have come loose during the installation Your hardware is now installed Next you need to install the PCI software drivers for your operating system The next section in the manual explains how to install the PCI sof...

Page 7: ...vice has been installed and will display the following windows Insert the CD into your CD ROM drive 2 Windows will tell you that it is unable to locate a driver Click Other Locations 3 The screen below will appear Make sure that the CD is inserted into your CD ROM drive In the Location bar type D where D is the drive letter of your CD ROM Drive ...

Page 8: ...sh 5 Windows may ask you to insert the Windows 95 CD Insert your Windows 95 CD into the CD ROM drive and click OK 6 Windows will now ask you to restart Click Yes to restart your computer Hardware and software driver installation is now complete for Windows 95 The next step is to install the Belkin 11Mbps Wireless Setup Utility Go to page 23 ...

Page 9: ...t a new device has been installed and will display the following window 2 The Add New Hardware Wizard will begin Click Next 3 When asked What do you want Windows to do select Search for the best driver for your device Recommended and click Next 4 Select CD ROM Place the CD ROM supplied with the card in your CD ROM drive and click Next 7 ...

Page 10: ... Next 6 The following screen will appear Click OK 7 Click on the Finish Button to complete the wizard Your computer may prompt you to restart if so allow the system to restart Hardware and software driver installation is now complete for Windows 98 ME The next step is to install the Belkin 11Mbps Wireless Setup Utility Go to page 23 ...

Page 11: ...r Windows starts up Windows will automatically detect that a new device has been installed and will display the following window 2 The Found New Hardware Wizard will start Click Next 3 In the next screen select Search for a suitable driver for my device recommended then click Next ...

Page 12: ...en will appear Insert the CD provided with the card into your CD ROM drive Select CD ROM drive then click Next 5 This screen will appear Click Next 6 The Digital Signature Not Found screen will appear This does not mean there is a problem Click Yes to continue ...

Page 13: ...inished the screen below will appear Click Finish to complete the installation If Windows prompts you to restart your computer do so Hardware and software driver installation is now complete for Windows 2000 The next step is to install the Belkin 11Mbps Wireless Setup Utility Go to page 23 ...

Page 14: ...e Drivers follow the steps below After Windows NT starts up 1 Turn on the power to the PC After Windows NT starts up insert the CD into your CD ROM drive 2 Click on Start select Settings then click on Control panel to open the Control Panel Window 3 Double click on the Network Icon The screen below will appear A list of adapter may appear in the window however the Belkin PCI adapter will not Click...

Page 15: ... drive letter of your CD ROM drive Click OK 5 Select Belkin 11Mbps Wireless PCI Adapter Card then click OK 6 This screen will appear Click OK Hardware and driver installation is now complete for Windows NT The next step is to install the Belkin 11Mbps Wireless Setup Utility Go to page 23 ...

Page 16: ...our Notebook PC 1 Insert the Wireless Notebook Network Card in the PCMCIA slot of your notebook with the color label facing up 2 Install the drivers for your particular operating system Go to the next section that applies to your operating system ...

Page 17: ...ct that a new device has been installed and will display the windows Below Insert the CD into your CD ROM drive 2 Windows will tell you that it is unable to locate a driver Click Other Locations 3 The screen below will appear Make sure that the CD is inserted into your CD ROM drive In the Location bar type D where D is the drive letter of your CD ROM Drive ...

Page 18: ...lick Finish 5 Windows may ask you to insert the Windows 95 CD Insert your Windows 95 CD into the CD ROM drive and click OK 6 Windows will now ask you to restart Click Yes to restart your computer Hardware and software driver installation is now complete for Windows 95 The next step is to install the Belkin 11Mbps Wireless Setup Utility Go to page 23 ...

Page 19: ...urn on the power to the PC After Windows 98 Me starts up the Add New Hardware Wizard will begin Click Next 2 When asked What do you want Windows to do select Search for the best driver for your device Recommended and click Next 3 Select CD ROM Place the CD ROM supplied with the card in your CD ROM drive and click Next ...

Page 20: ...ppear Click Next 5 The following screen will appear Click OK 6 Click on the Finish Button to complete the wizard Your computer may prompt you to restart if so allow the system to restart Hardware and software driver installation is now complete for Windows 98 ME The next step is to install the Belkin 11Mbps Wireless Setup Utility Go to page 23 ...

Page 21: ...ter Windows 2000 starts up insert the CD into your CD ROM drive 2 The Found New Hardware Wizard will start Click Next 3 In the next screen select Search for a suitable driver for my device recommended then click Next 4 The screen below will appear Insert the CD provided with the card into your CD ROM drive Select CD ROM drive then click Next ...

Page 22: ...n there is a problem Click Yes to continue 7 Windows will install the drivers When finished the screen below will appear Click Finish to complete the installation If Windows prompts you to restart your computer do so Hardware and software driver installation is now complete for Windows 2000 The next step is to install the Belkin 11Mbps Wireless Setup Utility Go to page 23 ...

Page 23: ... NT starts up insert the CD into your CD ROM drive 2 Click on Start select Settings then click on Control panel to open the Control Panel Window 3 Double click on the Network Icon The screen below will appear A list of adapter may appear in the window however the Belkin PCI adapter will not Click on Add 4 The screen below will appear Select Have Disk ...

Page 24: ... D is the drive letter of your CD ROM drive Click OK 6 Select Belkin 11Mbps Wireless PCI Adapter Card then click OK 7 This screen will appear Click OK Hardware and driver installation is now complete for Windows NT The next step is to install the Belkin 11Mbps Wireless Setup Utility Go to page 23 ...

Page 25: ...e CD ROM that came with your Belkin Wireless Notebook Network Card or Belkin Wireless Desktop Adapter into your CD ROM 2 From your desktop double click on My Computer then double click on your CD ROM Drive 3 Double click on the Setup icon Windows will automatically install the program onto your PC After the program is installed Windows may ask you to restart your computer Please do so ...

Page 26: ...d select Configuration Utility When the utility is running the Icon below will appear in the system tray When the icon is green it indicates that the wireless link is good When the icon is yellow it indicates that the wireless link is fair When the icon is red there is no link established To make any changes to the configuration of your network use the Wireless Setup Utility 1 Click on the icon fo...

Page 27: ...y number between 1 and 11 3 Rescan Button Clicking on the Rescan button will cause the Wireless Network Card to find the associated Ad Hoc network or the WAP s SSID 4 Current Tx Rate This shows the speed of your network connection using the Wireless Network Card 5 Throughput Tx This field shows the wireless transmission throughput in bytes per second Rx This field shows the wireless receipt throug...

Page 28: ...ithin its coverage area An WAP is configured with a Service Set Identifier This is a name that is given to the wireless network and is used by the wireless equipped computers to access the wireless network The WAP can also be configured to use encryption or grant access to computers with specific MAC addresses The WAP also effectively doubles the distance that computers in the wireless LAN can be ...

Page 29: ...hen there is use of a WAP Ad Hoc Mode Ad Hoc or Peer to Peer refers to a configuration in which each computer in a wireless network communicates directly with another An Ad Hoc wireless LAN consists of a group of computers each equipped with a wireless adapter connected directly via radio signals to form an independent wireless LAN Computers in a specific Ad Hoc wireless LAN must be configured to ...

Page 30: ...d the Network Name Infrastructure mode The SSID should be set to the same value as the WAP Ad Hoc mode The SSID on all Wireless Notebook Network Cards in the network are set to the same value 3 PS Mode The power save mode enables or disables the PC from going into sleep mode Enabled Allows your PCs to enter sleep mode but this can disrupt steady communication when the PC goes to sleep Disabled Dis...

Page 31: ...more secure than 64 bit encryption However using 128 bit encryption uses keys to scramble and unscramble the data that is being sent between the wireless equipped computers The wireless network must use the same key to be able to communicate using encryption Select 64 bit from the drop down menu You will notice when using 64 bit encryption there are 4 keys labeled Key 1 through Key 4 Only one key ...

Page 32: ... the network must use the same encryption rate and passphrase The passphrase can be changed as often as desired Setting 64 Bit Encryption 1 Select 64 bit from the drop down menu 2 Select Create with Passphrase 3 Enter a Passphrase and click Apply 4 Select the Default Key ID from the drop down menu These are labeled 1 4 Click Apply 64 bit encryption is now enabled Setting 128 bit Encryption 1 Selec...

Page 33: ...orking Software to configure your computers Make sure that no other network adapters are installed in your computer before running the SOHO Networking Software 1 Insert the SOHO Networking Software that came with your Belkin Wireless Notebook Network Card or Wireless Desktop Network Adapter into your CD ROM 2 Click Start click Run and type D NetSetup D is usually the default drive letter for the C...

Page 34: ... network and click Next The following screen will appear Select I am setting up the first computer in my network and click Next 3 You will need to enter some information into the next screen that appears 4 In the Computer Name field type a name for the computer such as Computer 1 The name must be different for each computer that belongs to the same network workgroup 5 In the Workgroup field type a...

Page 35: ...w needs to know if you want to create a client setup floppy disk If you have more computers that you need to set up to work with the wireless network click Yes This will save some setup files to a disk simplifying setup of subsequent computers If you are not going to set up any more computers click No and move to step 11 9 If you clicked Yes you will be prompted to insert a floppy disk into the PC...

Page 36: ...ewly created client setup disk into the PC s floppy drive Insert the disk you labeled Belkin Networking into the floppy drive and click OK The following screen will appear 4 In the Computer Name field type a name for the computer such as Computer 2 Remember the name must be different from that of the other computers on the network 5 The Workgroup field should be filled in with the workgroup name y...

Page 37: ...8 If you want to share files and printers on this computer select I want to share files and printers on my computer and click Finish If not select I do not want to share files and printers on my computer and click Finish 9 You must now restart the computer 10 Your PC is now configured Repeat these steps for the rest of the computers on your network ...

Page 38: ...ith the Belkin NetShare Utility to set up your sharing options 1 From the Start menu click Programs and select Belkin NetShare Utility to set up your sharing options The following screen will appear 2 The Network Info tab allows you to change the name of the computer and the workgroup Verify that the computer name and workgroup match what you entered in the Belkin NetSetup Software 3 You can click...

Page 39: ...a drive accessible to all PCs in your network highlight the drive in the left hand column and select Share 7 To stop sharing highlight the drive in the right hand column and click Stop Sharing The drive s will appear in the left hand column 8 For advanced sharing options click on the Properties button and the following screen will appear 9 On this screen you can share files on your computer as rea...

Page 40: ...would like to share or not share and select the Sharing button the following screen will appear 12 Select the preferred sharing option for this printer 13 Clicking on Connect to Network Printers will allow you to locate shared printers on your network Once you have located the printer you want to share over the network NetShare will automatically install printers from the host computer ...

Page 41: ...appear 3 Double click on the Entire Network icon and your workgroup will appear Click on your workgroup and all resources available to you will be listed OR 1 To access resources available on other computers click on the Network Neighborhood or My Network Places icon on your desktop 2 Double click on the computer that you wish to access 3 You can now access all network files that are available to ...

Page 42: ... cell or micro cell has its own base station each base station in turn is interconnected with other cells or bases BSS BSS stands for Basic Service Set A Basic Service Set is comprised of a WAP and all the LAN PCs that are associated with it ESS ESS ESS ID SSID stands for Extended Service Set More than one BSS is configured to become an Extended Service Set LAN mobile users can roam between differ...

Page 43: ...the preset RTS Threshold size the RTS CTS mechanism will not be enabled WEP Wired Equivalent Privacy is based on the use of 64 bit or 28 bit keys and the popular RC4 encryption algorithm Wireless devices without a valid WEP key will be excluded from network traffic Wireless Access Point WAP An internetworking device that seamlessly connects wired and wireless networks ESS BSS2 BSS1 Desktop PC Desk...

Page 44: ...es your existing phone lines to transmit data at high speeds Ethernet A standard for computer networks Ethernet networks are connected by special cables and switches and move data around 100Mbps IP Address IP stands for Internet Protocol An IP address consists of a series of four numbers separated by periods that identify a single unique Internet computer host Example 192 34 45 8 ISP Internet Serv...

Page 45: ...ateful Packet Inspection SPI is the type of corporate grade Internet security provided by your Belkin 4 Port Cable DSL Gateway Router Using SPI the gateway acts as a firewall protecting your network from computer hackers Subnet Mask A subnet mask which may be a part of the TCP IP information provided by your ISP is a set of four numbers configured like an IP address It is used to create IP address...

Page 46: ... limits human proximity to the antenna shall not be less than 20cm 8inches during normal operation Federal Communications Commission Notice This equipment has been tested and found to comply with the limits for a Class B digital device pursuant to Part 15 of the FCC Rules These limits are designed to provide reason able protection against harmful interference in a residential installation This equ...

Page 47: ...ement for radio equipment ETS 300 826 General EMC requirements for radio equipment To determine the type of transmitter check the identification label on your Belkin product Products with the CE marking comply with the EMC Directive 89 336 EEC and the Low Voltage Directive 72 23 EEC issued by the Commission of the European Community Compliance with these directives implies conformity to the follow...

Page 48: ...IVE IN LIEU OF ALL OTHERS WHETHER ORAL OR WRITTEN EXPRESSED OR IMPLIED BELKIN SPECIFICALLY DISCLAIMS ANY AND ALL IMPLIED WARRANTIES INCLUDING WITHOUT LIMITATION WARRANTIES OF MERCHANTABILITY AND FITNESS FOR A PARTICULAR PURPOSE No Belkin dealer agent or employee is authorized to make any modification extension or addition to this warranty BELKIN IS NOT RESPONSIBLE FOR SPECIAL INCIDENTAL OR CONSEQU...

Page 49: ...nts NN3 8RX United Kingdom Tel 44 0 1604678300 Fax 44 0 1604678330 Belkin Components 501 West Walnut Street Compton CA 90220 USA Tel 310 898 1100 Fax 310 898 1111 2002 Belkin Components All rights reserved All trade names are registered trademarks of respective manufacturers listed Belkin Components Ltd 7 Bowen Cresent West Gosford NSW 2250 Australia Tel 61 2 4372 8600 Fax 61 2 4325 4277 P73851 A ...

Reviews: