2.
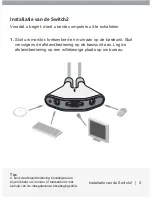
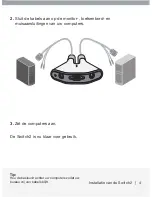
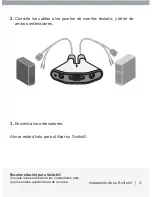
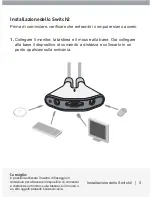
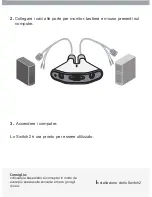
Collegare i cavi alle porte per monitor, tastiera e mouse presenti sul
computer.
3.
Accendere i computer.
Lo Switch2 è ora pronto per essere utilizzato.
Consiglio:
collocare la base dietro ai comupter in modo da
avere più spazio sulla scrivania e meno grovigli
di cavi.
Installazione dello Switch2
Summary of Contents for F1DF102P
Page 1: ...F1DF102Pea Quick Installation Guide Switch2 NL ES IT UK FR DE ...
Page 7: ...F1DF102Pea Guide d installation rapide Switch2 NL ES IT UK FR DE ...
Page 13: ...F1DF102Pea Installationsanleitung Switch2 NL ES IT UK FR DE ...
Page 19: ...F1DF102Pea Beknopte installatiehandleiding Switch2 NL ES IT UK FR DE ...
Page 25: ...F1DF102Pea Guía de instalación rápida Switch2 NL ES IT UK FR DE ...
Page 31: ...F1DF102Pea Guida di installazione Switch2 NL ES IT UK FR DE ...

