


12
Factory Mode
Access Factory Mode
Factory Mode:
How to Get into Factory Mode Menu
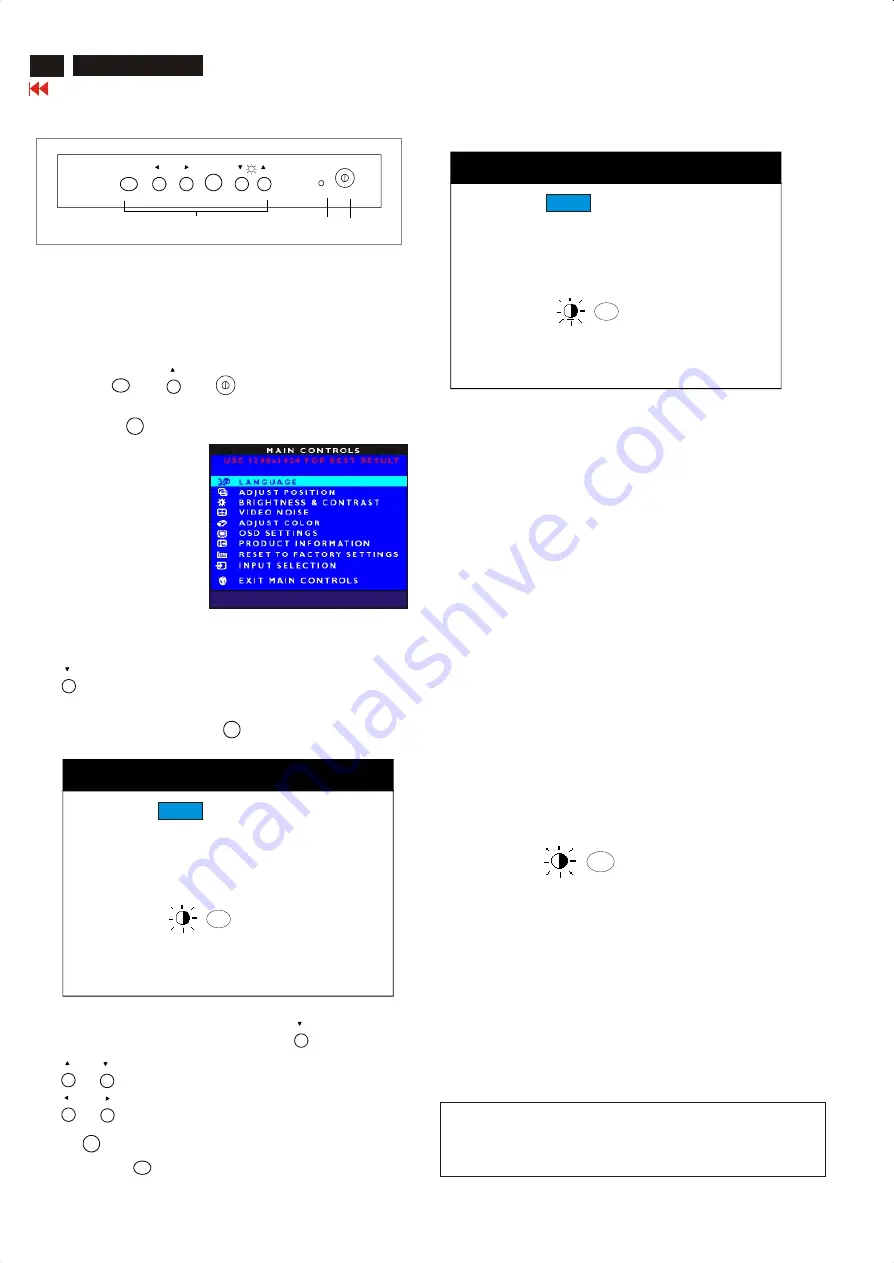
Turn off LCD monitor.
Push AUTO " " & " " & " " buttons simultaneously
,then release Power buttun only, untill picture comes on the screen.
Press MENU " " button, bring up Factory mode indication as
shown in Fig 2.
Fig. 2
Factory Mode indication==>
MAXDATA 180P V1.88 02-04-17
Contrast adjustment (Sub-Contrast). Use this menu item to
adjust the contrast gain of pre-amp ranges from 0 to 255.
(For
9 3 0 0 K R G B
6 5 0 0 K R G B
Color temperature gain adjustment. Use these menu items to
adjust the RGB gains of pre-amp for different color
temperatures, ranges from 0 to 255.
OFFSET R G B
Sub-Brightness adjustment. Use this menu item to adjust
the brightness level (DC-level) of pre-amp range from 0 to
255.(R/G/B ANALOG DC -level).
example: of Sub-Contrast in factory mode is
preset for 100%(Maximum Value) of Contrast Value in user
mode).
GAIN R G B
R/G/B GAIN adjustment. Use this menu item to adjust
the R/G/B (GAIN) of Amp. range from 0 to 255.(R/G/B
ANALOG GAIN Values).
AUTO SUB:
AUTO Colour to Adjust OFFSET R/G/B & GAIN R/G/B
automatically by LCD MONITOR CPU.
RESERVE1: NO FUNCTIONED, RESERVED ONLY.
RESERVE2: NO FUNCTIONED, RESERVED ONLY.
RESERVE3: NO FUNCTIONED, RESERVED ONLY.
AUTO SUB:
Use button to select factory adjustment indication (for example:
MAXDATA 180P V1.88 02-04-17), which is the entrance of the factory
adjustment menu, press MENU " " button to access it. The
window shows as below.
(PS: The “Offset R G B” function can be used on reduce or eliminate
snowy noise on the background when the resolution of video signal is
1280 X 1024 vertical 60Hz. Slightly increase or decrease the value
until snowy noise completely disappear.)
Default values (example) are as below.
Default values (example) are as below.
Leave Factory Mode
Turn off monitor, then turn on monitor again => go back
to User mode directly.
Leave Factory Mode
Turn off monitor, then turn on monitor again => go back
to User mode directly.
SUB BRI:
SUB BRI:
-
-
OK
OK
255
255
255
255
-
SUB CON:
SUB CON:
NO FUNCTIONED,”DIGITAL DC-Level” RESERVED
for LCD MONITOR 150P usage ONLY.
AUTO
MENU
Fig. 1
1 = Buttons for the OSD menu (On-Screen-Display)
2 = Power indicator
3 = Power button
2
3
1
AUTO
MENU
INPUT
MENU
9300K R G B
9300K R G B
6500K R G B
6500K R G B
OFFSET R G B
OFFSET R G B
SUB CON:
SUB CON:
SUB BRI:
SUB BRI:
-
-
AUTO SUB:
AUTO SUB:
-
OK
OK
GAIN R G B
GAIN R G B
RESERVE1:
RESERVE1:
RESERVE3:
RESERVE3:
RESERVE2:
RESERVE2:
MAXDATA 180P V1.88 02-04-17
00
00
Fig. 3
AUTO
Use or buttons to select SUB-CON, 9300K R G B,..etc.
Use or buttons to decrease/increase the value of each item.
Press " " => go back to MAIN CONTROLS.
All the default values are invisible. Press " " => appear.
To press AUTO " " button on this screen, the values of
OFFSET and GAIN will be adjusted by CPU automatically.
MENU
9300K R G B
9300K R G B
6500K R G B
6500K R G B
OFFSET R G B
OFFSET R G B
SUB CON:
SUB CON:
SUB BRI:
SUB BRI:
-
-
AUTO SUB:
AUTO SUB:
-
OK
OK
GAIN R G B
GAIN R G B
RESERVE1:
RESERVE1:
RESERVE3:
RESERVE3:
RESERVE2:
RESERVE2:
MAXDATA 180P V1.88 02-04-17
00
00
84
84
188
188
50
50
182
182
86
86
181
181
83
83
251
251
228
228
255
255
252
252
255
255
205
205
255
255
255
255
226
226
Max 101830
Summary of Contents for 101830
Page 30: ...9 Go to cover page 30 Max 101830 Schematic diagram Power...
Page 32: ...Power Board C B A 31 Max 101830 Go to cover page...
Page 33: ...9 Go to cover page 32 Max 101830 Schematic diagram Video Input Schematic diagram DC_Powers...
Page 35: ...9 Go to cover page 34 Max 101830 Schematic diagram Scaler...
Page 36: ...9 Go to cover page 35 Max 101830 Schematic diagram Frame_Beffer...
Page 43: ...Inverter Diagram PWB AMBIT 9 Go to cover page 42 Max 101830...
Page 44: ...43 Max 101830 Go to cover page Inverter Diagram PWB AMBIT...
Page 45: ...44 Max 101830 Go to cover page Schematic diagram Control...
Page 53: ...52 Max 101830 Go to cover page CA110 Application Continued...


