16/EN
2
Installation
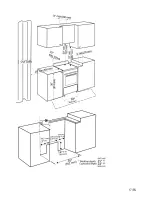
The kitchen floor must be able to carry the
weight of the appliance plus the additional weight
of cookware and bake ware and food.
•
If an appliance hood is to befitted, refer to
the manufacturer's instructions regarding
fixing height.
•
Any kitchen furniture next to the appliance
must be heat-resistant (212 °F min.).
Installation and connection
IMPORTANT:
Do not install the appliance next to refrigera-
tors or freezers. The heat emitted by the
appliance will lead to an increased energy
consumption of cooling appliances.
•
For installation the appliance must be con-
nected in accordance with all local electrical
regulations.
CAUTION:
Unit is heavy (approximately 150 kg (330 Ibs)
and requires at least two persons or proper
equipment to move. Do not move more than 3
meters without any instrument. Otherwise, you
can cause injury..
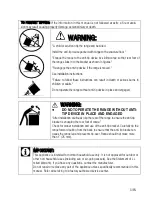
NOTICE
Material damage!
The door and/or handle must not be used for
lifting or moving the appliance. The appliance
must be placed directly on the floor. It must
not be placed onto a base or a pedestal.
•
To align the appliance with the worktop,
adjust the feet turning right or left hand as
required.
•
Hidden surfaces may have sharp edges.
Use caution when reaching behind or under
appliance.
•
Do not use the oven or warming drawer (if
equipped) for storage.
NOTICE
Material damage!
Do not place other items on the top of the
appliance. The appliance must be transported
upright. The door and/or handle must not be
used for lifting or moving the appliance. Take
care not to touch the oven heating element
also located at the top of the oven cavity, just
behind the ridged area. It is recommended to
wear gloves and long sleeves to protect hands
and forearms from abrasion and potential
scratches during the lifting process. It is also
recommended to take off watches and jewelry
and to wear work shoes during installation for
foot protection. Remove the oven door for
easier handling and installation.
•
The appliance must be placed directly on
the floor. It must not be placed onto a base
or a pedestal.
Summary of Contents for SLER30530SS
Page 2: ...User Manual SLER 30530 SS ...
Page 18: ...17 EN ...
Page 20: ...19 EN ...
Page 56: ...55 EN 10 WARRANTY STATEMENT FOR BEKO ELECTRIC AND GAS RANGES ...
Page 57: ......
Page 58: ...Envelope III 57 EN ...
Page 59: ...Envelope IV 58 EN ...


