15
The delete break-point sub-function 'dEL' operates
in exactly the same way as the 'Add' sub-function
described above. Once within the ‘dEL’ sub-
function each time the
P
button is pressed a break-
point is removed. When deleting a break-point
from a calibrated indicator, the break-point to be
deleted can be selected using the
▲
and
▼
push
buttons. The minimum number of break-point is 2,
break-points '0
:
1' and '1
:
1'.
When the required number of linearising break-
points has been entered, return to the linearisation
sub-menu by pressing
E
.
The indicator will display
the 'Add' or 'dEL' prompt depending upon the last
function used. Using the 'Pts' sub-function the
input current at which each break-point occurs and
the corresponding indicator display may now be
defined.
Using the
▲
or
▼
button select the 'PtS' function
in the sub-menu and press
P
to enter the function
which will display the first break-point '0
:
n', where n
is the total number of linearising break-points
entered – see Fig 7. The selected linearising
break-point can be changed using the
▲
and
▼
buttons. When the required linearising break-point
has been selected set the indicator input current to
the exact value at which the break-point is required
and press
P
*
. Using the
▲
and
▼
buttons and
the
P
button to move between digits, enter the
required indicator display at this break-point.
When set as required, press the
E
push button
to
enter the required indicator display and return to
the sub-menu from which the next beak-point can
be selected.
When all the break-points have been calibrated
pressing
E
twice will return the indicator to the
‘CAL’ function in the configuration menu.
Note:
*
The indicator input current must be
adjusted to the required value before the
P
button is operated to enter the required
indicator display.
Error message
If during calibration the indicator displays a
'FAiL' error message the current at which the
selected break-point is being set is not above
the proceeding break-point or is not below the
following break-point.
7.1.1 Example
Adding break-points to a new indicator
When adding break-points to a new indicator, or to
a lineariser following resetting to the factory
defaults using the 'LtAb' function described in
section 6.11, each additional break-point should be
added before the highest existing breakpoint.
The first additional break-point should be added
before the default break-point '1
:
1' which will result
in a display of '1
:
2'. If more new break-points are
required, using the
▲
button select the new
highest break-point '2
:
2' and add the second
additional break-point by operating the
P
push
button which will result in a display of '2
:
3'. Repeat
the sequence until the required number of break-
points has been entered.
The input current and at which each break-point
occurs and the corresponding indicator display
may now be entered as described above.
7.2 Lineariser calibration using the internal
reference.
The ‘SEt’ function enables the lineariser to be
calibrated without the need for an accurate
external current source. Throughout the calibration
the indicator input current may be any value
between 4 and 20mA.
The ‘SEt’ functions contains four sub-functions.
Display
Description of function
'Add'
Add a break-point
Adds a new break-point before the
displayed break-point. The calibration
of existing break-points is not changed,
but the identification number of all
subsequent break-point is increased by
one.
'dEL'
Remove a break-point
Removes the displayed break-point
and joins the preceding segment to the
following segment with a straight line.
The identification number of all
subsequent break-points is decreased
by one.
'in'
Defines the current at which break-
point occurs.
Enables the required current at each
break-point to be defined without
having to input an accurate input
current to the indicator.
'diSP'
Defines indicator display at break-
point.
Enables the indicator display at each
break-point to be defined.
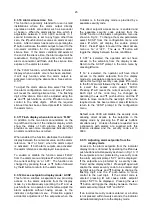
The number of break-point required should first be
entered using the 'Add' and 'dEL' sub-functions.
In both these sub-functions the indicator initially
displays the current break-point and the total
number of break-point being used as shown below.


