background image

9

05

05

06

06

07

A

A

A

A

D

D

DD

E

E

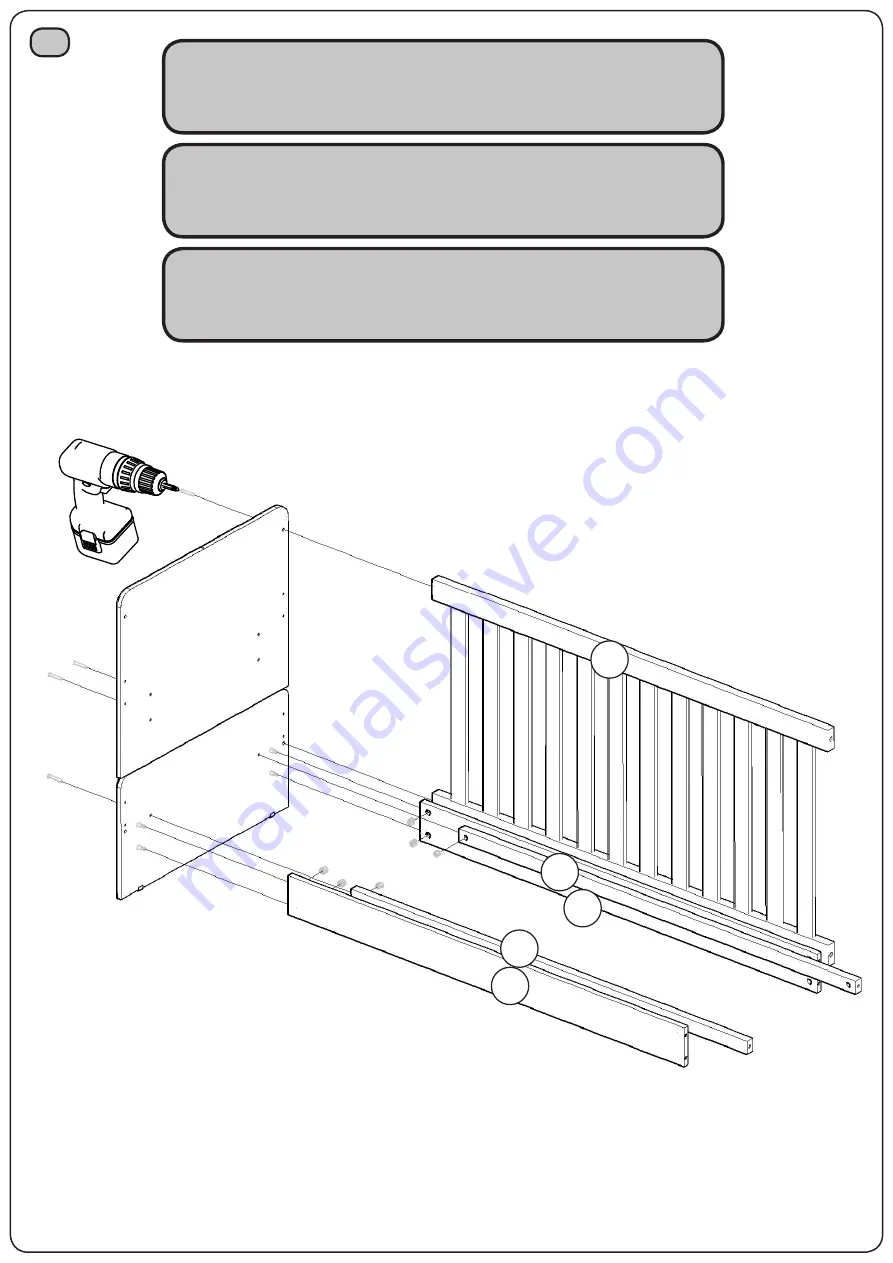
Utilizar a parafusadeira com o torque em 15 

para fixar a grade e para fixar o lastro.

Utilizar la atornilladora con el torque en 15 

para fijar la rejilla y para fijar el lastre.

Use the screwdriver with the torque at 15 to 

attach the rail and base frame.

3

Summary of Contents for Keisy IE05-10

Page 1: ...Tapa Top 650x395x12 08 1 1 02 Fundo cru Fondo sin procesar Raw background 735x313x3 09 1 1 04 Frente de gaveta Frente de caj n Front of drawer 614x175x15 10 1 1 08 Lado de gaveta Lado del caj n Side...

Page 2: ...roducto se vuelve causando accidente Indispensable to fix the product on the wall not the placement of these attachment fittings A D S and T may allow the product to turn caus ing an accident 1 2 3 2...

Page 3: ...dibujo Ej 01 02 03 04 hasta la conclusi n del montaje AVISO ADVERTENCIA SISTEMA DE MONTAGEM SISTEMA DE MONTAJE To clean your furniture use a dry or wet cloth and do not use chemicals that may damage...

Page 4: ...talmente montado conforme as orienta es do Manual de Instru es e ap s certificar que seus sistemas de travamento est o devidamente acionados III O Ber o deve ser colocado sobre um piso horizontal IV P...

Page 5: ...ones del Manual de instrucciones y despu s de asegurarse de que sus sistemas de bloqueo est n debida mente accionados III La cuna debe colocarse sobre un piso horizontal IV Para cunas con altura de ba...

Page 6: ...Instruction Manual and after making sure that your locking systems are properly engaged III The crib must be placed on a horizontal floor IV For cribs with adjustable base height The lowest position...

Page 7: ...IFICA O DA CONFORMIDADE REFEREM SE SOMENTE AO BER O THE INMETRO REGISTRATION AND THE CONFORMITY IDEN TIFICATION SEAL REFER ONLY TO THE CRIB EL REGISTRO EN EL INMETRO Y EL SELLO DE IDENTIFICACI N DE LA...

Page 8: ...I I I C C C C C Fura o para Op o Mini Cama Fura o para Ber o Op o mais alta do lastro Fura o para Ber o Op o mais baixa do lastro Perforaci n de cuna Opci n de lastre inferior Cradle Drilling Lower Ba...

Page 9: ...a parafusadeira com o torque em 15 para fixar a grade e para fixar o lastro Utilizar la atornilladora con el torque en 15 para fijar la rejilla y para fijar el lastre Use the screwdriver with the tor...

Page 10: ...ue em 15 para fixar a grade e para fixar o lastro Utilizar la atornilladora con el torque en 15 para fijar la rejilla y para fijar el lastre Use the screwdriver with the torque at 15 to attach the rai...

Page 11: ...stros 08 e 09 devem ficar 8 5mm da grade fixa 07 As extremidades dos lastros 08 e 09 devem ficar 2mm da grade fixa 07 Lastres extremos 08 y 09 deben quedar 8 5mm de la rejilla fija 07 Lastres extremos...

Page 12: ...12 6 10 11 A A A A...

Page 13: ...removidos para fins de transporte e ou armazenamento Base ballasts should not be removed for transportation and or storage purposes Los balastos base no deben retirarse para fines de transporte y o al...

Page 14: ...e function you can not use the product in the cradle function again Despu s de cambiar la funci n no podr utilizar el producto en la funci n de cuna de nuevo To assemble the mini bed remove the parts...

Page 15: ...os adhesivos Tapa tornillos K donde hay agujeros aparentes Para a montagem da Mini Cama necess rio utilizar a pe a 04 para a montagem da peseira e a pe a 01 para a montagem da cabeceira Para ensamblar...

Page 16: ...02 na travessa estrutural 05 deve ser feita as fura es For fixing the lower side 02 on the structural cross member 05 drills must be made Para la fijaci n del lateral inferior 02 en el tramo estructu...

Page 17: ...17 J J J J B B B B 02 02 13 Coloca o da cantoneira J Attaching the bracket J Colocaci n de la esquina J 12 Mini Cama conclu do Mini cama completa Mini Bed Complete...

Page 18: ...gens Herrajes Hardware 12x 14x Parafuso 1 4x50mm PAN Parafuso 4 5x25mm CHT Tornillo 1 4x50mm PAN Tornillo 4 5x25mm CHT Screw 1 4x50mm PAN Screw 4 5x25mm CHT A G 04x H Sapata U 12x15mm Zapata U 12x15mm...

Reviews: