Harley Davidson
Installation Manuel
Preparation
Installation of Harness
1. Unplug factory radio harness.
2. Plug in Bazooka fast harness into radio and plug
factory harness into Bazooka fast harness.
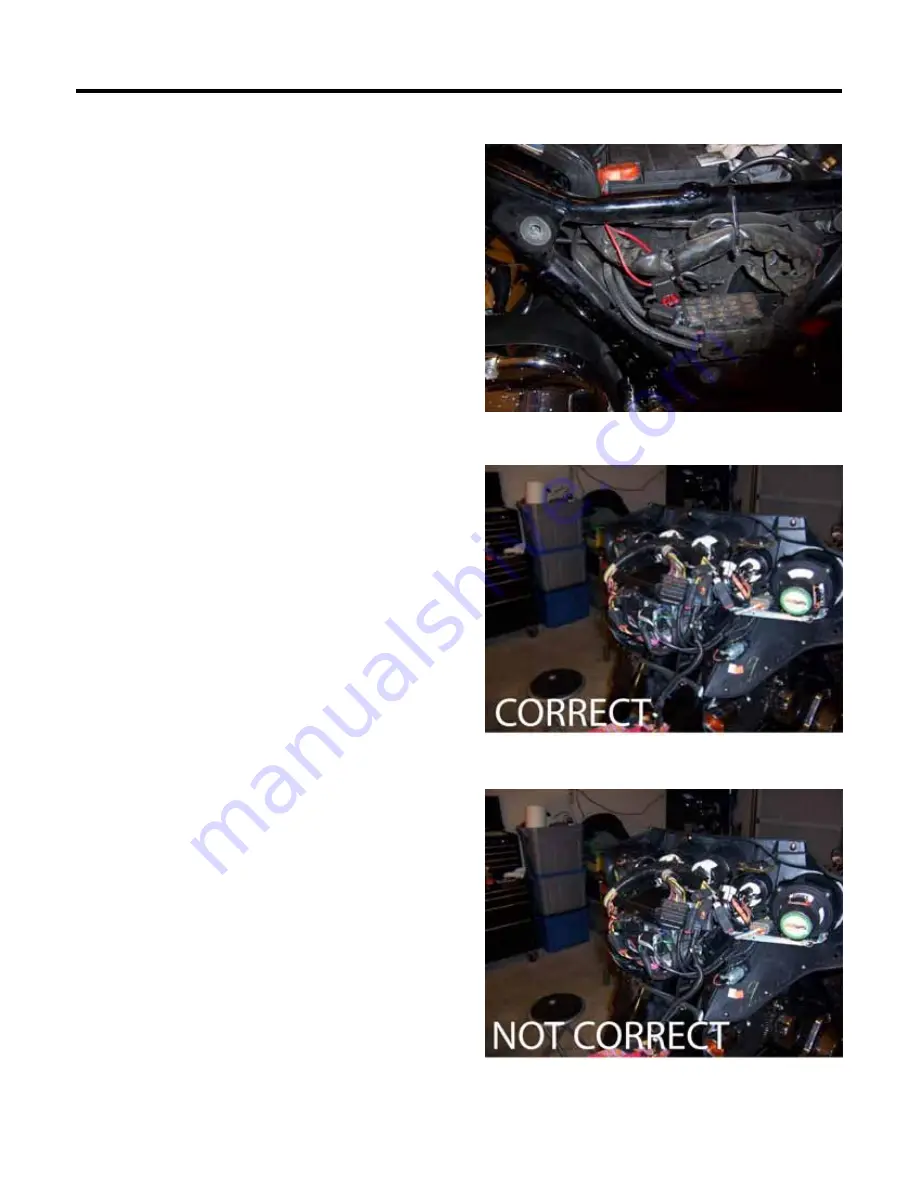
( Fig. 2-1 )
3. Run red power wire to battery leaving fuse block
with the factory fuses. Make sure fuse is removed
during install Attach ground wire to triple tree
ground terminal. Left side cover. ( Fig. 2-1)
4. Replace factory speakers. All speakers are shipped
with grills and in some cases rubber magnet
covers.
These are for shipping protection only. If rubber
magnet covers are on the speakers, they MUST be
removed prior to installation. Discard the grills and
use the OEM grills to complete the installation.
5. The front and rear speakers are clearly marked and
must be used as such .The front speakers must be
slid
into the speakers mounts with the crossover
network
placed toward the outside of the fairing and the
speaker terminals to the inside for ease of
installation. The rear speakers should be mounted
with the crossover network toward the rear of the
bike.
Tech Tip:
Fig. 2-2 is an example of where the crossover on the
speaker should be located.
Fig. 2-3 is an example of where the crossover on the
speaker should
NOT
be located.
Tech Tip:
Make sure the speaker connectors on the wire harness
are securely attached to the terminals of the Bazooka
speakers. You may need to take a pair of needle nose
pliers and crimp the female connector on the harness
onto the speaker spade to insure you have a good
connection that will not loosen up over time. You can
also use finger nail polish or blue lock tight to further
secure this connection.
Fig. 2-1
Fig. 2-2
Fig. 2-3


