4
2. Assemble instructions
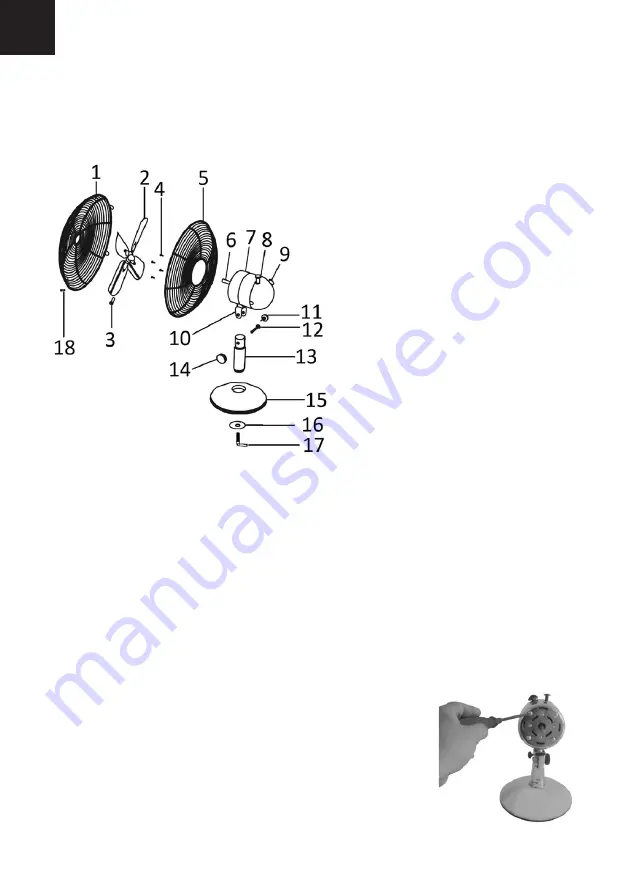
Please refer to the following diagram for assembly.
Assemble the fan before use
1. Remove all packing material and accessories. Make sure all the accesso-
ries are included, if any item is damaged or missing, contact your dealer.
In addition, you need screwdrivers before assembling.
2. Loosen and remove the Metal Washer and “L” shaped Locking Screw from
Metal Tube.
3. Place the Metal Tube on the Metal Base with steady plate, and then
carefully turn over the base and tube.
4. Place the Metal Washer on base, you may then,
using your fingers, thread and secure the “L”
shaped Locking Screw, then tighten.
5. When you are finished, flip the Base back
over so that the Motor Housing is now facing up.
Loosen and remove the four large Rear Grill
Mounting screws (See right figure).
1. Front Grill
2. Fan Blade
3. Blade Locking Screw
4. Rear Grill Mounting Screws
5. Rear Grill
6. Motor Shaft
7. Motor Housing
8. Oscillating Knob
9. Speed Control Knob
10. Housing Neck
11. Tilt Adjustment Screw
12. Tube Locking Screw
13. Metal Tube
14. Tube Locking Knob
15. Metal Base with steady plate
16. Metal Washer
17. “L” shaped Locking Screw
18. Safety screw with nut
GB


