


6
G. LED Indicators
Monitor Unit
Power
•
Green light (Power On)
•
Flashing green light (Low battery)
•
Off (Power Off)
Signal
•
Blue light (Good Signal Coverage)
•
Flashing blue light (Marginal Signal Coverage)
•
Off (No Signal)
Charge
•
Red light (Lithium Battery Charging)
•
Off (Battery Not Charging)
Camera Unit
Power
•
Green light (Power On)
•
Off (Power Off)
H. Mounting
Monitor Unit
Belt Clip
Push belt clip lock and move up
the belt clip to the direction as shown
in pic. 8.
Stand
Push belt clip lock and move down
the belt clip to the direction as shown
in pic. 9.
Lift the belt clip and lock into position.
7
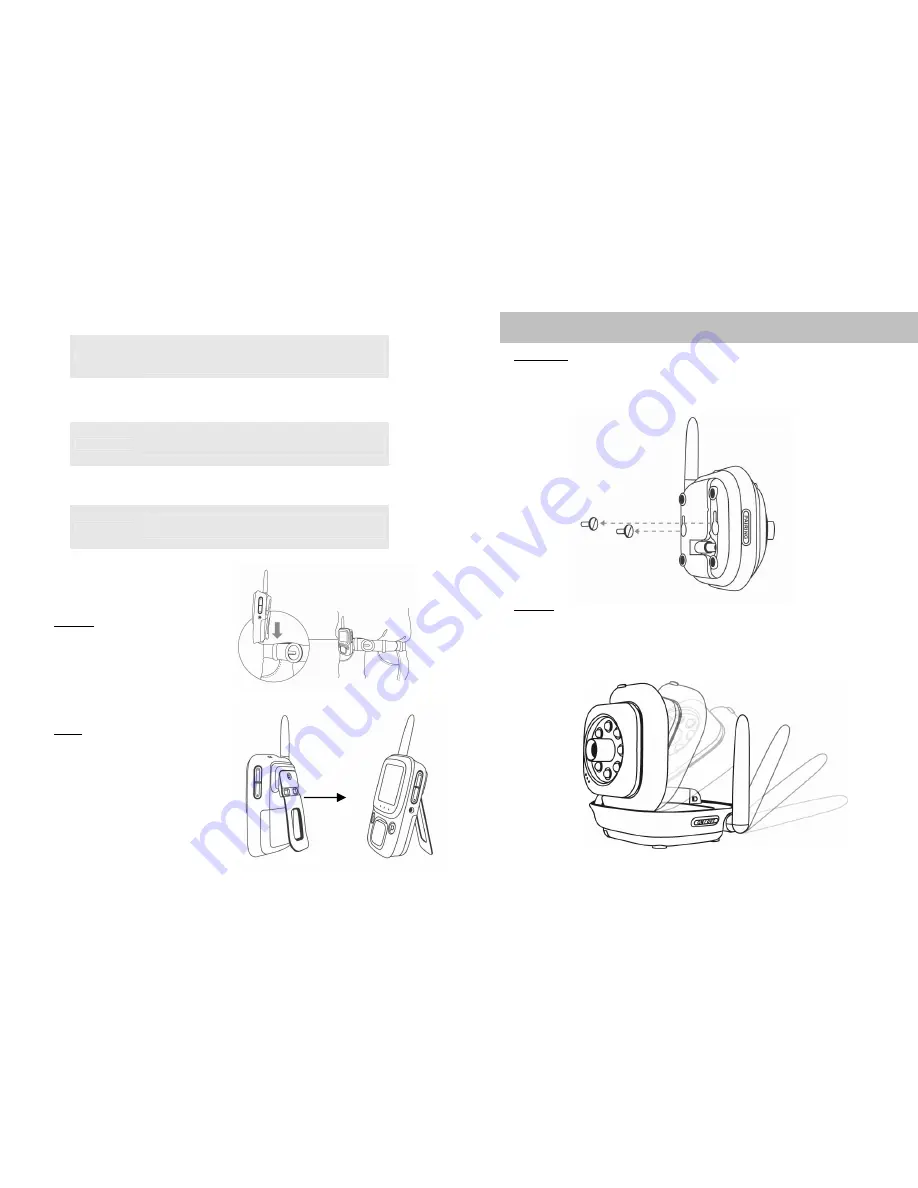
Camera Unit
NOTE : To achieve the best performance of signal transmission, please place the
antenna at a vertical position.
Wall Mount
Place 2 screws on the wall at 5.5cm pitch. Hook the camera unit on the screws as
shown in pic. 10. Lift the cover plate to adjust the flipping angle (0-90 degree) or
swinging angle (+/- 15 degree).
Flat Bed
Place the Camera Unit on a solid horizontal plane. Lift the cover plate to adjust the
flipping angle (0-90 degree) or swinging angle (+/- 15 degree).
Pic 11
Pic 10