305/15L
300748
Original-Gebrauchsanleitung
V2/0120
Page 1: ...305 15L 300748 Original Gebrauchsanleitung V2 0120 ...
Page 2: ...ge 36 4 Technical data 37 4 1 Overview of parts 37 4 2 Technical specification 38 4 3 Accessories 39 5 Installation and operation 40 5 1 Installation and connection 40 5 2 The benefits of vacuum packing 41 5 3 Guidelines for vacuum packaging 42 5 4 Operation 45 5 4 1 Functions of function buttons indicator diode 45 5 4 2 Vacuum packaging 47 6 Cleaning 54 7 Possible Malfunctions 55 8 Waste disposal...
Page 3: ...cessible for anyone carrying out the installation servicing maintenance or cleaning Please keep these instructions and give them to future owners of the device 1 Safety This device is designed in accordance with the presently applicable technological standards However the device can pose a danger if handled improperly and inappropriately All persons using the device must follow the recommendations...
Page 4: ...ls including children with physical or mental disabilities insufficient experience and or insufficient knowledge unless such persons are under the care of a person responsible for their safety or have received instructions regarding appropriate use of the device Children should be observed to ensure that they are not playing with or starting the device Never leave the device unattended when in use...
Page 5: ...event hazards and to ensure optimum efficiency no modifications or alterations to the device that are not explicitly approved by the manufacturer may be undertaken DANGER Electric shock hazard In order to avoid this risk please observe the following safety instructions Never allow the power cable to come into contact with heat sources or sharp edges The power cable should not hang over the side of...
Page 6: ...vice housing In case of electrical or mechanical modifications the electric shock hazard will occur Do not use any acid agents and make sure no water ingresses the device Never operate the device with moist hands or standing on wet floor Remove the plug from its socket when the device is not used in case of anomalies during operation before cleaning WARNING of hand injury In order to avoid this ri...
Page 7: ...urred during the use of the device against its intended purpose is borne solely and exclusively by the user Safety operation of the device is guaranted only when it is used for its intended purpose and according to the instructions included in this manual The vacuum packaging machine is only intended for vacuum packaging and marinating of appropriate food products or other objects 1 4 Use against ...
Page 8: ...d by violation of advice concerning operation and cleaning use other than designed alterations made by user use of inadequate spare parts We reserve the right to make technical changes for purposes of developing and improving the useful properties 2 2 Copyright protection The instruction manual including any texts drawings images or other illustrations is copyright No part of this publication may ...
Page 9: ...ter The outer and inner packing material should be removed completely from the device before installation If you liked to dispose the packing consider the regulations applicable in your country Supply re usable packing materials to the recycling Please inspect the device upon completeness In case any part is missing please contact our customer service center immediately 3 3 Storage Keep the packag...
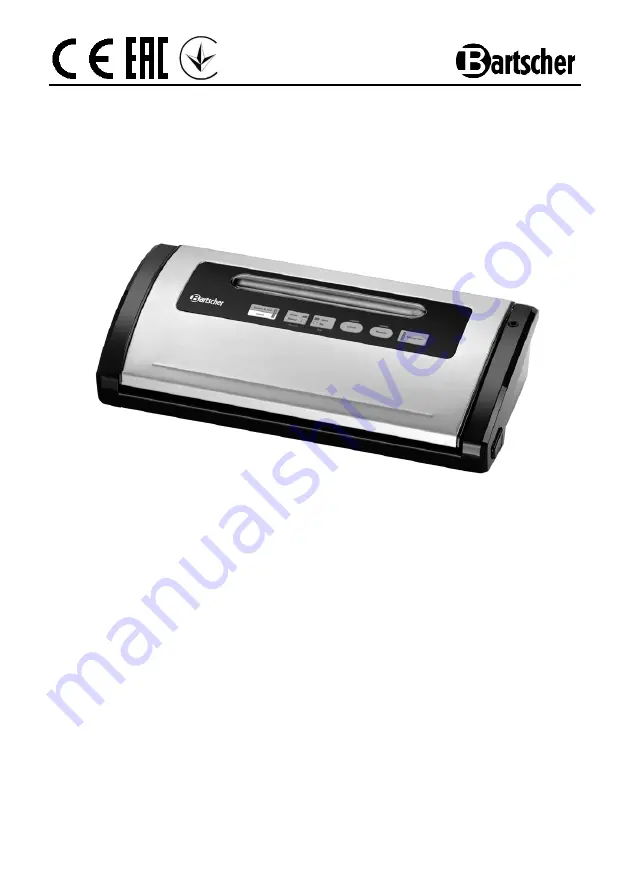
Page 10: ...ew of parts 1 Guard 2 Connector hose coupling 3 Release buttons 2x right and left 4 Air intake opening 5 Vacuum chamber 6 Welding bar 7 Bottom gasket 8 Cutting mechanism 9 Blade 10 Upper seal 11 Sealing strip 1 3 10 11 2 7 6 5 8 4 9 ...
Page 11: ...iner Vacuum control electronic Adjustable vacuum seal level Length of sealing strip 305 mm Number of seal seams 1 Regulated sealing duration 2 levels Control electronic Properties Roll holder with integrated blade Power 0 13 kW 230 V 50 Hz Vacuum pump 15 L min 0 9 m h Maximum vacuum 800 mbar Dimensions W 400 x D 180 x H 92 mm Weight 2 5 kg Includes 1 vacuuming film roll width 22 cm length 3 m 1 va...
Page 12: ... long Code no 300419 Vacuum bags G1 2L Capacity 1 2 litres Dimensions 160 x 250 mm Code no 300411 Vacuum bags G2 5L Capacity 2 5 litres Dimensions 200 x 300 mm Code no 300412 Vacuum bags G7 5L Capacity 7 5 litres Dimensions 300 x 400 mm Code no 300413 Vacuum containers artificial material clear transparent container white lid Capacity 1 5 litres stackable Dimensions W 135 x D 135 x H 180 mm Weight...
Page 13: ...pay attention to ensure good air circulation around the vacuum packing machine There should 10 cm of free space at the sides of the device and 1 m above it The device must be placed in an area inaccessible to children It is necessary to ensure that small children cannot access the device by pulling the power cable Place the device so that the plug is easily accessible so as to quickly disconnect t...
Page 14: ...the organization of work conserve foodstuffs in a healthy manner and to save money It may be used in special occasions to pack foodstuffs in airtight conditions thus prolonging their shelf life to prepare meals for an entire week to keep lettuces vegetables and herbs longer they remain crunchy and fresh more space is freed up in the freezer foodstuffs are protected from drying out and oxidation in...
Page 15: ...o go rancid Shelf life of dry foodstuffs such as nuts coconuts and muesli is also extended by vacuum packing Store them in cool and dark place 8 Fruits and vegetables such as apples bananas potatoes and root vegetables should be peeled prior to vacuum packing as this will prolong their shelf lives 9 Some vegetables such as broccoli cauliflower and white cabbage emit gases when vacuum packed For th...
Page 16: ... After cooling down vacuum pack in any portions In order to package foodstuffs which are not frozen it is necessary to use approx 5cm more plastic film because in freezing the foodstuffs expand in size Meat and fish should be placed on a paper towel and then vacuum packed together with the paper towel In this manner juices from the foodstuffs are absorbed Prior to packing foodstuffs such as tortil...
Page 17: ...ng in the water bath one corner of the vacuum bag should be cut in order to reduce vacuum and allow for successive steam outlet The foodstuffs should be consumed soon after unfreezing Never freeze them again Repacking of unpacked foodstuffs Many food products like cheese or meat products are sold in the trade vacuum packages Their taste and freshness may be also maintained after packing by repacki...
Page 18: ... this button is pressed the unit begins the vacuum sealing process shrinks the vacuum sealing bag until maximum underpressure is reached and hot seals the bag at the end A process that is under way may be halted by pressing this button again B Vacuum Gentle Normal button Gentle normal vacuum sealing this button lets the user select the speed and pressure depending on the food products that are to ...
Page 19: ... top of each other Afterwards the vacuum packing back is hot sealed Press this button to select the following functions 1 Sealing of an open end of the vacuum bag which is fed from the foil roll 2 Only hot sealing the vacuum packing bag In this way the user may exercise control so that excessive underpressure does not emerge within the vacuum packing bag which will prevent excessively gentle food ...
Page 20: ...nd of the bag in the vacuum chamber Always place the open end of the vacuum bag flat and evenly on the sealing strip do not fold or bend the vacuum bag Big vacuum bags which are not fully filled require longer vacuum packaging time smaller bags may be vacuum packed faster Always check the seal it should be even and have no folds In case of incomplete sealing cut off the seam and repeat the entire ...
Page 21: ... to make a vacuum sealing bag from a roll of film proceed as follows 1 Press the release buttons and open the cover 2 Make sure the knife is located at either end of the cutting mechanism right or left never in the middle 3 Raise the cutting mechanism and place the roll of film in the recess under the cover foreseen for this purpose 4 Extend the film roll to the desired length 5 Pull the cutting m...
Page 22: ...ly on both sides until both release buttons snap audibly 9 Press the Manual Seal button to begin sealing the bag The indicator diode for this button will light up As soon as the sealing process is concluded the indicator diode will be extinguished 10 Press both release buttons left and right and open the cover Take out the ready vacuum sealing bag 11 Check the achieved seam In case of incomplete s...
Page 23: ...strip in the area of the vacuum packing chamber do not fold or bend the vacuum sealing bag Make sure that the air suction holes are not covered by the vacuum bag Close the cover pressing evenly on both sides until both release buttons audibly snap into place Depending on the food products select the speed of vacuum sealing by pressing the Vacuum button Normal for standard or Gentle for soft and de...
Page 24: ...ps the process and the device switches to sealing of the vacuum bag When the indicator diodes Vacuum Seal Cancel or Manual Seal are extinguished the vacuum sealing process is concluded Press both release buttons right and left and open the cover Extract the sealed vacuum bag Check the achieved seam In case of incomplete sealing cut off the seam and repeat the entire vacuum packaging process Tip To...
Page 25: ...s in the OPEN position Depending on the food products select the speed of vacuum packing by pressing the Vacuum button Normal for standard products or Gentle for soft and gentle food products or items Press the Canister button The vacuum packing process begins To make sure that the air is removed from the area between the lid and the vacuum container press the lid down when the process begins The ...
Page 26: ...t up Make sure the vacuum container and the lid are clean and dry Fill the vacuum container with selected food products and leave at least 3 cm free from the top of the container Clean the edge of the container and attach the lid Connect the attached connection hose to the vacuum container lid and to the foreseen connector on the device Make sure the lid lock is in the OPEN position Press the Mari...
Page 27: ...nt Do not use aggressive cleaning agents solvents or products based on the aromatic essences Interior of the device o If food or liquid leftovers are found in the vacuum chamber on the sealing strip on the sealing bar or on any seals remove them with a paper towel If necessary remove the seals for cleaning o Wipe the vacuum chamber with a soft moist cloth Vacuum containers o When cleaning the vacu...
Page 28: ...p in the vacuum chamber Vacuuming time is too short Repeat the vacuum packaging process The seal of the vacuum chamber is damaged or dirty Clean the seal or replace it with a new one The vacuum packaging bag may be punctured To check it seal the bag with some air inside immerse in water and squeeze Air bubbles indicate that the bag is not tight Seal the packaging bag again or use another one The v...
Page 29: ...mation type of malfunction code number and serial number see identification plate on device underside date of purchase 8 Waste disposal Old devices The electric devices are marked with this symbol You must not dispose of electric devices with household waste When the device may not be longer used each consumer is obliged to dispose of the device at the dedicated local collection point separately f...