background image

3107C OWNER’S MANUAL                           2/01/23                                  Page 6 of 18 

MAINTENANCE PREPARATION 

 
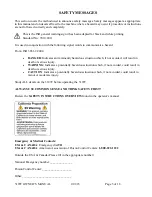
WARNING

: The engine, exhaust pipe and engine oil get hot during operation. Allow adequate time for 

the engine and engine components to cool before beginning maintenance. 

 
DANGER

: BEFORE beginning any maintenance on the 3107C that requires a guard be removed or 

exposes someone to a part that moves during operation, the 

3107C lockout procedure

 must be followed.  

 
Only trained and qualified personnel should perform maintenance or repairs of the 3107C or the battery.  


LOCKOUT PROCEDURE 


Manufacturers recommended lockout procedure: To render the 3107C inoperable. 

1.


DISCONNECT THE BATTERY. 

2.


REMOVE THE KEY. 


1.


Disconnect the battery: See: BATTERY SAFETY INSTRUCTIONS first,  

Disconnect the negative battery cable where the cable connects to the 3107C chassis prevent the cable 
from touching any part of the engine or chassis. Then disconnect the negative cable from the battery. 
Store the cable where only the person performing the maintenance has access to the cable. (When 
reconnecting, connect the battery first, chassis second) 
 

WARNING: 

The battery contains sulfuric acid that can cause blindness and severe burns. Avoid contact 

with eyes, skin and clothing.  Read the section: BATTERY SAFETY INSTRUCTIONS, in this manual. 
 

2.


Remove the key: 

Attempt to start the engine with the key. This should ensure that any residual power in the system is 
drained. Turn the key to off and remove the key. Store the key where only the person performing the 
maintenance has access to the key. 


WARNING

: DO NOT use your fingers, hands or any other body part to turn the chipper disk. The 

chipper is heavy and has sharp blades.  
 
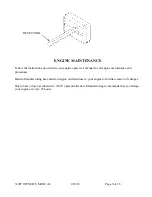
See figure: TO RENDER THE 3107C INOPERABLE on the next page: 
 
This is a recommended lockout procedure in accordance with OSHA 1910.147(a)(3)(i) it is your 
responsibility to establish and utilize procedures for affixing appropriate lockout/tagout devices. 
 
For more information on developing vehicle maintenance lockout/tagout procedures refer to OSHA, 
DIRECTIVE NUMBER: CPL 02-00-147. 


Summary of Contents for 3107C

Page 1: ...eed any replacement parts in the future please contact us at your convenience Our toll free phone number fax and email are listed below THANK YOU for your patronage and confidence in BARRETO equipment...

Page 2: ...dating from the delivery to the original user This warranty is in lieu of all other warranties whether written or implied and is limited to 1 Replacement of parts returned to the dealer and or factory...

Page 3: ...h if not avoided will result in death or serious injury WARNING Indicates a potentially hazardous situation which if not avoided could result in death or serious injury CAUTION Indicates a potentially...

Page 4: ...in the front of tongue Depending on crating method you will either need to attach the vehicle adapter to the wire or connect the light plugs to the lights follow the zip tie points two small holes ba...

Page 5: ...see the operator s manual in the canister attached to the chipper hopper ROUTINE MAINTENANCE Routinely check the condition clean tighten repair or replace as necessary the following Safety decals Muf...

Page 6: ...from the battery Store the cable where only the person performing the maintenance has access to the cable When reconnecting connect the battery first chassis second WARNING The battery contains sulfu...

Page 7: ...ine oil this often due to heavy duty use and extreme conditions inherent to 3107C use Barreto Manufacturing strongly recommends frequent oil changes Refer to this manual for equipment service requirem...

Page 8: ...your engine operator s manual for all engine maintenance and procedures Barreto Manufacturing has added an engine oil drain hose to your engine to facilitate easier oil changes Due to heavy duty use...

Page 9: ...se at the intervals indicated in the following illustration of grease points Wipe away excess grease KEEP GREASE OFF OF BELTS 1 Arm pivots Weekly or every 25 hours of use 2 Feed wheel bearing Daily or...

Page 10: ...NCE PREPARATION section To replace your belts 1 Remove the belt covers 2 Loosen the jam nuts holding the upper engine mount in plate 3 Pivot the engine upward to reduce tension and remove belt Use a w...

Page 11: ...must be rendered inoperable before removing the chipper blade access cover See the MAINTENANCE PREPARATION section WARNING Never turn the chipper disk with your hand or any other body part as serious...

Page 12: ...than 0 010 difference in the blade profile Uneven sharpening or wear will lead to excessive vibration while operating ANVIL INSPECTION AND REPLACEMENT WARNING The 3107C must be rendered inoperable bef...

Page 13: ...he hydraulic tank sight glass Never run the 3107C if the hydraulic oil is not visible in the sight glass The oil and filter should be changed every 200 hours The hydraulic control system uses a set of...

Page 14: ...is setting BATTERY SAFETY INSTRUCTIONS Only trained and qualified personnel should perform maintenance or repairs of the 3107C or the battery WARNING The battery contains sulfuric acid that can cause...

Page 15: ...DO NOT induce vomiting unless directed to do so by medical personnel Never give anything by mouth to an unconscious person Loosen tight clothing such as a collar tie belt or waistband Get medical atte...

Page 16: ...107C Make sure vents caps are pressed securely into battery Clean terminals and lugs with a mixture of baking soda and water A wire brush may be used Clean 3107C components near the battery with bakin...

Page 17: ...NTENANCE PREPARATION section Also review 3107C OPERATORS TROUBLESHOOTING GUIDE in the Operator s Manual The 3107C stalls as soon as anything is fed into either hopper Rotor stops engine remains runnin...

Page 18: ...8 kW at 3600 RPM Fuel Capacity 5 U S Gallons 18 9 liters External tank Engine Oil Capacity 2 43 U S Quarts 2 3 liters Electric Start Standard Hour Meter Standard INDEX ASSEMBLY INSTRUCTIONS 4 BATTERY...

Reviews: