background image

4. Installation

DVI

DVI

COMPUTER

COMPUTER

RS 232 C

RS 232 C

DVI

DVI

R.C.

R.C.

DVI

DVI

COMPUTER

COMPUTER

RS 232 C

RS 232 C

DVI

DVI

R.C.

R.C.

R / PR

R / PR

G / Y

G / Y

B / PB

B / PB

Hs / Cs

Hs / Cs

Vs

Vs

VIDEO

VIDEO

S-VIDEO

S-VIDEO

R / PR

R / PR

G / Y

G / Y

B / PB

B / PB

Hs / Cs

Hs / Cs

Vs

Vs

VIDEO

VIDEO

S-VIDEO

S-VIDEO

DESKTOP INPUT

DESKTOP INPUT

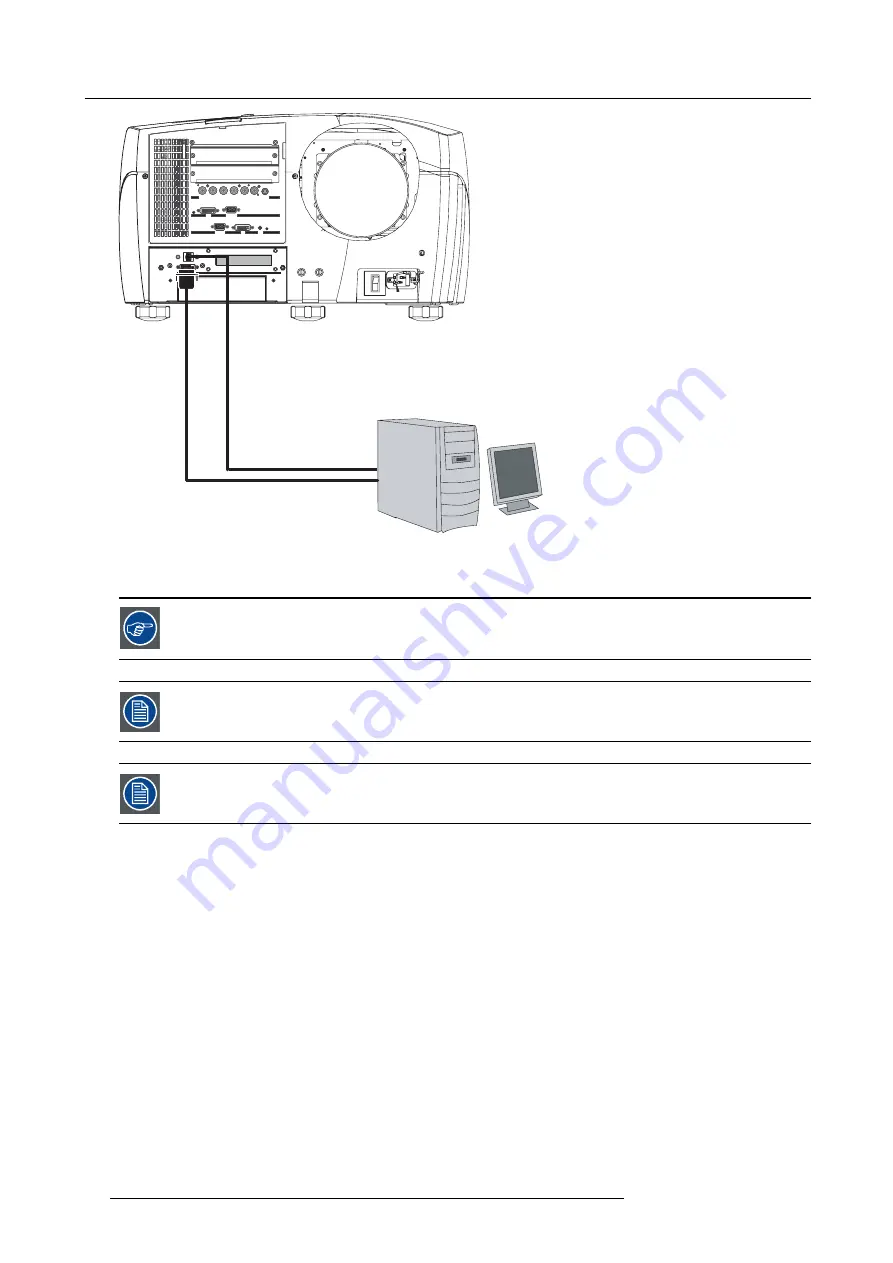
Image 4-23
Connecting a desktop input

Tip:

An Ethernet connection must also be set to allow Desktop integration

The projector can be connected to a LAN or can be connected to a desktop PC via a crossed cable (as indicated
above).

The desktop can be enabled/disabled, "Desktop", page 117

Using the desktop input makes only sense when using the Barco Desktop integration software. The Desktop
integration software is covered in the Desktop integration User Guide.

4.5.10 Communications

Overview

Network connections

Network settings

RS232 communication

4.5.10.1 Network connections

What can be done ?

The projector can be connected to a network allowing it to be accessed from any connected network device. The Ethernet connection
can be used to upload/download projector software and/or to set up communication (TCP-packets) with the projector. This network
can be a local area network or a small dedicated network

Following operations are made possible :

30

R59770286 NW-12 25/09/2008

Summary of Contents for NW-12

Page 1: ...NW 12 User Guide R9040410 R59770286 00 25 09 2008...

Page 2: ...Barco nv Presentations Noordlaan 5 8520 Kuurne Phone 32 56 36 82 11 Fax 32 56 35 86 51 E mail presentations bid barco com Visit us at the web www barco com Printed in Belgium...

Page 3: ...by itself cause the resulting work to be covered by the GNU General Public License However the source code for this file must still be made available in accordance with section 3 of the GNU General Pu...

Page 4: ...nd software on the date of commissioning at latest 30 days after the transfer of risks In the event of justified notice of complaint Barco can repair the fault or provide a replacement at its own disc...

Page 5: ...k settings 32 4 5 10 3 RS232 communication 34 4 5 11 Multichannel Installations 34 4 5 11 1 Linked CLO 34 4 5 11 2 Linked Dynacolor 35 4 6 Controls overview 36 5 Setup 39 5 1 Powering up the projector...

Page 6: ...harpness 103 7 6 6 9 Geometry Reset 104 7 6 6 9 1 Reset all levels 104 7 6 6 9 2 Restore to a level 104 7 6 6 10 Rename a Geometry File 106 7 6 6 11 Copy a Geometry File 107 7 6 6 12 Delete a Geometry...

Page 7: ...l Patterns 151 7 10 2 Scaled patterns 153 7 10 3 Formatter patterns 155 7 10 4 LFR 155 7 10 5 Convergence 156 7 11 Service 157 7 11 1 Diagnostics 157 7 11 2 Option key 157 7 11 3 Calibration of CLO se...

Page 8: ...Table of contents 4 R59770286 NW 12 25 09 2008...

Page 9: ...image reproduction 3 Getting started Start the projector for daily use 4 Advanced Advanced operation and setup using the remote control and the projector s OSD Desktop Integration The Barco NW 12 is...

Page 10: ...1 Introduction 6 R59770286 NW 12 25 09 2008...

Page 11: ...foam The package is secured with banding and fastening clips Lens packaging The Lens is supplied as an individual item and is packed in a cardboard box Save the original shipping cardboard and packing...

Page 12: ...iginal shipping carton and packing material they will be necessary if you ever have to ship your projector For maximum protection repack your projector as it was originally packed at the factory 8 R59...

Page 13: ...imaging electronic surfaces degrading performance then it is highly advisable and desirable to have this contamination removed prior to it reaching the projectors clean air supply Devices or structure...

Page 14: ...he viewers will be located and go for the highest gain screen possible A high gain screen will provide a brighter picture but reduce the viewing angle For more information about screens contact your l...

Page 15: ...ented according to the specifications up to 5 in an upward downward position There are no restrictions on the position of the projection axis Lamp axis Projector axis 5 5 Lamp axis Projector axis Forb...

Page 16: ...3 Installation guidelines 12 R59770286 NW 12 25 09 2008...

Page 17: ...allation in the RCU Lens installation Projector configuration Positioning the projector Connections Controls overview Projector dimensions Dimensions are given in mm and inch 1inch 25 4 mm weight with...

Page 18: ...y Installation in the RCU How are the batteries delivered The batteries not yet installed to save the battery life time are delivered inside the plastic bag with the power cord How to install 1 Remove...

Page 19: ...121 TLD HB 0 8 1 R9842040 TLD HB 1 6 2 0 1 R9842060 TLD HB 2 0 2 8 1 R9842080 TLD HB 2 8 5 0 1 R9842100 TLD HB 5 0 8 0 1 R9842120 See the Maintenance appendix for more information about lens cleaning...

Page 20: ...x 6 95 x SW 0 30 PDmin 4 17 x SW 0 8 PDmax 6 95 x SW 11 8 The distances are measured starting from the back side of the flange of the projector lens Image 4 3 4 2 3 Shift capabilities Description The...

Page 21: ...Shift 100 Vertical Shift 25 Projector Image 4 5 Example of a vertical shift of 100 and 25 4 2 4 Lens installation Necessary tools Hexagonal key n 4 delivered with the projector Necessary parts Lens L...

Page 22: ...e screening UP to the top side Note Install both the lens and the lens interface plate with their screening UP oriented upwards 3 Mount gently the assembly lens plate on the lens holder Mount and tigh...

Page 23: ...er screws 4 3 Projector configuration The different configurations Depending on the installation the projector can be mounted in different ways the 4 different configurations are 1 Rear Ceiling 2 Rear...

Page 24: ...the lens coinciding with the centre of the screen Positioning the projector The position of the projector with reference to the screen may also be different depending on the installation Basically the...

Page 25: ...b c S S B S H S W S H S W F C D S H 2 B A A ref Front plate Image 4 11 ON Axis projector installation a Side view b Top view c Back view x Optical axis projection lens p Projector s Screen F Floor R59...

Page 26: ...age 4 12 OFF Axis projector installation a Side view b Top view c Back view x Optical axis projection lens p Projector s Screen F Floor A 100 Off Axis position means that the position of the centre of...

Page 27: ...source to the desktop input Communications Multichannel Installations 4 5 1 Power connection Power connection 1 Use the supplied power cord to connect the projector to the power outlet 2 Plug the fema...

Page 28: ...signal input output section The input output section has a modular architecture i e it is composed of several 5 slots which can be equipped with different input modules The different available inputs...

Page 29: ...IDEO S VIDEO Image 4 16 Input Output layers Layer 3 4 5 are fixed i e they may only be fitted with the boards mentioned above An optional board SDI HDSDI or DVI is to be installed on the first or seco...

Page 30: ...O S VIDEO R PR R PR G Y G Y B PB B PB Hs Cs Hs Cs Vs Vs VIDEO VIDEO S VIDEO S VIDEO DESKTOP INPUT DESKTOP INPUT Image 4 17 4 5 4 Connecting a component video signal Introduction A component video sign...

Page 31: ...DEO VIDEO S VIDEO S VIDEO DESKTOP INPUT DESKTOP INPUT Image 4 18 4 5 5 Connecting a DVI signal Both DVI and HDCP DVI are supported and can be connected to the DVI connector of this projector In case a...

Page 32: ...deo signal 1 Connect the BNC connector to the projector s video input DVI DVI COMPUTER COMPUTER RS 232 C RS 232 C DVI DVI R C R C DVI DVI COMPUTER COMPUTER RS 232 C RS 232 C DVI DVI R C R C R PR R PR...

Page 33: ...nnect a computer 1 Connect the D15 connector to the projector s computer input DVI DVI COMPUTER COMPUTER RS 232 C RS 232 C DVI DVI R C R C DVI DVI COMPUTER COMPUTER RS 232 C RS 232 C DVI DVI R C R C R...

Page 34: ...he desktop can be enabled disabled Desktop page 117 Using the desktop input makes only sense when using the Barco Desktop integration software The Desktop integration software is covered in the Deskto...

Page 35: ...ktop integration The software on the delivered CDROM must therefore be installed on the desktop PC See the Desktop integration software User Guide How to connect the projector 1 Connect the RJ 45 male...

Page 36: ...ngs are used to set the Ethernet Communication parameters Following parameters are available MAC Address MAC Address of the projector This is a non adjustable value programmed into the Ethernet board...

Page 37: ...ighlight Installation in the menu bar 3 Push the key to pull down the Installation menu 4 Push the cursor key or to highlight Network settings and press ENTER to select Image 4 26 A dialog box will be...

Page 38: ...om the RS232 cable to the RS Input on the projector DVI DVI COMPUTER COMPUTER RS 232 C RS 232 C DVI DVI R C R C DVI DVI COMPUTER COMPUTER RS 232 C RS 232 C DVI DVI R C R C R PR R PR G Y G Y B PB B PB...

Page 39: ...OUTPUT L2 L3 IN1 IN2 IN1 IN2 COMPUTER RS 232 C DVI R C DESKTOP INPUT R PR G Y B PB Hs Cs Vs VIDEO S VIDEO DVI IN1 IN2 L1 STEREO INPUT STEREO OUTPUT L2 L3 IN1 IN2 IN1 IN2 COMPUTER RS 232 C DVI R C Swi...

Page 40: ...5 PAUSE To stop projection for a short time press PAUSE The image disappears but full power is retained for immediate restarting 6 STANDBY Standby button to start projector when the power switch is sw...

Page 41: ...bottom of the front panel allows to inform the user on the status of the projector and other information like warnings etc DESKTOP INPUT NW 12 standby Image 4 33 See the Appendix for a listing of the...

Page 42: ...4 Installation 38 R59770286 NW 12 25 09 2008...

Page 43: ...tup of linked projectors in a multichannel system 5 1 Powering up the projector How to power up the projector 1 Switch the power switch to 1 Image 5 1 Power switch 2 The software will be initialized T...

Page 44: ...layed increased by 60 seconds during which the LCD display shows the text BOOT NW 12 Boot Image 5 3 Standby status The standby status is shown on the LCD display An information field will rotate betwe...

Page 45: ...ction lamp is started up This may take up to 15 seconds During this phase the LCD display and the keypad are lit 1 The progression is shown with the asterisk characters adding up 2 This is followed by...

Page 46: ...en all projectors in the room 2 Enter the same address with the digit buttons within 5 seconds after pushing the address key The projector can now be controlled with the RCU For example if the project...

Page 47: ...he projector address 5 5 Setting up the orientation What must be done Depending on the mechanical orientation of the projector the projector s internal settings have to be adapted The projector is shi...

Page 48: ...n In addition motorized lenses will also allow you to Zoom and focus the image All these lens parameters can be adjusted using the RCU the local keypad or in the Installation menu of the projector s O...

Page 49: ...elect the Installation 3 Press to Pull down the Installation menu 4 Use or to select Lens adjustments Image 5 13 5 Press ENTER A text box appears on the screen follow the instructions Image 5 14 Image...

Page 50: ...ar 2 Press to select the Installation item 3 Press to Pull down the Installation menu 4 Use or to select RS232 baud rate Image 5 16 5 Press to pull down the menu 6 Use or to select the desired baud ra...

Page 51: ...settings previous source This function can be disabled if undesired or inadequate for safety reasons CAUTION If the Automatic startup function is enabled one must be aware of the fact that it involves...

Page 52: ...o access the advanced More items can be reprogrammed How to change the password 1 Press MENU to activate the Tool bar 2 Press to select the Installation item 3 Press to Pull down the Installation menu...

Page 53: ...the different control loops by a simple check CLO adding the projector to this control loop will allow the brightness light output of the projector to be controlled by the master Dynacolor adding the...

Page 54: ...dialog box is displayed Image 5 22 How to set a projector to Master 1 In the linked projector menu of the projector to be set as Master Select the Master check box and press ENTER 50 R59770286 NW 12 2...

Page 55: ...be declared as slave i e to be controlled by the Master For example IP address 150 158 193 110 3 Select and press ENTER for the desired parameters to be controlled by the master i e CLO and or Dynacol...

Page 56: ...5 Setup 52 R59770286 NW 12 25 09 2008...

Page 57: ...e remote control AUT AUTO IMAGE O IMAGE PC PC RGB RGB VIDEO VIDEO Fire W Fire Wire ire DVI DVI IQ PC IQ PC SDI SDI S VIDEO S VIDEO PHASE PHASE TINT TINT COLOR COLOR BRIGHTN BRIGHTN CONTR CONTR ZOOM ZO...

Page 58: ...6 Getting started 54 R59770286 NW 12 25 09 2008...

Page 59: ...erted in this manual are of the advanced type all the items are visible The menus seen by a standard user on the screen will hence not correspond with the menus in the manual i e the advanced items wi...

Page 60: ...numeric keys on the remote control 1 Press ENTER to activate the input field Image 7 2 2 Key in the desired value Entering numeric values using the arrow keys on the remote control 1 Press ENTER to ac...

Page 61: ...of boards installed in the projector For example L1 RGB YUV L2 DVI In this case an RGB YUV board is installed in the first layer L1 a HDCP DVI board is installed in the second layer L2 When selecting...

Page 62: ...ent adjustment on a video signal Depending on the type of signal NTSC PAL the terms differ Color adjusts the level of color saturation in a PAL signal Tint adjusts the level of color saturation in an...

Page 63: ...w appears on the screen Adjustments on an RGB signal The projector allows different adjustments on an RGB signal Contrast Brightness Phase Input balance AutoImage or manual edit of the image file sett...

Page 64: ...will contain one item Lx DVI x being the layer on which the RGB signal is connected for example L4 DVI if the signal is connected to layer 4 3 Use or to select Lx DVI Image 7 8 4 Press ENTER to confi...

Page 65: ...ightness will affect the dark areas of the image Increase the brightness to lighten up the parts that are too dark How to change the Brightness 1 Press MENU to activate the Tool bar 2 Press to select...

Page 66: ...How to change the Tint 1 Press MENU to activate the Tool bar 2 Press to select the Image item 3 Press to Pull down the Image menu 4 Use or to select settings 5 Press to pull down the menu 6 Use or to...

Page 67: ...e the Tool bar 2 Press to select the Image item 3 Press to Pull down the Image menu 4 Use or to select settings 5 Press to pull down the menu 6 Use or to select Gamma 7 Press ENTER On the screen appea...

Page 68: ...der box Image 7 16 8 Use or the numeric keys on the remote or the keypad to change the Noise Reduction 7 4 2 Gain control on Video 7 4 2 1 Automatic Gain on Video Automatic Gain on Video is only for V...

Page 69: ...control is enabled ON the manual setting does not affect the gain Automatic gain control must therefore be disabled The manual gain control must be done on an external pattern with white areas grey sc...

Page 70: ...pect ratio Some DVD sources may even use the anamorphic 16 9 or anamorphic 2 35 1 to take advantage of the higher vertical resolution offered by the 4 3 ratio The term anamorphic means that the origin...

Page 71: ...XGA 1920x1200 What can be done The aspect ratio setting forces the projector to project an image using a defined aspect ratio Auto 4 3 16 9 16 10 5 4 Custom The settings do not refer to the aspect rat...

Page 72: ...aspect ratio based on the information stored in the image files whereas Custom allows to set a personnel ratio Selecting Auto in case of a Video source may shrink the image horizontally The aspect ra...

Page 73: ...epresentation setting is enabled How to set a custom Aspect ratio 1 Press MENU to activate the Tool bar 2 Press to select Image 3 Press to Pull down the Image menu Image 7 26 4 Use or to select Aspect...

Page 74: ...dow separately How to select a preset color temperature 1 Press MENU to activate the Tool bar 2 Press to select the Image item 3 Press to Pull down the Image menu 4 Use or to select Color temperature...

Page 75: ...nals of a particular source there are conditions in fact we must know the black and the white level of the source i e 1 the considered source must be able to generate a white signal ideally a 100 whit...

Page 76: ...Input balance 5 Press to pull down the menu 6 Use or to select Automatic Black level 7 Press to pull down the menu 8 Use or to enable ON or to disable OFF Automatic Black level Image 7 33 9 Press ENTE...

Page 77: ...spots appear on the black part of the image 12 Adjust the Blue black level until bright spots appear on the black part of the image 13 Adjust the Red black level until bright spots appear on the black...

Page 78: ...als 11 Adjust the Green white level gain until bright spots appear on the white part of the image 12 Adjust the Blue white level gain until bright spots appear on the white part of the image 13 Adjust...

Page 79: ...s be edited if necessary the AutoImage is launched via the button on the RCU the projector s OSD or from the desktop s OSD File notation The notation of the image file happens as follows Standard SXGA...

Page 80: ...e load In some cases the user wants only one particular file to be loaded for a particular input source i e to prevent the automatic load of an inadequate file One can link a file to every possible in...

Page 81: ...age What can be done AutoImage creates the best suited image file for the connected source It calculates measures several source parameters Total pixels per line Start pixel Phase Contrast Brightness...

Page 82: ...Image can also be launched via the RCU with the dedicated AutoImage key 7 5 5 Edit file What can be done with the Edit file menu The Edit file menu makes it possible to change the settings of the fil...

Page 83: ...h ENTER Note greyed out fields can not be updated total pixels Which items can be adjusted The following items can be adjusted Total horizontal pixels Active horizontal pixels Horizontal start in pixe...

Page 84: ...es Advanced Data settings The advanced button enables the advanced settings for a data source Image 7 47 color space allows to select between 5 different color spaces RGB ITU_BT_709 SMPTE_240M ITU_BT_...

Page 85: ...the remote or the keypad to edit and change the file name confirm with ENTER Image 7 49 7 5 7 Rename file How to rename a file 1 Press MENU to activate the Tool bar 2 Press to select the Image files i...

Page 86: ...to the custom directory How to copy a file 1 Press MENU to activate the Tool bar 2 Press to select the Image files item 3 Press to Pull down the Image files menu 4 Use or to select copy Image 7 52 5...

Page 87: ...Press to select the Image files item 3 Press to Pull down the Image files menu 4 Use or to select delete Image 7 54 5 Press ENTER A dialog box is displayed Image 7 55 6 Use or to select the desired fi...

Page 88: ...ed in order to fit exactly the screen shape Editing a standard file will automatically create a custom file The file notation in the Geometry files menu describes a file path For example Standard Dist...

Page 89: ...location 31 30 0 10 9 8 7 6 5 1 4 3 2 25 29 24 23 11 12 13 14 15 16 17 18 19 20 21 22 26 28 27 32 31 30 0 10 9 8 7 6 5 1 4 3 2 25 29 24 23 11 12 13 14 15 16 17 18 19 20 21 22 26 28 27 32 Image 7 58 F...

Page 90: ...21 20 21 19 21 20 21 18 21 20 21 19 21 21 20 21 21 21 21 21 21 19 20 18 20 19 20 20 21 17 21 21 20 21 19 21 20 21 18 21 20 21 19 21 21 20 21 21 21 21 21 21 19 20 18 20 19 20 20 21 17 21 21 20 21 19 21...

Page 91: ...On top of this hierarchy the 2x2 points Adjusting points on level 1 will affect level 2 till 21 At the bottom of the structure we find the 33x33 points adjustment adjusting grid points on level 21 wil...

Page 92: ...iew Accessing the Geometry Edit menu Geometry Edit wizard Geometry Edit Modes Editing a geometry file Axis link Shift Adjustment Transport Delay Sharpness Geometry Reset Rename a Geometry File Copy a...

Page 93: ...n entering the Edit mode the Edit dialog box is displayed When selecting a point in a certain adjustment a yellow box shows the selection and a blue dotted box is placed around the selected grid point...

Page 94: ...used to perform all the geometry corrections This gives the user real time access to the distortion characteristics Each individual point can be selected and shifted to the desired location in real ti...

Page 95: ...s edit box PixelY this edit box allows to edit the position of the point along the y axis Axislink see Axislink Modes see Geometry Edit Modes Table 7 3 dialog box legend When applying a distortion to...

Page 96: ...7 Advanced Image 7 67 Image 7 68 Image 7 69 92 R59770286 NW 12 25 09 2008...

Page 97: ...he lowest level points and end with the highest level zones see Geometry distortions level hierarchy A 3x3 mode adjustment gives the following new points to be adjusted the 4 points of the 2x2 mode be...

Page 98: ...Advanced The column is adapted to 32 Image 7 71 2 Press to select the next adjustment point The row is adapted to 32 Image 7 72 3 Press to select the next adjustment point 94 R59770286 NW 12 25 09 200...

Page 99: ...dapt the value of PixelsY The image is distorted along the X axis Notice the unaffected regions The adjustment is done in small steps Adjusting for instance from 0 to 100 using the Adjust mode is not...

Page 100: ...Use and to select the digit and use and to increment decrement the digit Tip One can also use the numeric digits to fill in the desired value The image is distorted along the X axis Notice the unaffec...

Page 101: ...a basic 2x2 adjustment with AxisLink set On and Off 1 Start with a non distorted image assume the left top corner is selected 0 0 Image 7 77 2 Shift the left top corner 300 pixels to the left 0 0 Ima...

Page 102: ...torted image this will result in a quick adjustment when dealing with complex setups AxisLink OFF The coordinate system used for the adjustment is absolute Y 300 216 300 300 300 X Y Y 3 0 0 AxisLink O...

Page 103: ...ft adjustment it is possible to shift the whole image This is considered as a displacement of the 4 corner points of the 2x2 mode The same dialog box is used as for the geometry edit How to use the Sh...

Page 104: ...7 Advanced The Edit mode is selected Image 7 82 5 Use and to select the PixelsX edit box The PixelsX edit box is focused Image 7 83 6 Press ENTER 100 R59770286 NW 12 25 09 2008...

Page 105: ...T1 T2 Output DMD Transport Delay Frame 1 Frame 1 Frame 2 Frame 2 Image 7 85 Transport Delay definition During this delay all image information is gathered and processed by the projector A Transport D...

Page 106: ...in case of extremely distorted images extremely curved screens A delay set too short may introduce clipping phenomenons in the image How to set Transport Delay to manual or automatic 1 Start up the Ge...

Page 107: ...be adjusted In a multi channel setup first adjust the transport delay of all projectors one by one leave the projector with the maximum value then set all other projectors to this maximum value 3 Pres...

Page 108: ...dit menu 2 Push or to select Reset 3 Push the key to pull down the menu 4 Push or to highlight Reset all levels Image 7 92 All the levels are reset If these levels contained geometry corrections this...

Page 109: ...ple restoring to a 9x9 level How to restore to a level 1 Start the Geometry Edit menu 2 Push or to select Reset 3 Push the key to pull down the menu 4 Push or to highlight the desired level to restore...

Page 110: ...ons this will be noticed in the image by a more or less accentuated jump 5 Press BACK to return to the Geometry Edit menu 7 6 6 10 Rename a Geometry File How to rename a geometry file 1 Start up the G...

Page 111: ...haracters and use or to browse through the characters 5 Press ENTER The file is renamed 6 Press BACK to return to the Geometry Edit menu 7 6 6 11 Copy a Geometry File How to Copy a Geometry File 1 Sta...

Page 112: ...key or the numeric keys on the RCU or the local keypad to edit and change the values confirm with ENTER 7 Press BACK to return to the Geometry Edit menu 7 6 6 12 Delete a Geometry File How to Delete a...

Page 113: ...ime warning Lamp Power Mode Constant Light Output CLO 7 7 1 Lamp info What can be done All information about the lamp is stored inside the lamp house EEPROM and can be displayed via the projector s OS...

Page 114: ...e 7 5 Lamp Information How to display the lamp info 1 Press MENU to activate the Tool bar 2 Press to select the Lamp item 3 Press to Pull down the Lamp menu 4 Use or to select Info Image 7 102 5 Press...

Page 115: ...t can be done The Lamp can be set to the normal or economic mode Following Mode Settings are available NORMAL Normal Light Output ECONOMIC Reduced Light Output Table 7 6 Lamp Mode Settings CLO is not...

Page 116: ...amp power is adjusted Setting CLO off means that the lamp will operate at constant power no power adaptation to meet constant light output In the illustration below a normal light output curve is show...

Page 117: ...active setting 7 7 4 2 CLO Target What must be done The light output target for the CLO is set in this menu This value will be forced on the projector provided the CLO has been set ON Two targets can...

Page 118: ...g of this master projector Following CLO Settings are available MASTER Master projector to control the CLO in a chain of projectors the target value in the Master projector will be the target value fo...

Page 119: ...ected background is black How to pause the image display 1 Press MENU to activate the Tool bar 2 Press to select General 3 Press to Pull down the General menu 4 Use or to select Pause Image 7 114 5 Pr...

Page 120: ...played and the projector will shut down after a pre determined time The countdown time can be set in a dialog box in a range from 180 to 3600 seconds default value 300 The Timer can also be disabled H...

Page 121: ...ss to Pull down the General menu 4 Use or to select Desktop 5 Press to open the menu 6 Use or to select ON Image 7 118 7 Press ENTER The desktop is displayed if the desktop PC is connected see connect...

Page 122: ...y will be re freshed at the same vertical frequency as the sources In the asynchronous mode the display will be refreshed at a different vertical frequency than the source The maximal vertical refresh...

Page 123: ...enu bar position menu 5 Press ENTER Image 7 121 6 Use or to position the Menu bar 7 9 4 Status bar position What can be done The status bar wizard menu can be centered vertically the range being from...

Page 124: ...A slider box is displayed Use the 4 arrow keys to drag the box to the desired position There is a coarse and a fine adjustment of the position use ENTER when slider box is displayed to switch between...

Page 125: ...7 125 The projector color gamut is defined by the triangle formed by the x y coordinates of Red Green and Blue Due to the tolerance on optical components the x y values of this color gamut of each pro...

Page 126: ...er of the Common Color Gamut is described by the 6 points of intersection of the 2 separate color gamuts G1 G2 R1 R2 B1 W1 0 x y 1 2 3 4 5 6 7 1 2 3 4 5 6 7 8 B2 W2 Gc Wc Yc Rc Mc Bc Cc Image 7 128 Th...

Page 127: ...Red L Red Light output Green L Green Light output Blue L Blue Light output White L White Light Output Red Blue Green Light output Desired Values These are the colors you want the projector to display...

Page 128: ...ng these settings may seriously affect the performance of the projector Default Desired This will reset the desired parameters to no color change values measured values This can be interesting to reca...

Page 129: ...ple projectors Common values must be calcu lated and filled in every projector In case one uses linked Dynacolor the master projector will calculate the common values and force them on all the linked...

Page 130: ...the projector 5 Press Proceed A Green test pattern is displayed 6 Proceed in the same way for Green and Blue as for the Red color 7 The values are finally updated in the measured values of the Dynaco...

Page 131: ...7 Advanced Image 7 131 How to calibrate Dynacolor for projector 2 1 Proceed in the same way as for projector 1 R59770286 NW 12 25 09 2008 127...

Page 132: ...tically Manually Calculating the common color values 1 calculate the common values and fill them in the Desired values of both projectors Both projectors will now operate within the same color gamut A...

Page 133: ...ojectors 7 9 6 3 Black Color Matching Overview Introduction Black Color adjustment for Set 1 7 9 6 3 1 Introduction Black Color uniformity In a multi channel system the color of black can differ over...

Page 134: ...r Set 1 1 Press MENU to activate the Tool bar 2 Press to select the Display setup item 3 Press to Pull down the Display setup menu 4 Use or to select Dynacolor 5 Press to open the menu 6 Use or to sel...

Page 135: ...channel setup the Soft edge possibilities enable an image blending that gives the appearance of a single image thus achieving realistic immersion for the majority of simulation and virtual reality app...

Page 136: ...s Polaris is a Test Pattern Generator software that can generate a user defined test pattern that is used to align projection systems It also has the ability to generate predefined patterns for standa...

Page 137: ...7 Advanced Image 7 138 Soft edge adjustment points Image 7 139 Soft edge points numbering Top and bottom side edges R59770286 NW 12 25 09 2008 133...

Page 138: ...ct points in the levels underneath The level of the adjustment gives a measure of this impact A level 1 adjustment happens on the 4 corners of the soft edge zone and will thus affect the whole zone wh...

Page 139: ...will affect level 1 till 6 At the bottom of the structure we find the level 6 points adjusting on level 6 will not affect any other points these are called local points 7 9 7 3 Accessing the Soft edge...

Page 140: ...ustment is applied can be the source or a full white image pattern The procedures in this manual are explained using a full white background Adjustment guide An adjustment guide consisting of a 4 brig...

Page 141: ...7 Advanced Image 7 145 Image 7 146 Image 7 147 Image 7 148 R59770286 NW 12 25 09 2008 137...

Page 142: ...oint along the x axis How to start up the edit dialog box 1 Press the MENU key to activate the Tool bar 2 Push the cursor key or to highlight Display setup 3 Push the key to pull down the menu 4 Push...

Page 143: ...nced The item is focused Image 7 150 2 Press ENTER The internal soft edge is selected Image 7 151 How to enable the soft edges 1 Push or to select the desired Edges check box R59770286 NW 12 25 09 200...

Page 144: ...mage 7 153 3 Do the same for the other desired edges The default soft edge is applied on the selected edges How to select the source background 1 Push or to select the desired Source check box in this...

Page 145: ...Advanced The item is focused Image 7 154 2 Press ENTER The selected check box is checked and a full white image is displayed with the soft edges on the 4 sides Image 7 155 R59770286 NW 12 25 09 2008 1...

Page 146: ...Advanced Image 7 156 How to enable the adjustment guide 1 Push or to select the check box ON to enable the adjustment guide The item is focused Image 7 157 2 Press ENTER 142 R59770286 NW 12 25 09 200...

Page 147: ...check box is checked and the guide is displayed vertical and horizontal grey scale bars Image 7 158 Image 7 159 How to set the hierarchy level 1 Push or to select the hierarchy level slider box R59770...

Page 148: ...evel is the level 1 Image 7 161 2 Use the arrows to select a point to be displaced 3 Press ENTER to go to the Edit mode 4 Use the arrows to select the desired field 5 Press ENTER to edit the field The...

Page 149: ...e and it must have the same resolution as the projector s native resolution Uploading an alpha plane file Alpha planes must be uploaded in the following projector directory accessible via FTP D displa...

Page 150: ...e brightness level can be matched using 1 CLO in this case the light power is matched over the different projectors see CLO in the Lamps section 2 Black level this will act on the brightness of the bl...

Page 151: ...eta planes The Black level adjustment has to be done for all the channels projectors 7 9 7 5 2 Internal black level What can be done Internal black level can be adjusted via the projector s software u...

Page 152: ...tness level The file must be a TIFF file and it must have the same resolution as the projector s native resolution Uploading a Beta plane file Beta planes must be uploaded in the following projector d...

Page 153: ...hide unwanted image information or noise or to put two images next to each other without overlap soft edge This is also called stitching The adjustment of hard edges is done in the same menu as the s...

Page 154: ...ased on following data Total pixels lines Start pixel lines Phase Contrast brightness levels AutoImage works only for data signals To launch Autoimage see AutoImage in the Image files menu How to set...

Page 155: ...The other items are treated in the Installation or Setup chapter 7 10 1 Internal Patterns Overview The projector is equipped with different internal patterns which can be used for adjustment purposes...

Page 156: ...vels Blue Levels Level 1 Level 16 Min Level 0 Level 1 Level 16 Max Level 255 Image 7 180 Purity How to select an internal pattern 1 Press MENU to activate the Tool bar 2 Press to select the Installati...

Page 157: ...ess ENTER The active selection is shown with a white bullet 7 10 2 Scaled patterns Overview Unlike the Internal Patterns the Scaled Patterns will be distorted according to the active Geometry File Ima...

Page 158: ...activate the Tool bar 2 Press to select the Installation menu 3 Press to Pull down the menu 4 Use or to select Internal Patterns Image 7 185 5 Press to Pull down the menu 6 Use or to select the desire...

Page 159: ...Press to select the Installation menu 3 Press to Pull down the menu 4 Use or to select Formatter Patterns Image 7 188 5 Press to Pull down the menu 6 Use or to select the desired pattern 7 Press ENTE...

Page 160: ...o loss of data for each pixel you shift one color of the image you will lose on line horizontal or vertical depending on the setting of this color E g If you change the vertical convergence setting fo...

Page 161: ...the data box of the color you want to shift horizontally 7 11 Service Overview Diagnostics Option key Calibration of CLO sensor Operation options 7 11 1 Diagnostics Diagnostics See the Troubleshootin...

Page 162: ...a new unknow source no automatic file selection will be done Instead a more or less suited file will be selected resulting in a misaligned image Image settings must be done manually edit image file H...

Page 163: ...not valid x Desktop input signal resolution is out of specification For safety reasons the warning messages Lamp runtime warning and Lamp runtime exceeded will always pop up during start up of the pro...

Page 164: ...7 Advanced 160 R59770286 NW 12 25 09 2008...

Page 165: ...o s Helpdesk concerning an error code make sure to mention the prefix and both digits since this data is most useful for Barco engineers to determine which actions have to be taken 8 1 2 Overview of t...

Page 166: ...Lamp info L 14 Lamp info error LPS comm LPS L 21 LPS1 error Lamp fail LPS L 22 Lamp fail LPS1 L 30 LPS1 error PFC failure LPS1 L 31 LPS1 PFC failure LPS failure LPS1 L 32 LPS1 LPS failure Boost failur...

Page 167: ...put layer H 72 FPGA file error 8 2 Trouble shooting through the OSD What can be done The projector bus allows the diagnostic of different hardware components divided in two main groups I2C diagnostics...

Page 168: ...Diagnostics 5 Press to pull down the menu 6 Use or to select Lamps and power supply and press ENTER Image 8 4 A text box is displayed Image 8 5 How to display the formatter status information 1 Press...

Page 169: ...temperatures and the fan speeds 1 Press MENU to activate the Tool bar 2 Press to select the Service item 3 Press to Pull down the menu 4 Use or to select Diagnostics 5 Press to pull down the menu 6 U...

Page 170: ...4 Use or to select Diagnostics 5 Press to pull down the menu 6 Use or to select Display mode and press ENTER Image 8 10 A text box is displayed Image 8 11 How to enable the warning messages 1 Press M...

Page 171: ...Trouble shooting 6 Press to select Warning messages 7 Press to pull down the menu 8 Use or to select On 9 Press ENTER Image 8 12 A white bullet shows the active setting R59770286 NW 12 25 09 2008 167...

Page 172: ...8 Trouble shooting 168 R59770286 NW 12 25 09 2008...

Page 173: ...80 PAL 50 xml 625 576 864 675 SVGA 60 xml 628 600 1056 800 SVGA 85 xml 631 600 1048 800 1600 192 xml 651 600 2160 1600 ESVGA 73 xml 660 624 1120 832 SVGA_1 72 xml 666 600 1040 800 SG_60_3 60 xml 720 6...

Page 174: ...2 60 xml 1089 1050 1864 1400 HD_1080P 60 xml 1118 1080 2576 1920 HD_1080I 60 xml 1125 1080 2200 1920 HD_30P 30 xml 1125 1080 2200 1920 HD_25I 50 xml 1125 1080 2640 1920 HD_25P 25 xml 1125 1080 2640 19...

Page 175: ...to the wall outlet NEMA L6 20P American power plug to connect the power cord to the wall outlet On Axis projection Projection where the projector is positioned so as to have the centre of the lens coi...

Page 176: ...Glossary 172 R59770286 NW 12 25 09 2008...

Page 177: ...b 25 S Video 28 Constant Light Output Mode 112 contrast 60 Controls overview 36 convergence 156 Copy 107 Geometry 107 File 107 D delete 108 geometry 108 Delete a Geometry File 108 Description 114 Desk...

Page 178: ...Environment 9 General 9 Laser Beams 9 Screen Type 10 Internal black level 147 Internal Patterns 151 introduction 5 Introduction 120 125 146 DynaColor 120 L lamp 109 110 info 109 runtime 110 warning 1...

Page 179: ...linked 49 sharpness 62 Sharpness 103 Shift Geometry 99 sliderbox 120 soft edge 132 138 145 146 148 adjustments 132 alpha planes 145 beta planes 148 bleck level 146 Soft edge 131 Introduction 131 Soft...

Page 180: ...Index 176 R59770286 NW 12 25 09 2008...

Page 181: ...ximum shift range in function of lens 16 7 2 Standard geometry files overview 84 7 3 dialog box legend 91 7 5 Lamp Information 110 7 6 Lamp Mode Settings 111 7 7 CLO Settings 114 7 11 dialog box legen...

Reviews: