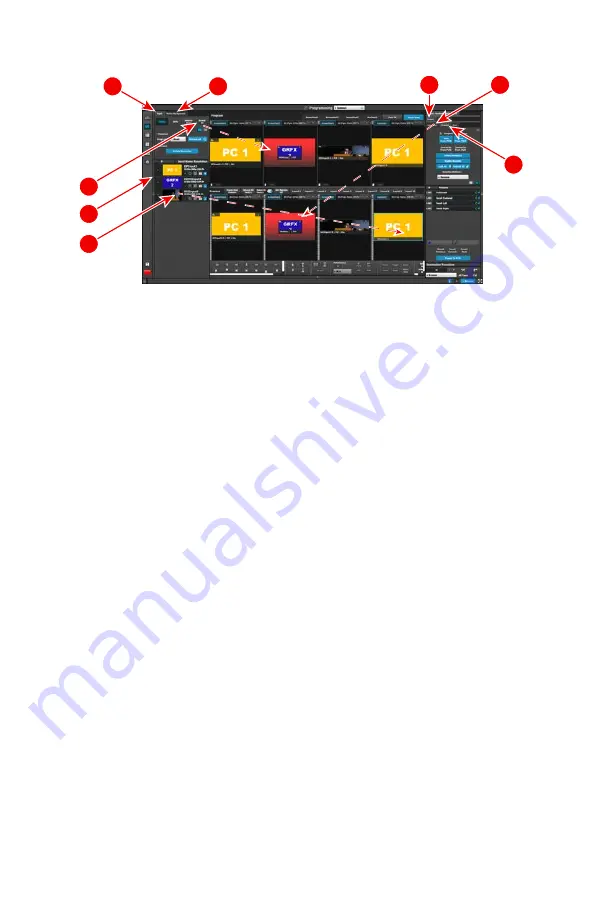
P3
: Create Source Files – Under the Input tab create any additional source files
(optional). Select the Adjust tab and perform any additional adjustments and press
Save. Repeat for all Inputs/Sources and save.
P4
: Drop Backgrounds onto Screen Destinations – Under the Background tab select
a Background and drop it to a Screen Destinations. Repeat for all Backgrounds and
save.
P5
: Drop Layers & Sources – Under the Layer tab select a layer and drop it to a
Screen Destination. Select a Source under the Input tab and drop it into the layer.
Alternatively, select a source and drag it to the destination to automatically show
the layer with the selected source. Select the Adjust tab and perform any additional
adjustments. Repeat for all layers and sources and save.
P6
: Drop Inputs/Backgrounds to Aux Destinations – Under the Input or Background
tabs select an Input \ Background and drop it to the Aux Destinations. Select the
Adjust tab and perform any additional adjustments. Repeat for all Backgrounds and
save.
P7
: User Keys – Select a layer and under Adjust and User Keys tabs click on the
Enables to save. Repeat for all desired User Keys and save.
P8
: Presets – Select Screen(s) and under Adjust and Preset tabs create a new preset
or manage existing ones. Repeat to create multiple Presets.
P1
P3
P2
P4
P6
P7
P5
P8
Programming Menu
Programming Menu
P1
: Select thumbnails for Backgrounds – Press
Refresh All
, or select the thumbnails
to represent the Backgrounds.
P2
: Select thumbnails for Inputs &Stills – Press
Refresh All
, or select the thumbnails
to represent the Inputs and Stills.
M1
: Select MVR Sources – From the dropdown menus select the Inputs,
Backgrounds, and Destinations you want to view and drop them into Multiviewer
Outputs. Overlapping is not allowed. An MVR source may be used twice.
A maximum total of 63 windows can be used for Inputs and 63 windows can be
used for Outputs.
Multiviewer (MVR) Menu
Page 7 of 8


