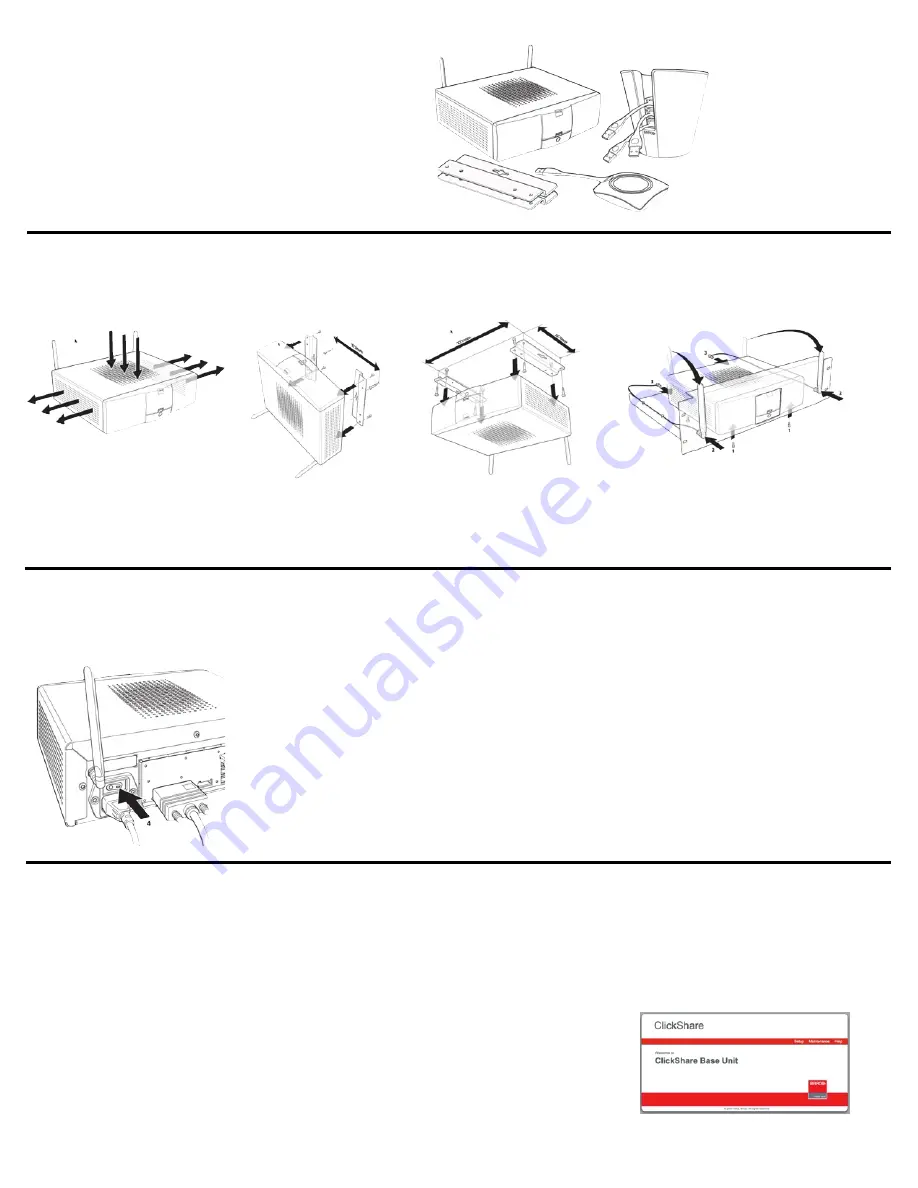
Step 1 - Unpacking the components
For a basic system, confirm that you have:
✓
1 - A Base Unit
✓
2 - Four Buttons
✓
3 - A Button Tray
✓
4 - Two Mounting Brackets
✓
A power chord
✓
A DVI-i to VGA adapter
Step 2 - Installing the Base Unit
There are four mounting options:
For details see Installation Guide R5900004 - Installing ClickShare -> Installation methods
Step 3 - Connecting the Base Unit to a/c and the display
Attach the power cable from the Base Unit to a 110v grounded AC wall plug. Do not power-on the Base Unit until after you connect the video
cable you brought with you from the Base Unit to the Display.
Step 4 - Accessing the Base Unit Admin Functions Using a Browser
For details see: IT & Facilities Guide R5900003 Web Interface -> Accessing ClickShare Web Interface
Option #1: Access Via WiFi
When powered on, the Base Unit broadcasts its SSID, the public name of the ClickShare WiFi network. The default is ClickShare-
XXXXXXXXXX with the 10 digit number being the base unit’s serial number.
Use your laptop’s network connection tools to connect to the Base Unit’s WiFi network.
The default network password:
clickshare
(all lower case).
Open a browser window. Now navigate to: http://192.168.2.1
Log in using the default: Username:
admin
and Password:
admin
1
2
3
4
Table Mount
Wall Mount
Rack Mount
Ceiling Mount
Requires the ClickShare Rack Mount
Order number: R9861006R01
Always make sure to provide a minimum 2 inch clearance for all ventilation grids.
If Connecting from the DVI out, Power-on the Base Unit after you are connected. ClickShare will then
read the display resolution using EDID and set the Base Unit output resolution to match the display.
You can also manually set the resolution through the Web Interface.
For details see below and see: IT & Facilities Guide R5900003 Web Interface -> Configuring ClickShare
Through The Web Interface
Welcome screen


