12
ECO 810
3. INSTALLATION INSTRUCTIONS
3.1. FITTING INSTRUCTIONS
When fi tting the stove, local and/or national regulations relating to fi re safety
must be followed. In case of doubt, consult the fi re safety department of the local
fi re brigade, particularly if the stove is to be fi tted in a home with walls and/or
fl oors containing fl ammable material.
Position the appliance suffi ciently far away from the wall behind it. If the
walls are not fi re-proof, the distance should be such that the wall in question
cannot become hotter than 80 °C, even when the stove is stoked up to high
temperatures. In case of doubt, insert a fi re-proof protection shield.
The fl oor on which the appliance is placed must have suffi cient bearing power.
Combustion air supply
To ensure that your stove works well, it is essential that it has a supply of
combustion air. The combustion air suction opening is at the bottom of the stove,
to the rear. The air required can be drawn in either from the ambient air in the
living room, or from the crawl space under the fl oor. If the air is drawn in from the
crawl space, please ensure that it is well ventilated. It is also possible to draw in
the air from outside.
In this case, use piping with a diameter of Ø80 cm. Choose for an air-inlet a
place on the wall which allows air to be drawn in at all times. (For example an
air-inlet with a cover plate and free intake openings on the sides.)
3.2. CHIMNEY
Be sure that existing chimneys are completely air-tight and in good condition. In
terms of dimensions, the chimney must have a diameter of at least 150 mm for
the entire length (including the chimney pot).
Ensure that the chimney is fi tted with an appropriate cap to avoid rain and dirt
getting in (as well as bird’s nests).
The draught fl owing through the chimney determines how well your stove will
burn (recommended draught 0.15 mbar: = 15 Pa).
In the event of problems, a solution may be a different chimney cap, if necessary
one with a chimney fan. Contact a specialist if you have any doubts about any of
the above points.
Summary of Contents for ECO 810
Page 2: ......
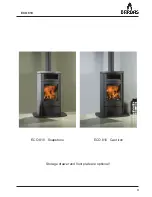
Page 3: ...3 ECO 810 ECO 810 Soapstone Storage drawer and oor plate are optional ECO 810 Cast iron...
Page 4: ...4 ECO 810...
Page 6: ...6 ECO 810...
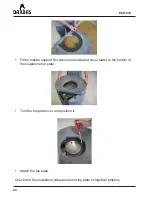
Page 18: ...18 ECO 810 Placing the retardant plate brake plate below in the appliance...
Page 38: ...38 ECO 810 11 REPLACEMENT PARTS...
Page 40: ...40 ECO 810 12 DIMENSIONS...
Page 47: ...47 ECO 810...


