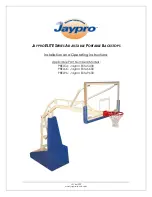
WELCOME TO THE FAMILY OF RAIDER BASKETBALL SYSTEM
OWNERS!
In order to have the safest fun and longest use of your Raider
Basketball System
TM
, please note and heed the
following:
1. Prior to main post preparation and goal assembly, call utility services for location of underground utility lines
before you dig.
2. Vertical main post assembly is a two-part process.
PART 1
Day 1. Complete Anchor System Installation per following Instructions.
Day 2. Allow concrete to cure.
Day 3. Allow concrete to cure.
Day 4. Allow concrete to cure.
Day 5. Allow concrete to cure.
Day 6. Allow concrete to cure.
PART 2
Day 7. Complete Raider Basketball System
assembly instructions.
3. For safety measures have at least 3 capable persons to assist you in assembly of your Raider Basketball
System.
ANCHOR SYSTEM INSTALLATION INSTRUCTIONS
(Day 1)
1. Determine the location of the goal. Position the hole
close to the playing surface without making contact.
Dig a hole 24" x 24" square and 48" below the playing
surface. Note softer soil will require a larger hole. (See Figure 1 detail)
2. Assemble anchor system as follows: Screw nuts
on to the threads 4" down on the anchor bolt. Insert
threads of anchor bolt through hole on anchor
plate and secure with another nut . Repeat this step
for the remaining anchor bolts. (See Figure 1).
2.
Note the direction of the J-
Bolts is really not that
important, however we
would recommend that all
four point to the center of
the template as shown.


