18
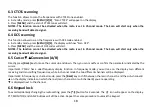
6.3 CTCSS scanning
The function allows to scan the frequencies with CTCSS tone enabled.
a. In standby mode, press
[MENU] [2][9]
, “Scan CTCSS” will appear on the display.
b. Press
[MENU]
and the scan of CTCSS tones will start.
NOTES: The function cannot be activated when the radio is set in Channel mode. The Scan will start only when the
receiving band will detect a signal.
6.4 DCS scanning
This function allows to scan the frequencies with DCS code enabled.
a. In standby mode, press
[MENU] [3][0]
; the display will show “Scan DCS”.
b. Press
[MENU]
and the scan of DCS codes will start.
NOTES: The function cannot be activated when the radio is set in Channel mode. The Scan will start only when the
receiving band will detect a signal.
6.5 Cursor
▼▲
Conversion (A/B)
Directly press
[Back]
key to move the cursor up and down. Then, you can modify or confirm the parameters indicated by the
cursor.
Important1: P10UV has a dual-frequency display function. In frequency mode, you will see on the display two
different
receiving and transmitting frequencies; while in channel mode the two different channels will be displayed.
Important2: In frequency or channel mode, press the
[Back]
key to shift between the main channel A and the sub-channel B
▲
on the display indicates on which channel (main channel A or sub channel B) you are operating.
▼
is displayed next to the channel.
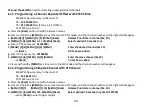
6.6 Keypad lock
To avoid accidentally changing the radio setting, press the
[* ]
button for 2 seconds. The
icon will appear on the display.
PTT, MONITOR, and LAMP buttons will still be active. Repeat the same procedure to unlock the keypad.
Summary of Contents for Pofung P10UV Series
Page 1: ...USER S MANUAL...
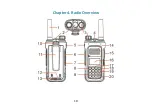
Page 13: ...10 Chapter4 Radio Overview...


