


9
© Banner Engineering Corp. www.bannerengineering.com
Q
UICK
S
TART
G
UIDE
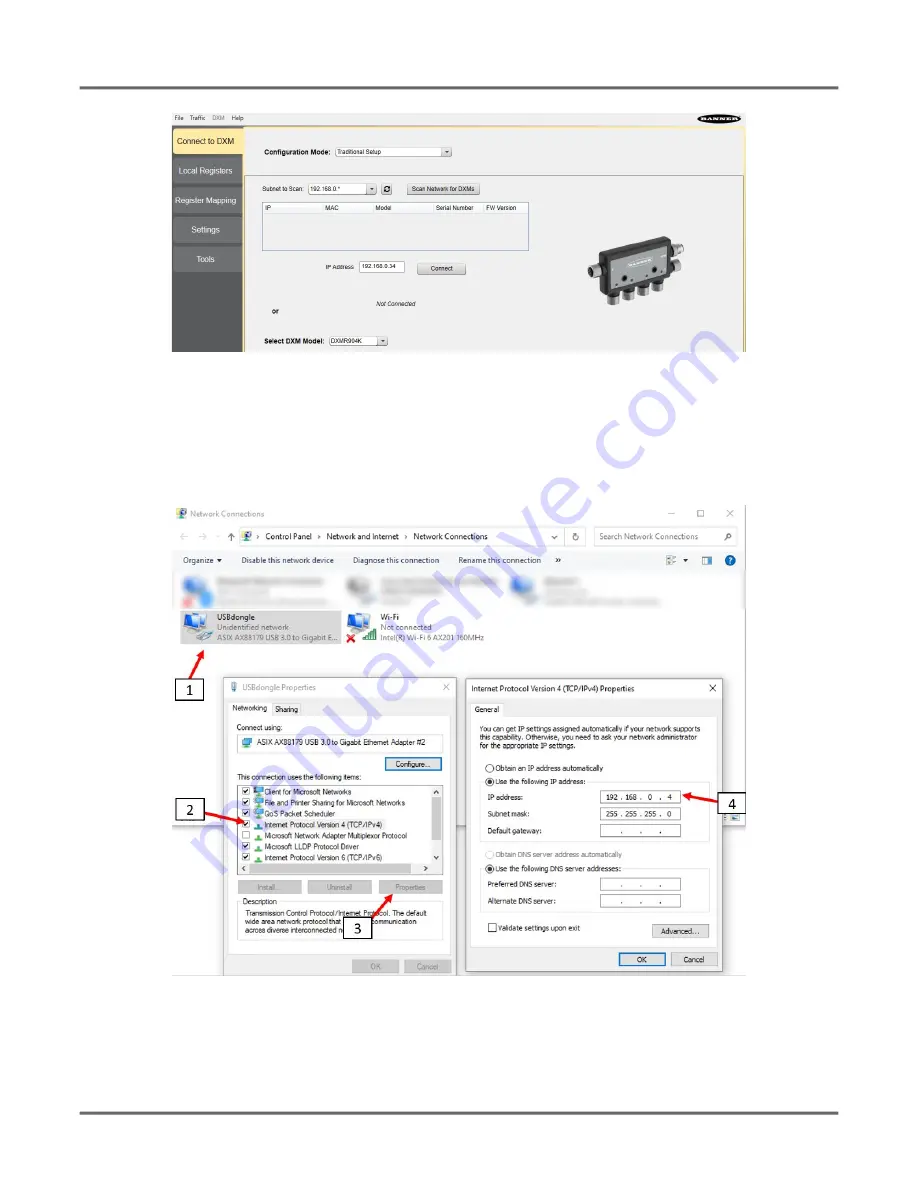
Figure 3:
Opening splash screen for Traditional Setup mode
When the
Select DXM Model
drop-down is set to DXMR110-8K, a new network discovery table is displayed. Click
Scan Network for DXMs
to
detect DXM devices on the host computer's network. Discovered DXMs are listed in the network discovery table. Double-click any row entry to
connect to that DXM. If the DXM's IP address is already known, the standard TCP connection option is available below the network discovery
table.
The default IP address of the DXMR90-4K is 192.168.0.1. To connect to the device, you need to be on the same subnet. You can do this by
accessing the control panel on your PC and accessing your Network Connections properties. It is important to ensure that the adaptor you are
connected to is within the 192.168.0.* subnet when you first connect to the DXMR90-4K IO-link master.
Figure 4:
Windows Network Properties settings screen
IMPORTANT
:
Any model of DXM may connect to the configuration software regardless of which device model is selected in the configuration soft
-
ware. Compatibility is checked before configuration files are uploaded to the device.
For more information on the device registers and port settings of the DXMR110-8K IO-Link Master, refer to the DXMR110-8K IO-Link Master
IO-Link Master Device Register Map (p/n 233478).


