d) In the connection properties, click
Internet Protocol Version 4 (TCP/IPv4)
, and then click
Properties
.
e) In the
Internet Protocol (TCP/IPv4) Properties
, select
Use the following IP address
.
f)
Make sure that the IP address is 192.168.3.1, and the subnet mask is 255.255.255.0.
The IP address must be compatible with the default device address 192.168.3.100.
2. As an alternate method, change the IP address of the device.
3.
In Barcode Manager, click
Find Devices
.
The device displays in
Sensor Neighborhood
with a dark gray icon, meaning it is now part of the LAN and can be configured. The new
IP address also displays.
4.
Double-click or drag the
device
icon into the
Selected Device Information Area
.
Details about the device display in this area.
After device discovery, configure your device through Barcode Manager. Go to
on p. 6.
Automatic Setup
To begin configuration, the reader must be correctly mounted at the correct reading distance for your application so that its Field of View covers
the application reading area.
1.
Click
Open Device Configuration
. The
Open Device Configuration
window opens showing the list of configurations (jobs) cur-
rently saved on the device. For new devices, the only saved configuration is the Default configuration.
2. Click
OK
. The device enters Live Image Capture mode and begins acquiring images.
3. Place the application code
9
in front of the reader at the correct application reading distance.
4. If needed, focus the reader on the code.
5.
After the code is positioned, click
Pause
to stop image acquisition.
Note:
If the image display area is too dark to see the images being captured, drag the Gain and Exposure Time
sliders to the right to increase visibility. This will not affect Automatic Setup.
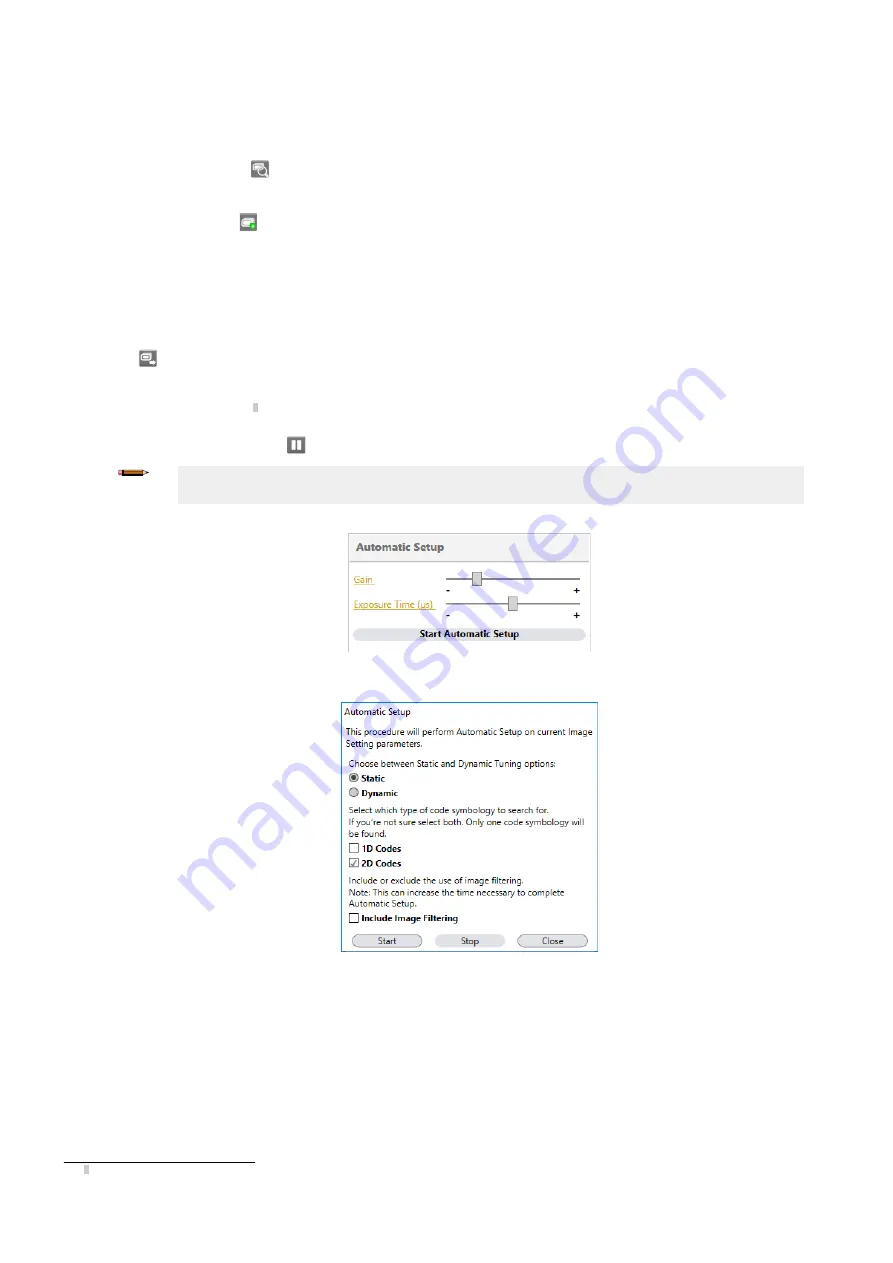
Figure 10. Gain and Exposure Time
6. Click
Start Automatic Setup
. The
Automatic Setup
window opens.
Figure 11. Automatic Setup
7. Select the correct reading conditions.
•
Static
Tuning—No maximum limit on exposure time
•
Dynamic
Tuning—Maximum allowable image exposure is automatically calculated using the parameters
•
1D
code
•
2D
code
•
Include Image Filtering
—Select to find the best decoding condition.
8. Click
Start
.
The reader begins acquiring images, adjusting the brightness and focus (for liquid lens autofocus models), and adjusting the decoding
settings to find a barcode and optimize reading for the first code it finds. At the end of the procedure the Status: Completed message
displays.
9. Close the
Automatic Setup
window.
Your reader is now optimized for decoding. Continue setting up the reader for your application as desired. Typically,
Reading Phase
is
configured next.
9 Automatic Setup does not recognize the following symbologies: Postal Codes, Pharmacode, MSI, Standard 2 of 5, or Matrix 2 of 5, and Interleaved 2 of 5.
ABR 7000
6
P/N 207633 Rev. D