Using Web-based Management
54
1.
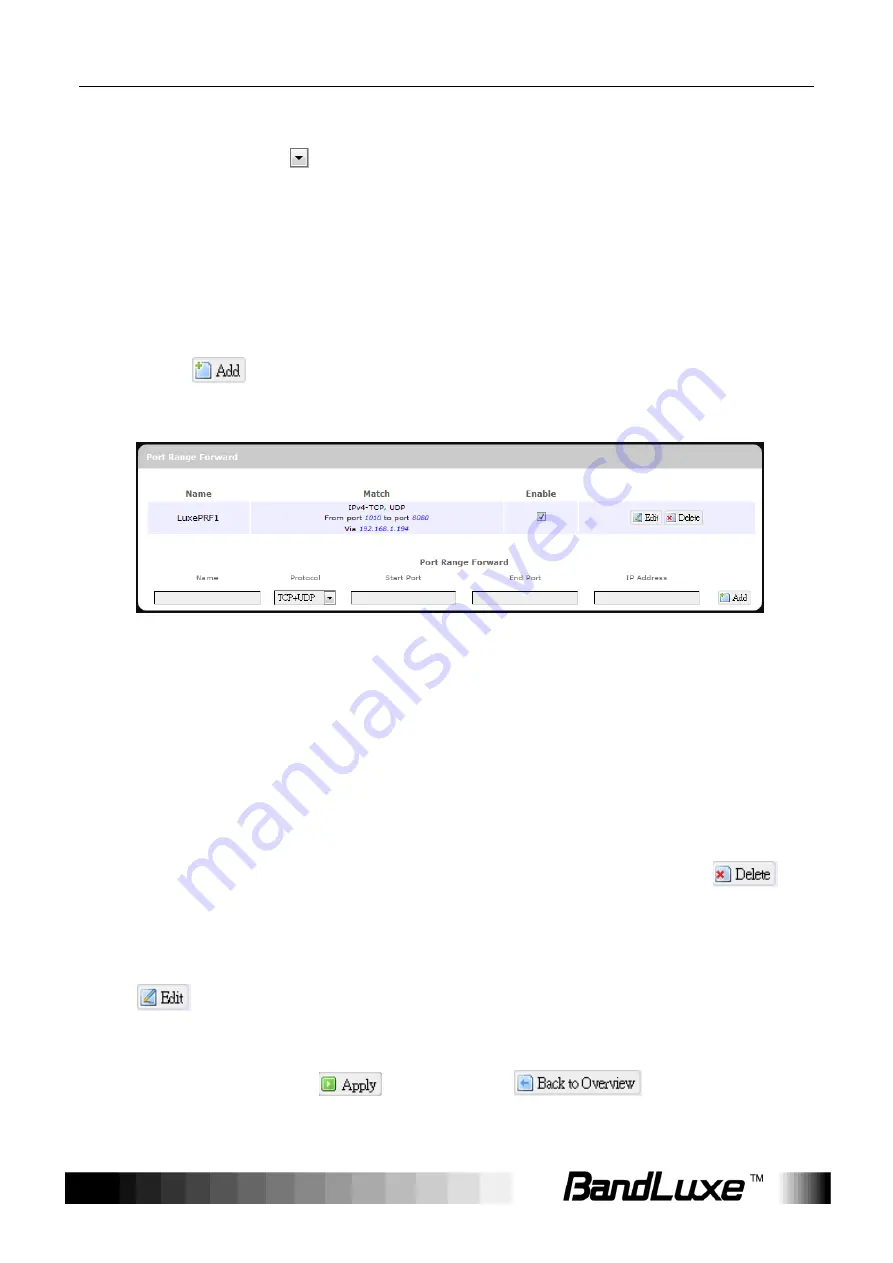
Name
: Enter an application name for this port range forwarding rule.
2.
Protocol
: Click
and select a protocol from the drop down list
–
TCP+UDP
(default),
TCP
,
UDP
, or
Other…
3.
Port Range Forward
: Specify the range of port forwarding by entering
the
Start Port
number and the
End Port
number.
4.
IP address
: Enter the IP address of the PC running the specific
application.
5. Click
. The port range forwarding rule you have just entered will be
added to the Port Range Forward list.
In
the status area, the message
Unapplied Change
may appear next to
“Operator Name” to indicate configuration changes temporarily stored in
the router.
6. More rules can be added to the Port Range Forward list by repeating
Steps 0-0.
7. (a) To enable or disable a Port Forwards list rule, click its check box
under „Enable‟.
(b) To remove any Port Forwards rule, click its corresponding
button.
8. To edit a particular Port Forwards rule in detail, click its corresponding
button, and the rule‟s associated configuration page (more flexible
and detailed than express settings in Steps 0-0) will appear. After making
any changes, click
. Finally click
to exit this
configuration page.
(a) (b)
Summary of Contents for R558C Series
Page 1: ...User Manual BandLuxe R558C Series LTE HSPA Wi Fi Router...
Page 2: ......
Page 13: ...Using Web based Management 11 Mobile internet access will be enabled shortly after...
Page 26: ...Using Web based Management 24 Click Perform reboot to restart the router...
Page 68: ...Using Web based Management 66...
Page 89: ...Appendix B Specifications 87 Certification RoHS...


