Security Setup
40
Port Range Trigger
Port Range Triggering
This feature allows the Router to watch outgoing data for specific port
numbers. The Router remembers the IP address of the computer that
sends the matching data, so that when the requested data returns
through the Router, the data is pulled back to the proper computer by way
of IP address and port mapping rules.
To add a new port range triggering:
1. Click
Add
.
2. In the
Application
field,
enter the name of your application.
3. In the
Triggered Range
field,
enter the triggered port number range
for each application. Check with the Internet application
documentation for the port number needed. Enter the starting port
number of the Triggered Range in the left field. Enter the ending
port number of the Triggered Range in the right field.
4. In the
Forwarded Range
field,
enter the forwarded port number
range for each application. Check with the Internet application
documentation for the port number needed. Enter the ending port
number of the Triggered Range in the right field.
5. Activate/deactivate the
Enabled
checkbox to enable/disable the
client’s DHCP IP reservation.
To apply the changes, click
Apply
.
To cancel the latest changes without saving the changes, click
Undo
.
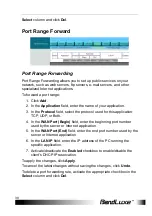
To delete a port triggering rule, activate the appropriate checkbox in the
Select
column and click
Del
.


