40
41
BICYCLE
ASSEMBLY
BICYCLE
ASSEMBLY
1
2
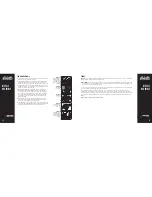
AVOID THESE GEARS!
GEAR OPERATION
Multi speed bicycles can have internal or derailleur gear systems.
WARNING:
Improper shifting can result in the chain jamming,
or becoming derailed resulting in loss of control or a crash.
Always be sure the chain is fully engaged in the desired gear
before pedaling hard.
Avoid shifting while standing up on the pedals or under load.
To shift properly, pedal the bicycle with little pressure on the pedals,
and move the shifter (1) gear at a time, ensuring that the chain is fully
engaged in that gear before applying more pressure on the pedals. For
bicycles with 3 front chain rings; avoid “Cross Chaining”, which is the
position when the chain is in the smallest cog in the rear combined with
the inner or smallest chain ring in the front, or the largest cog in the rear
and the outer or largest chain ring in the front. These gear positions
put the chain at the most extreme angle and can cause premature wear
to the drivetrain. Bicycles with 3 front chain rings have enough gear
“overlaps” that these gears are not needed.
(Fig. A)
INTERNAL GEARS
(no derailleur)
An internal gear system is one where the gears are housed within the rear hub of
the bicycle. With internally geared bicycles, it is recommended to STOP pedaling
while you shift gears. The bike may be sitting still or rolling to shift. Shifter designs
vary, you will either twist or operate a push button to change gears. The shifter
will indicate either “low to “high” or a series of numbers from 1 up. Low or “1”
is the lowest gear. This is used for slower riding, hill climbing, or to allow for
easier pedaling. It is recommended to start off in this gear and move through
the gears as speed increases as needed, or comfortable. It is OK to ride the
whole time in only one gear if this is comfortable. Backpedaling should have no
effect on an internally geared bicycle (unless it is equipped with foot activated
brakes), however, backpedaling should not be necessary when riding, and invites
the possibility of clothing being caught in the chain, and should be avoided. See
Assembly and Maintenance for further information on proper gear adjustment.
FIG. A
FIG. B
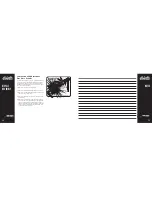
FRONT DERAILLEUR
(Fig. C)
Shift both shifters to the smallest number indicated and place
the chain on the corresponding cog and chainwheel. Disconnect the
front derailleur cable from the cable anchor bolt. Check the position
of the front derailleur; it should be parallel with the outer chainwheel
and clear the largest chainwheel by 1-3mm when fully engaged. With
the chain on the smallest chainwheel in front and the largest cog in
back, adjust the Low limit screw so the chain is centered in the front
derailleur cage. Reconnect the cable, pull any slack out, and tighten the
anchor bolt securely. Shift the front shifter to the largest chainwheel. If
the chain does not go onto the largest chainwheel, turn the high limit
screw in 1/4 turn increments counter-clockwise until the chain engages
the largest chainwheel. If the chain falls off the largest chainwheel, and
into the pedals, you will need to turn the High limit screw in 1/4 turn
increments clockwise until the chain no longer falls off. Shift through
every gear, using the barrel adjusters to ine tune each transition. The
barrel adjuster for the front derailleur is located on the front shifter
where the cable comes out of the shifter. Clockwise will loosen the cable
tension and direct the chain closer to the frame while counter-clockwise
will tighten the cable tension and direct the chain away from the frame.
WARNING:
Do not ride a bicycle that is not shifting properly.
Overlooking proper adjustments may cause irreparable damage
to the bicycle and/or bodily injury. Never move the shifter while
pedaling standing up, or under heavy load, nor pedal backwards
after having moved the shifter. This could jam the chain and cause
serious damage to the bicycle and/or rider.
Low adjusting screw
Cable
anchor bolt
High adjusting
screw
Chainguide clearance
of 1-3mm
Outer chainguide
Inner
chainguide
FIG. C


