background image

Masoneilan SVI FF Bench Quick Start Manual 

=

|


9

© 2019 Baker Hughes, a GE company, LLC. All rights reserved.

12. Right-click 

FF H1 Interface, 

click 

Additional Functions > LiveList

LiveList

 appears 

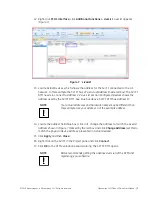
(Figure 7). 

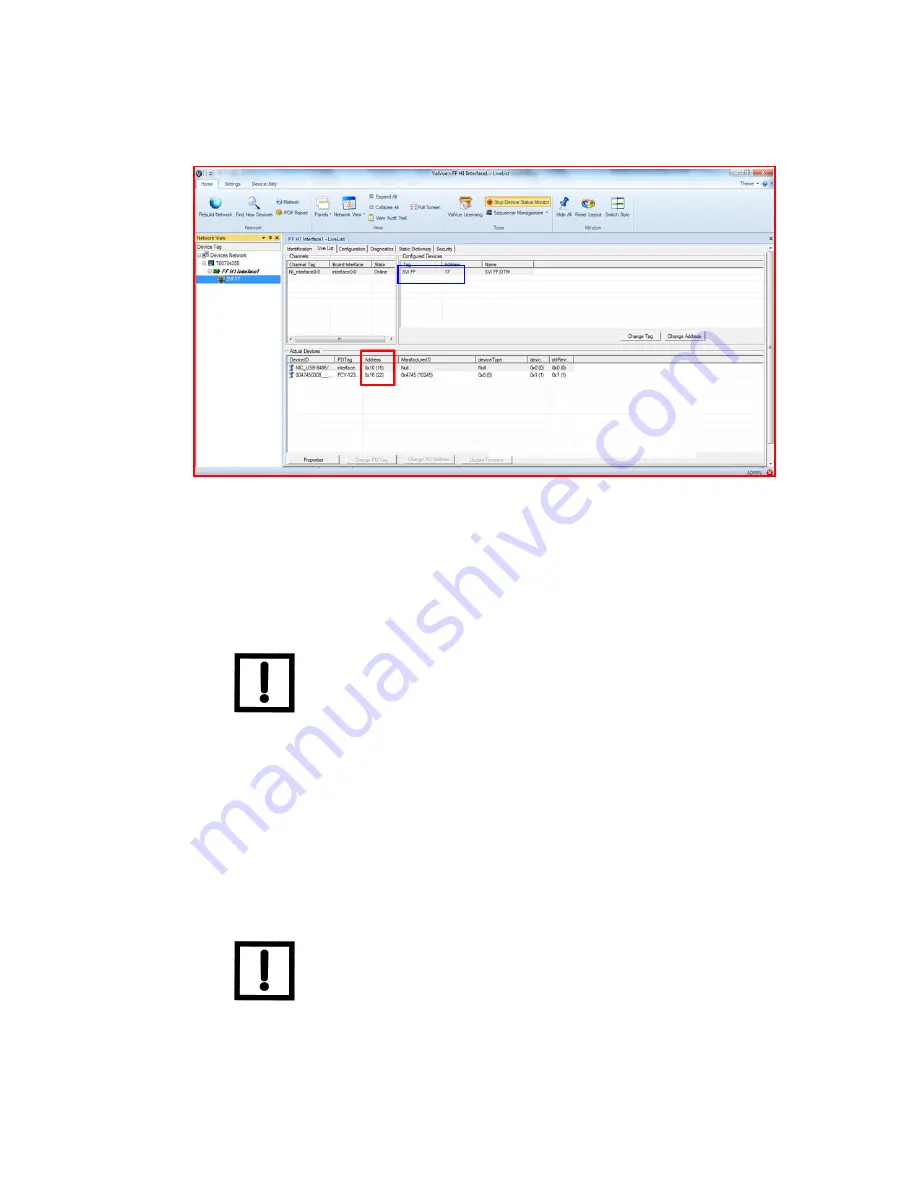
Figure 7 LiveList

13. Locate 

Actual Devices

, which shows the address for the SVI FF connected to the H1 

network. In this example the SVI FF has 

22

 as 

Actual Address

 (inside red box). The SVI FF 

DTM needs to connect to 

Address


22

Live List

 section 

Configured Devices

 shows the 

address used by the SVI FF DTM. See blue box above: SVI FF DTM has 

Address


17

.

14. Locate the 

Address

 field (blue box), click in it, change the address to match the 

LiveList 

Address

 shown in Figure 7 marked by the red box and click 

Change Address 

(set this to 

match the physical device address, presented in 

Actual Devices

). 

15. Click 

Apply

 and then 

Close

.

16. Right-click on the SVI FF in the 

Project

 pane and click 

Connect

.

17. Click 

OK

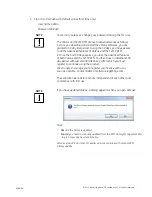
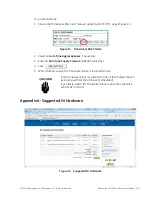
 to the DTM evaluation period warning. The SVI FF DTM opens.

Your actual addresses and hardware names may be different than 
this example. Use your address, not the example address.

BHGE recommends getting the advanced version of the DTM and 
registering your software.

NOTE

NOTE

Summary of Contents for Masoneilan SVI FF

Page 1: ...Masoneilan SVI FF Advanced Performance Digital Positioner Bench Quick Start Rev E Instruction Manual BHGE Data Classification Public...

Page 2: ...AL EQUIPMENT IN POTENTIALLY HAZARDOUS ENVIRONMENTS THEREFORE THESE INSTRUCTIONS SHOULD BE INTERPRETED AND APPLIED IN CONJUNCTION WITH THE SAFETY RULES AND REGULATIONS APPLICABLE AT THE SITE AND THE PA...

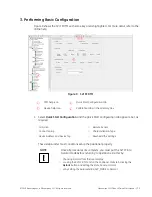
Page 3: ...This procedure consists of the following major steps 1 Physical Setup on page 4 2 Software Install and Configuration on page 5 3 Performing Basic Configuration on page 11 4 Optional Find Stops and Ope...

Page 4: ...486 Connect the leads to the power hub any terminal as follows red lead to green to S black lead to c Plugging the USB plug into USB 8486 into the laptop PC Figure 1 Bench Setup Equipment 4 Mount the...

Page 5: ...on upgrade via the NI website If NI FBus does not start various tools exist including NI Interface Configuration Utility and NI Dialog utility which are useful in analyzing communications issues ValVu...

Page 6: ...the advanced features of both ValVue and the SVI FF DTM You then have an additional 30 day period with just standard features after which you must register to continue using the product We strongly e...

Page 7: ...ppears Figure 3 DTM Library Management 5 Click Update and once the DTM Updates list refreshes select the GE NI FBUS FF DTM and the SVI FF and click Add Sel 6 Click OK to close DTM Library Management d...

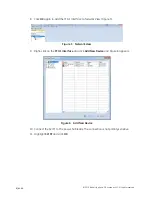
Page 8: ...FF H1 Interface to Network View Figure 5 Figure 5 Network View 9 Right click on the FF H1 Interface and click Add New Device and Figure 6 appears Figure 6 Add New Device 10 Connect the SVI FF to the...

Page 9: ...the SVI FF DTM See blue box above SVI FF DTM has Address 17 14 Locate the Address field blue box click in it change the address to match the LiveList Address shown in Figure 7 marked by the red box a...

Page 10: ...og does not appear click Upload All Parameters icon see red box in Figure 8 If you have updated the FF DTM software a dialog appears when you open ValVue 3 Click Yes and the library is updated No and...

Page 11: ...etup the positioner properly DTM help icon Quick Start Configuration tab Device help icon Calibration tabs in the directory tree Air Action Remote Sensor Control Tuning Characterization Type Device Ad...

Page 12: ...totune on page 14 Not successful read the Find Stops Log Note the reasons for failure If magnets are out of range then a Click Find Stops tab b Adjust the magnet noting Raw Sensor Value and picture of...

Page 13: ...e 3 8 required travel 100 4 8 full mechanical travel 79 stop adjustment A sample procedure is 1 Click the Find Stops tab and entering 79 in Open Stop Adjustment field 2 Click the Download Selected Tab...

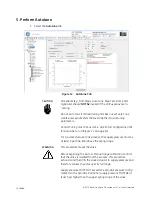
Page 14: ...art Configuration Tab for Autotune to run Figure 12 on page 14 For a successful Auto Tune process the supply pressure must be at least 5 psi 34 5 kPa above the spring range WARNING This procedure move...

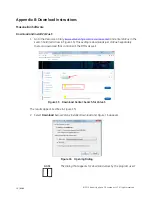
Page 15: ...ct an Auto Tune Aggressiveness if necessary 3 Enter an Auto Tune Supply Pressure standard unit only 4 Click 5 When finished ensure the Transducer block is returned to Auto Appendix A Suggested NI Hard...

Page 16: ...nd enter ValVue in the search field red arrow in Figure 15 This example downloads just ValVue3 separately there is a download that contains all the DTMs as well Figure 15 Download Center Search for Va...

Page 17: ...If you have a previous install of ValVue3 you are prompted to uninstall first and then you must run the installer again to finish the upgrade NOTE If you are upgrading from ValVue 2 x you must update...

Page 18: ...OK and it saves to the Windows Downloads folder NOTE For fastest installation save the download file to your laptop PC Don t install from the website 4 Open Windows Explorer and click the Windows Dow...

Page 19: ...Versions Feature Sub feature Advanced Standard Device States Positioner State X X Positioner Alert Log X X Trend and Position Setup X Device State X X Configuration Control Configuration X X Extended...

Page 20: ...This page intentionally left blank...

Page 21: ......

Page 22: ...111 Moscow Phone 7 495 585 1276 Fax 88 7 495 585 1279 Houston Texas Phone 1 281 671 1640 Fax 88 1 281 671 1735 INDIA Mumbai Phone 91 22 8354790 Fax 88 91 22 8354791 SAUDI ARABIA Phone 966 3 341 0278...

Reviews: