


16
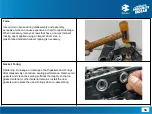
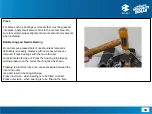
Force
Use common sense during disassembly and assembly,
excessive force can cause expensive or hard to repair damage.
When necessary, remove screws that have a non-permanent
locking agent applied using an impact driver. Use a
plastic-faced mallet whenever tapping is necessary.
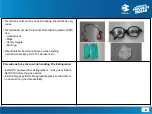
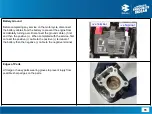
Gasket, O-ring
Hardening, shrinkage, or damage of both gaskets and O-rings
after disassembly can reduce sealing performance. Remove old
gaskets and clean the sealing surfaces thoroughly so that no
gasket material or other material remains. Install the new
gaskets and replace the used O-rings when re-assembling.
Summary of Contents for Pulsar F250 BS VI
Page 5: ...5 Workshop Safety...
Page 10: ...10 General information...
Page 22: ...22 Information for Customer...
Page 34: ...34 Technical Specifications...
Page 39: ...39 I Read I Learn...
Page 40: ...40 Vehicle Identification...
Page 42: ...42 Speedometer Information ABS System...
Page 43: ...43 Speedometer Details...
Page 44: ...44 Speedometer Details...
Page 45: ...45 Speedometer Details...
Page 46: ...46 Speedometer Details Details IFE ODO...
Page 47: ...47 Speedometer Details Details AFE 1 TRIP 1 AFE 2 TRIP 2...
Page 48: ...48 Speedometer Details DTE TRIP...
Page 49: ...49 Speedometer Details Speedometer Setting...
Page 50: ...50 Speedometer Details Speedometer Setting USB Charger...
Page 55: ...55 Control switches Ignition switch Headlight Side stand information...
Page 56: ...56 Control switch LH...
Page 57: ...57 Control switch RH...
Page 59: ...59 Headlight...
Page 61: ...61 Steering cum Ignition switch...
Page 62: ...62 Cranking ON OFF Control...
Page 63: ...63 Fuel Tank Cap...
Page 64: ...64 Preventive Maintenance Chart...
Page 76: ...76 PDI Check sheet...


