background image

Battery


WARNING

The following procedure is very dangerous and should be performed with utmost 

care and attention. Wear protective eye wear, rubber gloves, and have water available 

should electrolyte come in contact with skin or eyes. KEEP ALL CHILDREN AWAY FROM 

THE AREA WHILE THIS PROCEDURE IS BEING PERFORMED.

POISON – CAUSES SEVERE BURNS

Contains sulfuric acid.

Avoid contact with skin, eyes, or clothing

To prevent accidents, rinse empty container with water.

ANTIDOTE:

External – flush with water

Internal – Call physician immediately. Drink large quantities of water or milk.

Follow with milk of magnesia, beaten eggs or vegetable.

Eyes – Flush with water for 15 minutes and get prompt medical attention.

KEEP OUT OF REACH OF CHILDREN.

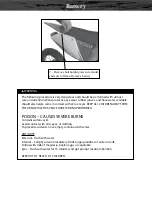
9.   Remove bolt holding rear side fender 

and seat to frame. Remove battery

Summary of Contents for X250 Xmoto Extreme

Page 1: ...X250 Dirt Bike Set Up Instructions Removal from crate 1 Remove cardboard carton 2 Remove metal frame and parts included...

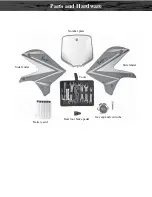
Page 2: ...Parts and Hardware Gas cap and vent tube Side fender Side fender Number plate Tools Battery acid Rear foot brake pedal...

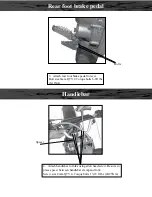
Page 3: ...t brake pedal to lever Bolt size 6mm QTY 2 Torque bolts 6 8ft lbs 8 11Nm Bolts 4 Attach handlebar to forks using allen head screw Be sure to place spacer between handlebar clamp and fork Screw size 8m...

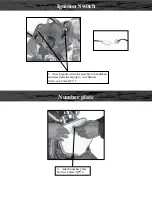
Page 4: ...Ignition Switch Number plate 5 Attach ignition switch assembly to handlebars and attach electrical plug to wire harness Screw size 6mm QTY 2 6 Attach number plate Bolt size 6mm QTY 2...

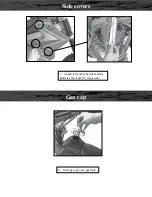
Page 5: ...Side covers Gas cap 7 Attach left and right side fenders Bolt size 6mm QTY 6 3per side 8 Twist gas cap onto gas tank...

Page 6: ...NG PERFORMED POISON CAUSES SEVERE BURNS Contains sulfuric acid Avoid contact with skin eyes or clothing To prevent accidents rinse empty container with water ANTIDOTE External flush with water Interna...

Page 7: ...e children unattended around battery If air bubbles cease to float to the top of the electrolyte bottles tap lightly on top DO NOT remove container from battery while it is draining Never cut or pierc...

Page 8: ...rging rate Charge battery 0 7 Amps for 5 10 hours After charging is complete press down firmly with both hands to seat the caps Do not pound or hammer The battery is now sealed see figure 7 Once batte...

Page 9: ...ing instructions WARNING This engine may be shipped with oil in it This oil should be drained and replaced with new engine oil as described in the owners manual Never attempt to start the engine witho...

Reviews: