background image

BA_375-E42_01_DEF_MJ_4419

31 | 

32

W. Baelz & Sohn GmbH & Co.

 · Koepffstrasse 5 · 74076 Heilbronn · Germany · 

www.baelz.de             Seite | Page  

Motorized Rotary Actuator  


    baelz 375-E42

Malfunction

Cause

Action required

Actuator not working

Power failure

Determine the cause and correct the 

problem.

Defective fuse (in control cabinet)

Determine the cause and correct the 

problem, replace the fuse.

Rotary actuator incorrectly connected

Re-connect as specified on circuit 

diagram (inside cover).

Short circuit caused by humidity

Determine the cause, dry the rotary 

actuator; if necessary, replace cover 

seal and screws and/or fit protective 

cover.

Short circuit caused by incorrect connection Connect correctly.

Motor winding damage caused, for example, 

by high voltage or defective electronics

Determine cause, measure current 

data, compare with nameplate and 

specifications, dismantle rotary 

actuator and return for repair.

Voltage drop due to connecting cables being 

too long and / or having insufficient cross-

section

Measure current data with rotary 

actuator, recalculate connecting 

cables and replace as necessary.

Actuator running erratically, 

constantly opening and 

closing

Power fluctuations exceed permissible 

tolerance

Improve power supply conditions.

Loose contact in supply line

Check and tighten connections 

(terminal blocks).

Actuator stops intermittently

Valve jamming

Enable smooth valve movement.

Actuator does not move to 

end position. Valve fails to 

open / close

System pressure too high

Adjust system pressure.

Poor input signal

- interfering signals

- signal fluctuation

Check input signal at rotary actuator, 

correct the problem causing the 

malfunction.

Rotary actuator fails to 

move or does not move 

correctly to the position 

defined by the input signal.

Circuit board defective

Replace circuit board, if necessary 

dismantle actuator and return for 

repair. 

10.1 Checklist for operational malfunctions

Summary of Contents for BA 375-E42

Page 1: ...5 74076 Heilbronn Germany www baelz de Seite Page BA_375 E42_01_DEF_MJ_4419 Operating Instructions BA 375 E42 Motorized Rotary Actuator baelz 375 E42 Technical specifications subject to change without...

Page 2: ...Accessories and options 7 3 1 Type name 7 2 3 Operating conditions 7 3 TRANSPORT AND STORAGE 7 4 ASSEMBLY 8 4 1 Fitting position 8 4 2 Assembly with the valve 8 4 3 Principle of operation 9 4 3 1 Man...

Page 3: ...7 2 6 3 point control with a continuous output signal 19 7 3 Wiring diagrams and allocation of connection terminals 19 7 3 1 Wiring diagram 19 7 3 2 Allocation of connection terminals 20 7 4 Configura...

Page 4: ...ication complies with the identification label of the rotary actuators before starting any activities The actual technical data of the rotary actuators and the power supply requirements are the specif...

Page 5: ...in a safe manner and avoid any operation that would endanger the safety of persons or damage the rotary actuator or other property in any way 1 4 Before starting work Before carrying out any work chec...

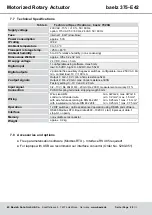
Page 6: ...ical Specifications baelz 375 E42 Torque Nm 150 Postioning time for 90 s 60 at 60 Hz the positioning speed and power consumption both increase by 20 Power consumption 230 V VA 65 Nominal current 230 V...

Page 7: ...er against rain direct sunlight strong draughts dust 3 TRANSPORT AND STORAGE Risk of injury caused by failure to observe safety regulations Caution Wear the required personal and other protective equi...

Page 8: ...wheel on the rotary actuator anticlockwise until the mechanical stop of the OPEN position is reached before assembling Thorougly degrease the contact surfaces of the connecting flanges of the rotary a...

Page 9: ...motion If a positioner is used the actuator will automatically move back to the original position Therefore only carry out manual adjustment when the actuator is disconnected from the power supply It...

Page 10: ...wiring and connection observe the regulations for the construction of electric power installations and the regulations of the local energy supplier Check compliance of the supply voltage and frequenc...

Page 11: ...range If the range is exceeded rotate the coupling by one tooth relative to the output shaft Fig 3 Setting the mechanical end stops 5 2 Setting the limit switches Move actuator into chosen end positi...

Page 12: ...potentiometer limit switches or positioning electronics While performing this activity there is unobstructed access to hazardous live exposed moving and rotating parts Adjustments performed incorrect...

Page 13: ...iometer shaft Solder the potentiometer wiring to the potentiometer insert downwards through the 8 mm hole and connect to the lower part of the plug connector 2 red 28 gray 29 yellow 30 Fix the lower p...

Page 14: ...connect actuator from power supply before starting work Danger 1 Remove the two allen screws 1 on the main switch board Replace them with two spacer bolts 3 2 Clip the spacer 2 into the main switch bo...

Page 15: ...elow 2 Replace the screws with the spacer bolts 3 Place the adaptor panel onto the spacer bolts and the capacitor bracket and fix with the metal countersunk screws IMPORTANT NOTE The holes in the adap...

Page 16: ...age the screw thread 2 Fit the 7020A digital positioner circuit board To do this place the plastic spacer sleeves over the four threaded holes in the corners of the isolation panel Insert the slotted...

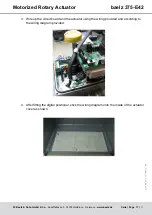
Page 17: ...www baelz de Seite Page Motorized Rotary Actuator baelz 375 E42 3 Wire up the circuit board and the actuator using the wiring provided and according to the wiring diagram provided 4 After fitting the...

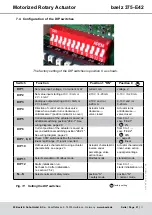
Page 18: ...d operating options For further information and additional functions see baelz 7020 operating instructions 7 2 1 Standard operation using DIP switches The DIP switches can be used to carry out standar...

Page 19: ...action into account See wiring diagrams in the baelz 7020 operating instructions 7 2 6 3 point control with a continuous output signal 1 Set the positioner up and wire to power supply as described pr...

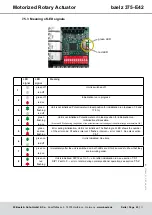
Page 20: ...N S switch must be set to S safety mode 20 22 Digital input for a switch used to select between two conditions e g open closed or summer winter 23 24 25 26 Analogue output position indicater using vol...

Page 21: ...rns clockwise valve closed Actuator turns anticlockwise valve closed DIP 5 Current position of the actuator is saved as additional switching position 2EZ 1 See wiring diagram page 20 from 0 to 1 save...

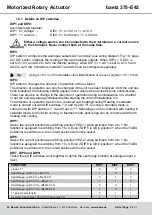
Page 22: ...or not the unit was already initialized before starting the current initialization run The direction of operation must not be confused with heating cooling Heating in standard mode is carried out wit...

Page 23: ...DIP 12 is set to 1 errors and alarms occurring during normal positioner operation will not be shown This enables errors occurring during initialization to be distinguished from errors during normal p...

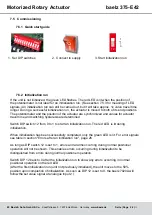
Page 24: ...actuator travel time and switching hysteresis are determined Switch DIP switch 12 from 0 to 1 to start an initialization run The red LED is lit during initialization When initialization has been succe...

Page 25: ...tialization run Initialization still possible If the red LED is flickering the position of the potentiometer is at the edge of the optimal range and therefore OK 5 green and red flashing Error during...

Page 26: ...sitioner operation Setting DIP switch 12 from 1 back to 0 permits the red LED to show any normal operational errors instead of initialization errors which may have occured Error code Error Corrective...

Page 27: ...codes can be allocated The error codes 7 to 10 are not allocated and are reserved for additional alarms Error code Error Corrective action 1 Sensor malfunction at analogue input AI1 No signal from pot...

Page 28: ...V 100 mA 2 output signals Output 1 0 2 10 V min ohmic resistance 5k Output 2 0 4 20 mA max ohmic resistance 300 Factory setting 0 10 V and 0 20 mA Input signal 0 2 10V Re 63k 0 4 20mA Re 200 measureme...

Page 29: ...ung heater 11 1 Zusatzpotentiometer additional potentiometer 13 Gewindestift setscrew 15 Sechskantmutter hex nut 21 1 Motorklemme 3 motor terminal 3 26 1 Handrad handwheel 26 2 Zylindergriff cylindric...

Page 30: ...rrectly installed 2 Check the actuator settings and the specifications on the nameplate 3 Correct the problems as specified in the checklist page 31 4 If the problem cannot be corrected contact the Ba...

Page 31: ...ns dismantle rotary actuator and return for repair Voltage drop due to connecting cables being too long and or having insufficient cross section Measure current data with rotary actuator recalculate c...

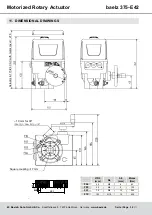
Page 32: ...nor to make this drawing accessible to a thirdparty without our permission Ce plan ne doit pas tre ni photocopi ni polycopi ni rendu accessible un tiers Anschlussma e ISO5211 D3 mm D4 mm h2 mm Mmax N...

Reviews: