background image

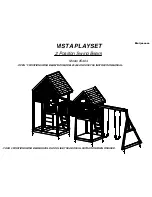
Owner’s Manual Play Set


                                                                                                                                                                                                                                Rev12/13/12 

The following chart explains the fall height in feet from which a life threatening head injury 

would not be expected 

Critical Heights in feet (m) of Tested Materials 

Material 

Uncompressed Depth 

Compressed Depth 


6" (152mm) 

9" (228mm) 

12" (304mm) 

to 9" (228mm) 

Wood Chips 

7' (2.13m) 

10' (3.05m) 

11' (3.35m) 

10' (3.05m) 

Double-Shredded bark mulch 

6' (1.83m) 

10' (3.05m) 

11' (3.35m) 

7' (2.13m) 

Engineered Wood Fibers 

6' (1.83m) 

7' (2.13m) 

>12' (3.66m) 

6' (1.83m) 

Fine Sand 

5' (1.52m) 

5' (1.52m) 

9' (2.74m) 

5' (1.52m) 

Coarse Sand 

5' (1.52m) 

5' (1.52m) 

6' (1.83m) 

4' (1.22m) 

Fine Gravel 

5' (1.52m) 

7' (2.13m) 

10' (3.05m) 

6' (1.83m) 

Medium Gravel 

5' (1.52m) 

5' (1.52m) 

6' (1.83m) 

5' (1.52m) 

Shredded Tires* 

10-12' (3.0-3.6m) 

N/A 

N/A 

N/A 


*This data is from tests conducted by independent testing laboratories on a 6-inch depth of uncompressed shredded tire samples produced by four manufacturers.  The tests 

reported critical heights, which varied from 10 feet to greater than 12 feet.  It is recommended that persons seeking to install shredded tires as a protective surface request test 

data from the supplier showing the critical height of the material when it was tested in accordance with ASTM F1292. 


Operating Instructions:


NOTE

: Your children’s safety is our #1 concern.  Observing the following statements 

and warnings reduces the likelihood of serious or fatal injury.  Please review these 
safety rules regularly with your children. 


1.  This Playcenter is designed for specific number of occupants whose combined weight 

should 

not exceed

 a designated weight on the elevated floor or the swing area, the total Unit capacity 

is outlined in the Basic Setup Dimensions section of instruction manual.  The maximum fall 
height and recommended play area is also available in the Basic Setup Dimensions section of 
the manual for the specific unit. 

2.  On-site adult supervision is 

required

3.  Instruct children 

not

 to walk close to, in front of, behind, or between moving swings or other 

moving playground equipment. 

4.  Instruct children to sit in and 

never

 stand on swings 

5.  Instruct children 

not

 to twist the chains and ropes and not to loop them over the top support 

bar, since this may reduce the strength of the chain or rope. 

6.  Instruct children 

not 

to jump from swings or other playground equipment in motion. 

7.  Instruct children to 

not to push

 empty seats.  The seat may hit them and cause serious injury. 

8.  Instruct and teach children to sit in the center of the swings with their full weight on the seats. 
9.  Instruct children 

not

 to use the equipment in a manner other than intended. 

10. Instruct children to 

always

 go down slides feet first.  Never slide head first. 

11. Instruct children to 

look

 before they slide to make sure no one is at the bottom. 

12. Instruct children to 

never

 run up a slide, as this increases their chances of falling. 

13. The parents should 

dress


children


appropriately

. (Examples would include the use of well-

fitting shoes and the avoidance of ponchos, scarfs, and other loose-fitting clothing that is 
potentially hazardous while using equipment). 

14. Instruct children 

not

 to climb when the equipment is wet. 

15. Instruct children to 

never

 jump from a fort deck.  They should always use the ladder, ramp or 

slide. 

16. Instruct children to 

never

 crawl or walk across the top of monkey bars. 

17. Instruct children to 

never

 crawl on top of a fort roof. 

Meijer.com

Summary of Contents for TREK 54213

Page 1: ...etsonline com you will also find any updates on assembly instructions and information to order replacement parts Save this assembly manual for future reference in the event that you need to order replacement parts Owner s Manual Frequently Asked Questions Assembly Instructions Warranty Information VISTA Wooden Play Set Model 54273 INS 54273 A VISTA ENG 08 16 13 Meijer com ...

Page 2: ...IAL ATTENTION TO THE IMPORTANT TIPS AND SAFETY INFORMATION AFTER YOU HAVE READ THE ASSEMBLY MANUAL YOU WILL BE ABLE TO DECIDE IF YOU NEED PROFESSIONAL HELP TO COMPLETE THE ASSEMBLY OF THE STRUCTURE SEPARATE AND IDENTIFY ALL PARTS TO MAKE SURE THAT YOU HAVE ALL OF THE PARTS LISTED IF YOU CAN T FIND ALL OF THE PARTS CHECK THE PACKING MATERIAL SMALL PARTS MAY HAVE FALLEN INTO IT DURING SHIPMENT IF YO...

Page 3: ...or safety violations that could result in serious injury This manual contains helpful information concerning Assembly Preparation Installation Procedure and Required Maintenance Always keep the safety of your children in mind as your play structure is being built and as your children play on the set Before your children play on the set please review the Operation Instructions with them to help ens...

Page 4: ...kelihood of serious burns A slide that faces north will receive the least direct sunlight 9 Separate active and quiet activities from each other For example locate sandboxes away from swings or use a guardrail or barrier to separate the sandbox from the movement of the swings Suggested Playground Surfacing Do not install home playground equipment over concrete asphalt packed earth grass carpet or ...

Page 5: ...capacity is outlined in the Basic Setup Dimensions section of instruction manual The maximum fall height and recommended play area is also available in the Basic Setup Dimensions section of the manual for the specific unit 2 On site adult supervision is required 3 Instruct children not to walk close to in front of behind or between moving swings or other moving playground equipment 4 Instruct chil...

Page 6: ...ments of 16 CFR 1303 Check all wood members for deterioration and splinters Sand down splinters and replace deteriorating wood members Reinstall any plastic parts such as swing seats or any other items that were removed for the cold season Rake and check depth of loose fill protective surfacing materials to prevent compaction and to maintain appropriate depth Replace as necessary Twice a month dur...

Page 7: ...ough spots on your playset Please note this is a requirement of your warranty Assembling and maintaining the playset on a level location is very important As your children play your playset will slowly dig its way into the soil and it is very important that it settles evenly Make sure the playset is level and true one each year or at the beginning of each play season Disposal Instructions When the...

Page 8: ... no elevated play surface does not need any protective surfacing X3 1 3 Use containment such as digging out around the perimeter and or lining the perimeter with landscape edging Don t forget to account for water drainage X3 1 3 1 Check and maintain the depth of the loose fill surfacing material To maintain the right amount of loose fill materials mark the correct level on play equipment support p...

Page 9: ... is subject to revision at any time by the responsible technical committee and must be reviewed every five years and if not revised either approved or withdrawn Your comments are invited either for revision of this standard or for additional standards and should be addressed to ASTM Headquarters Your comments will receive careful consideration at a meeting of the responsible technical committee wh...

Page 10: ...re information 8 What is the best way to get started assembling the playset Backyard Discovery recommends taking all the parts out of the boxes and arranging them by part number before you begin any assembly This will not only allow faster assembly but will also identify any parts that may be missing or damaged so they can be replaced before assembly If parts are missing or need replacement go to ...

Page 11: ...Rubber Mallet Optional Ladder Phillips Screw Driver Drill Attachments Phillips Head 3 16 5 16 1 8 3 8 Drill Bits Tools Required for Installation These are the tools that are generally required for assembly of our outdoor products These tools are not included with the outdoor product purchase Meijer com ...

Page 12: ... m General Information Your set has been designed and engineered for children only and for residential use only A maximum of 150 lbs per child is recommended for play activities designed for individual use A maximum of 120 lbs per child is recommended for play activities designed for multiple child use A maximum of 14 children is recommended for this playset 26 2 1 2 8 m 6 1 8 m 30 4 1 2 9 3 m 38 ...

Page 13: ...ification Modules Used NOT TO SCALE TOWER II WITH LOFT MODEL 54113 2 BOX SET 10 FT VACUUM SLIDE 2 MODEL 50226 TOWER I MODEL 54013 2 BOX SET BRIDGE MODEL 5422 2 POSITION SWING BEAM MODEL 5404 MONKEY BAR MODEL 69012 Meijer com ...

Page 14: ...ts flush to the tube or member and place caps over exposed bolts snug to the nut 8 Pay close attention to the ITEMS NEEDED FOR EACH STEP They can be a valuable aid when sorting your wood and hardware Assembly will be made easier if items are sorted by step 9 Pay close attention to make sure you are using the correct hardware in each step Using incorrect hardware may result in improper assembly 10 ...

Page 15: ...rder of Assembly 1 TOWER II WITH LOFT MODEL 54113 2 BOX SET 2 TOWER I MODEL 54013 2 BOX SET 3 BRIDGE MODEL 5422 4 2 POSITION SWING BEAM MODEL 5404 5 10 FT VACUUM SLIDE 2 MODEL 50226 6 MONKEY BAR MODEL 69012 Meijer com ...

Page 16: ...STEP 40 ASSEMBLE ONLY THE OUTSIDE PLUG BOARDS G12 M1 M13 2 TZ BRACKETS OMITTED STEPS 39 START 1 2 3 4 5 6 7 8 9 10 11 12 13 14 15 13 12 11 10 9 8 7 6 5 4 3 2 1 1 2 3 4 5 6 7 8 9 10 11 12 13 14 15 16 17 18 19 20 21 22 23 22 21 20 19 18 17 16 15 14 13 12 11 10 9 8 7 6 5 4 3 2 1 YOUR TOWER II WITH LOFT SHOULD LOOK LIKE THE ABOVE ILLUSTRATION WHEN FINISHED Meijer com ...

Page 17: ... RIGHT SIDE OPENING DO NOT PLUG THE OPPOSITE SIDE OMITTED STEPS 19 30 PLACE YOUR TOWER I APPROXIMATELY 52 AWAY FROM TOWER II TO ALLOW EASY ASSEMBLY OF BRIDGE COMPONENT MAKE SURE YOUR TOWERS ARE ORIENTED AS SHOWN IN THE ILLUSTRATION BELOW YOUR TOWER I SHOULD LOOK LIKE THE ABOVE ILLUSTRATION WHEN FINISHED TOWER I TOWER II 52 APPROXIMATELY Meijer com ...

Page 18: ...VISTA PLAYSET Bridge Model 5422 OPEN BRIDGE BOX MODEL 5422 AND USE THE INSTRUCTION MANUAL OMITTED STEPS 9 10 11 12 13 YOUR BRIDGE SHOULD LOOK LIKE THE ABOVE ILLUSTRATION WHEN FINISHED Meijer com ...

Page 19: ... PLAYSET 2 Position Swing Beam Model 5404 OPEN 2 POSITION SWING BEAM BOX MODEL 5404 AND USE THE INSTRUCTION MANUAL YOUR 2 POSITION SWING BEAM SHOULD LOOK LIKE THE ABOVE ILLUSTRATION WHEN FINISHED Meijer com ...

Page 20: ...de 2 Model 50226 OPEN 10 FT VACUUM SLIDE BOX MODEL 50226 AND USE THE INSTRUCTION MANUAL OMITTED STEPS 1 2 REPEAT PROCESS TO ATTACH OTHER SLIDE YOUR 10 FT VACUUM SLIDES SHOULD LOOK LIKE THE ABOVE ILLUSTRATION WHEN FINISHED Meijer com ...

Page 21: ...A PLAYSET Monkey Bar Model 69012 OPEN MONKEY BAR BOX MODEL 69012 AND USE THE INSTRUCTION MANUAL OMITTED STEPS 6 7 8 FINISHED YOUR MONKEY BAR SHOULD LOOK LIKE THE ABOVE ILLUSTRATION WHEN FINISHED Meijer com ...

Page 22: ...s stated in the applicable Assembly Manual Acts of nature including but not limited to wind storms hail floods excessive water exposure Improper installation including but not limited to installation on uneven unlevel or soft ground Minor twisting warping checking or any other natural occurring properties of wood that do not affect performance or integrity Backyard Discovery products have been des...

Reviews: