background image

Important Assembly Notes

 
1) While assembling unit, take time before and after each step to make sure unit is level.  If unit is
    not level, assembly will be difficult and improper assembly may result.  Extra care must be taken to
    ensure the unit is square.
 
2) Pay close attention to the ITEMS NEEDED FOR EACH STEP.  They can be a valuable aid when
    sorting your wood and hardware.  Assembly will be made easier if items are sorted by phase.
 
3) Pay close attention to make sure you are using the correct hardware in the correct step. Using
    incorrect hardware may result in improper assembly.
 
4) Whenever a T-nut is used, follow these directions.  Place T-nut in pre-drilled hole.  Tap in with hammer.
    Place bolt with washers in the opposite side.  Hand tighten to make sure the bolt is in the T-nut.
    DO NOT over tighten.
 
5) Read each step thoroughly. The written steps may include important information not
    shown in the illustrations.

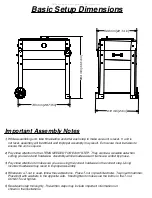
Basic Setup Dimensions

8

8

4

 m

m

 [

3

4

 3

/4

 i

n

]

735 mm [28 7/8 in]

610 mm [24 in]

566 mm [22 1/4 in]

All manuals and user guides at all-guides.com

Summary of Contents for 1706811

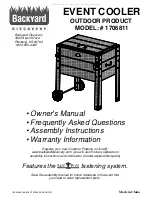
Page 1: ...45 Made in China INS 1806818 A EVENT COOLER ENG 08 21 17 Features the fastening system Register your new Outdoor Product on line www backyarddiscovery com you will also find any updates on assembly instructions and information to order replacement parts Save this assembly manual for future reference in the event that you need to order replacement parts All manuals and user guides at all guides com...

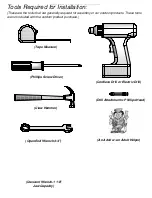
Page 2: ...llips Screw Driver Drill Attachments Phillips Head Tools Required for Installation These are the tools that are generally required for assembly of our outdoor products These tools are not included with the outdoor product purchase Crescent Wrench 1 1 8 Jaw Capacity All manuals and user guides at all guides com ...

Page 3: ...by phase 3 Pay close attention to make sure you are using the correct hardware in the correct step Using incorrect hardware may result in improper assembly 4 Whenever a T nut is used follow these directions Place T nut in pre drilled hole Tap in with hammer Place bolt with washers in the opposite side Hand tighten to make sure the bolt is in the T nut DO NOT over tighten 5 Read each step thoroughl...

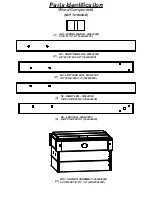
Page 4: ... LEG W4L07004 5 8 x2 3 8 x26 3 4 16x60x678 2 N4 LEFT SIDE LEG W4L07005 5 8 x2 3 8 x25 3 4 16x60x653 2 N5 RIGHT LEG W4L07006 5 8 x2 3 8 x26 3 4 16x60x678 2 N6 LEFT LEG W4L07007 5 8 x2 3 8 x25 3 4 16x60x653 2 1 BX1 COOLER ASSEMBLY W2A02029 20 7 8 x28 7 8 x17 1 4 530x734x439 All manuals and user guides at all guides com ...

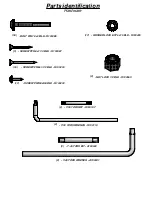
Page 5: ...100387 3 SCREW PFH 8x1 1 2 BLK H100200 16 SCREW PWH 8x5 8 BLK H100202 11 T 30 TORX BIT H100147 2 T 30 TORX WRENCH H100114 2 NUT LOCK 1 2 BLK H100563 2 WASHER LOCK EXT 6x15 BLK H100405 17 T 40 TORX BIT A100042 2 T 40 TORX WRENCH A100041 2 All manuals and user guides at all guides com ...

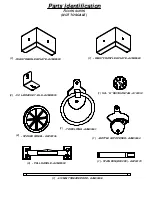
Page 6: ...E A4M00559 3 BOTTLE CAP OPENER A4M00654 1 SPOKED WHEEL A6P00136 2 RIGHT FRONT LEG PLATE A4M00660 1 RIGHT REAR LEG PLATE A4M00659 1 610 MM THREADED ROD A4M00658 1 SQ A REVISION TAG A100314 1 1 STAIN PEN BW 2UV A6P00173 TOWEL RING A4M00661 1 All manuals and user guides at all guides com ...

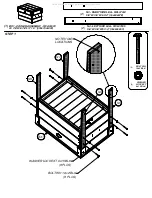
Page 7: ...0 7 8 x28 7 8 x17 1 4 530x734x439 N3 RIGHT SIDE LEG W4L07004 5 8 x2 3 8 x26 3 4 16x60x678 2 N4 LEFT SIDE LEG W4L07005 5 8 x2 3 8 x25 3 4 16x60x653 2 N3 N3 N4 N4 BX1 WASHER LOCK EXT 6x15 BLK 8 PLCS BOLT WH 1 4x2 BLK 8 PLCS NOTE HOLE LOCATIONS All manuals and user guides at all guides com ...

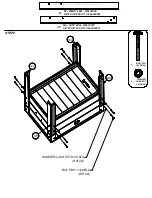
Page 8: ...CK EXT 6x15 BLK 8 N5 RIGHT LEG W4L07006 5 8 x2 3 8 x26 3 4 16x60x678 2 N6 LEFT LEG W4L07007 5 8 x2 3 8 x25 3 4 16x60x653 2 N5 N6 N6 N5 WASHER LOCK EXT 6x15 BLK 8 PLCS BOLT WH 1 4x2 BLK 8 PLCS All manuals and user guides at all guides com ...

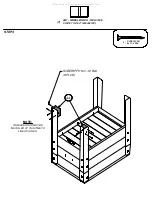
Page 9: ...EEL BLOCK W4L07008 2 3 8 x1 3 4 x4 60x44x102 2 SCREW PFH 8x1 1 2 BLK 8 NOTE THREADED ROD MAY BE INSTALLED AT THIS TIME TO LINE UP HOLES AA1 SCREW PFH 8x1 1 2 BLK 8 PLCS All manuals and user guides at all guides com ...

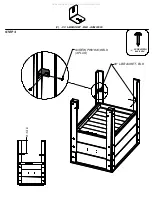
Page 10: ...STEP 4 90 L BRACKET BLK A4M00555 2 SCREW PWH 8x5 8 BLK 4 9 1 4 in 90 L BRACKET BLK SCREW PWH 8x5 8 BLK 4 PLCS All manuals and user guides at all guides com ...

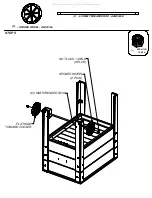
Page 11: ... NUT LOCK 1 2 BLK 2 610 MM THREADED ROD A4M00658 1 SPOKED WHEEL A6P00136 2 FLAT SIDE TOWARD COOLER 610 MM THREADED ROD SPOKED WHEEL 2 PLCS NUT LOCK 1 2 BLK 2 PLCS All manuals and user guides at all guides com ...

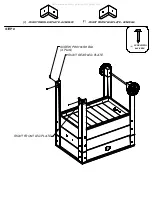
Page 12: ... 6 SCREW PWH 8x5 8 BLK 4 RIGHT FRONT LEG PLATE A4M00660 1 RIGHT REAR LEG PLATE A4M00659 1 RIGHT REAR LEG PLATE SCREW PWH 8x5 8 BLK 4 PLCS RIGHT FRONT LEG PLATE All manuals and user guides at all guides com ...

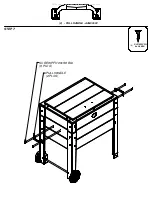
Page 13: ...STEP 7 PULL HANDLE A4M00559 2 SCREW PFH 8x5 8 BLK 8 PULL HANDLE 2 PLCS SCREW PFH 8x5 8 BLK 8 PLCS All manuals and user guides at all guides com ...

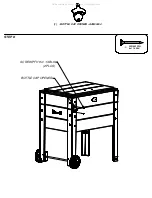
Page 14: ...STEP 8 BOTTLE CAP OPENER A4M00654 1 SCREW PFH 8x1 1 4 BLK 2 BOTTLE CAP OPENER SCREW PFH 8x1 1 4 BLK 2 PLCS All manuals and user guides at all guides com ...

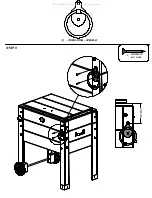
Page 15: ...STEP 9 SCREW PFH 8x1 1 4 BLK 2 TOWEL RING A4M00661 1 4 5 8 in All manuals and user guides at all guides com ...

Page 16: ...STEP 10 PULL HANDLE A4M00559 1 SCREW PFH 8x5 8 BLK 4 PULL HANDLE SCREW PFH 8x5 8 BLK 4 PLCS INCLUDED IN KIT All manuals and user guides at all guides com ...

Page 17: ...STEP 11 SCREW PWH 8x5 8 BLK 2 SQ A REVISION TAG A100314 1 A REVISION TAG SCREW PWH 8x5 8 BLK 2 PLCS 3 7 8 in All manuals and user guides at all guides com ...

Reviews: