background image

Version 0.4 

Backline Engineering 

Expand:

 This will expand the playback bar to show all of the recorded events in the 

loop, including the ones not being played. If the loop cannot be expanded any further, 
‘Cannot Expand’ will be displayed in the playback bar. 
 

Record:

 You can start recording a new layer on top of the current loop using this 

button. Recording will start at the beginning of the loop and stop at the end of the loop. 
You cannot add a layer until the loop has been reduced to show only the current active 
events. Also, once a layer is recorded, you can no longer expand the loop past the 
current events shown. In that case, when you stop playing the loop it is saved in its 
reduced form. 
 

Undo:

 You can undo the last layer recorded. Only the last layer can be undone. 


Stop / Play: 

This button can be used to start and stop loop playback. A three-button 

footswitch can be used to control the three buttons across the bottom of the screen (see 
appendix C). When ending loop playback, press once to stop at the end of a loop, press 
twice to stop immediately.  
 

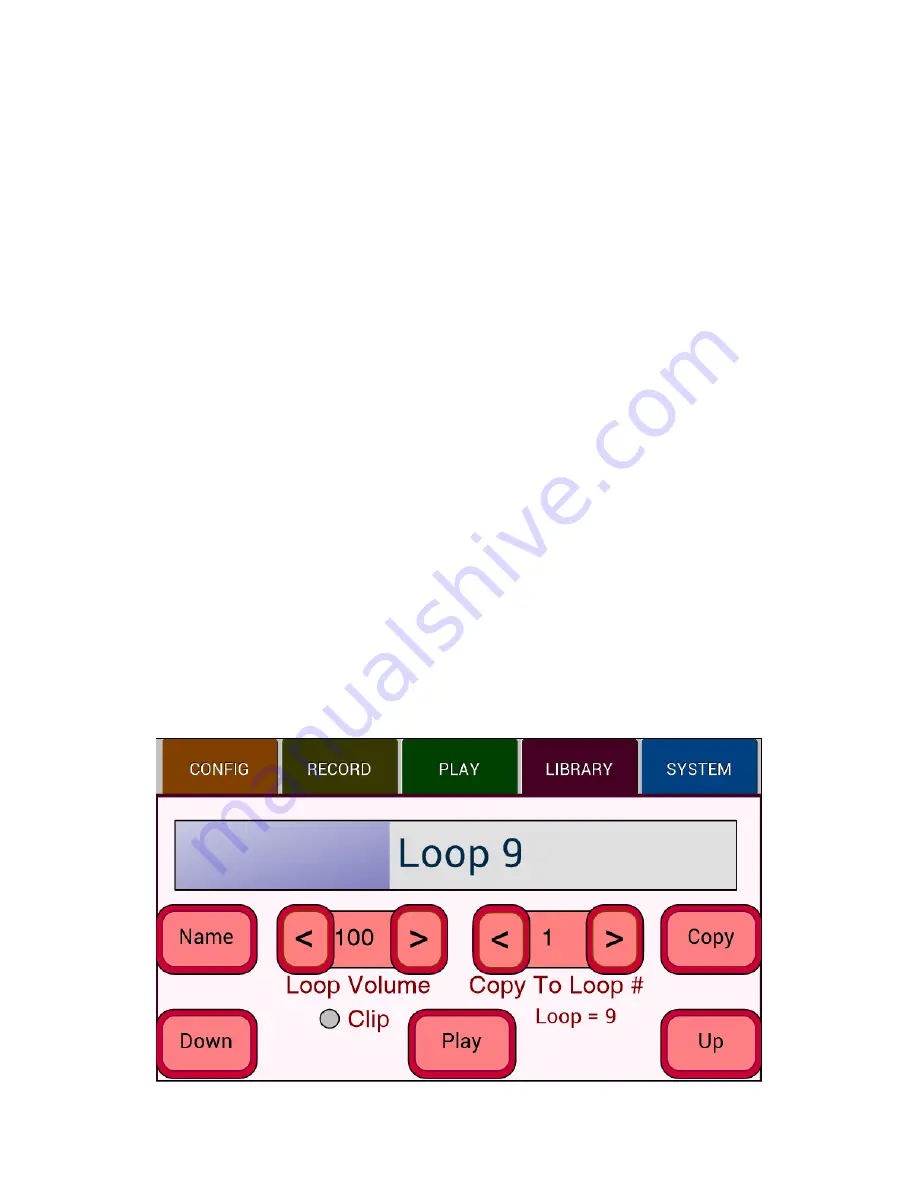
Library Screen 

The library screen can be used to manage and play a loop library of up to 250 five-
minute loops. The current loop name is shown in the loop progress bar. 
 

Name:

 Allows you to change the name of a loop using up to 16 characters. You cannot 

change the name of an empty loop. 
 

Loop Volume:

 The loop playback volume can be adjusted from 0 to 150 with 100 

representing 0db and 150 about +3db. When adjusting volume, make sure the clipping 
indicator is not turning red. The loop volume is saved with the loop data when playback 
is stopped allowing each loop to have a different volume setting. 


Summary of Contents for RiffBoxII

Page 1: ...down to specific loop lengths for backing tracks Use the loop editor to modify loop start and stop points which are timed to audio events and then store the loops in a massive library During live per...

Page 2: ...so be set in true bypass mode when the looper is not being used If you only plan to record and playback relatively clean signals input1 and output1 do not need to be connected In this case the event d...

Page 3: ...looking for a match If the Event Span value is greater than the Matching Events value automatic loop recognition only looks at groups of events separated by the Event Span value For example a Event S...

Page 4: ...he loop will fade slightly until it is completely faded when is reaches the Playback Count value which ranges from 1 to 100 New layers will be recorded at full volume 4 Auto Layer When a new layer is...

Page 5: ...odes to work properly Notes that are not recognized as being in tune will light up the left or right boxes in red Notes that are in tune light up the center box green All three boxes will also turn re...

Page 6: ...ecial Notes Up to 100 events can be displayed on the screen at one time and there are a maximum of 200 event times stored If there are more than 100 events in a loop only the first 100 events will be...

Page 7: ...ayer recorded Only the last layer can be undone Stop Play This button can be used to start and stop loop playback A three button footswitch can be used to control the three buttons across the bottom o...

Page 8: ...When ending loop playback press once to stop at the end of a loop press twice to stop immediately System Screen The system screen shown below allows control of various system and MIDI functions Bypass...

Page 9: ...appendix E MIDI Through When this is on the MIDI input is looped to the MIDI output When MIDI Through is enabled MIDI Clock Out is disabled MIDI Sysex Utility This screen comes up when the MIDI Sysex...

Page 10: ...h playback event 1 100 1 100 40 Setting the high playback event 101 200 1 100 41 Reducing the playback loop length 1 42 Expanding the playback loop length 1 43 Save current preset values 1 44 Turn byp...

Page 11: ...otswitch as described in the Record Playback and Library screen sections of this manual It can also be controlled from a MIDI footswitch using MIDI messages as described in the MIDI implementation sec...

Page 12: ...nput using either a mono or stereo cable Make sure to set the FootSw Jack control to an output on the system screen Connect the output 2 jack on RiffBoxII to the guitar input jack on Trio Connect the...

Reviews: