7
2. To access the programming button on your
E-Z Command
® Turnout, remove
the programming button cover as shown in figure 1. Use a pen to press the
programming button (figure 2) for two seconds. The turnout will toggle twice
to indicate that it is in programming mode.
3. Press the UNLIT direction (arrow) button on your
E-Z Command® Plus
Control
Center (figure 3). Then press the turnout’s assigned address button four times.
The turnout will toggle three to five times to reset the turnout to its new default
position. Once the position has been programmed, you can control the turnout
or select different turnouts with address buttons 1-8. You can return to
locomotive control mode by pressing the FUNCTION button once.
Note: The direction buttons are only used to program the default position of the
E-Z Command
® turnout and will not toggle the position of the turnout.
MANUAL TURNOUT OPERATION
All
E-Z Command
® Turnouts can also be toggled manually at any time by throwing the
switches indicated in figure 4.
USING THE WALK-AROUND COMPANION
For flexibility of movement around larger layouts, you can use the separately available
Bachmann #44907 Walk-Around Companion
alongside your
E-Z Command®
Plus
Control Center. Simply use the I/O cable included with the Walk-Around Companion to connect to
your control center.
Please note that when using the Walk-Around Companion, you will be limited to 28-speed steps and functions FO-F4 for all 9 addresses.
TIPS & TROUBLESHOOTING
If your train doesn’t respond to commands, make sure that:
• all wiring is correctly installed as shown
• the transformer is securely plugged into the wall socket
• the emergency stop button is lit (indicating that the control center is receiving power)
• the correct button for the train you wish to operate is active (button is lit)
• the control center is not in “emergency stop” mode (STOP button blinking)
• the speed control knob has been rotated clockwise if you used it to stop an individual locomotive
Never connect another controller to track controlled by an
E-Z Command
®
Plus
unit. Separate “power
districts” can be created using separate units, but they must be double-isolated so that no train
can bridge the joints between sections.
Never use an electronic track cleaner near your
E-Z Command
® system.
Only plug a Bachmann
E-Z Command
® device, or other devices approved explicitly by
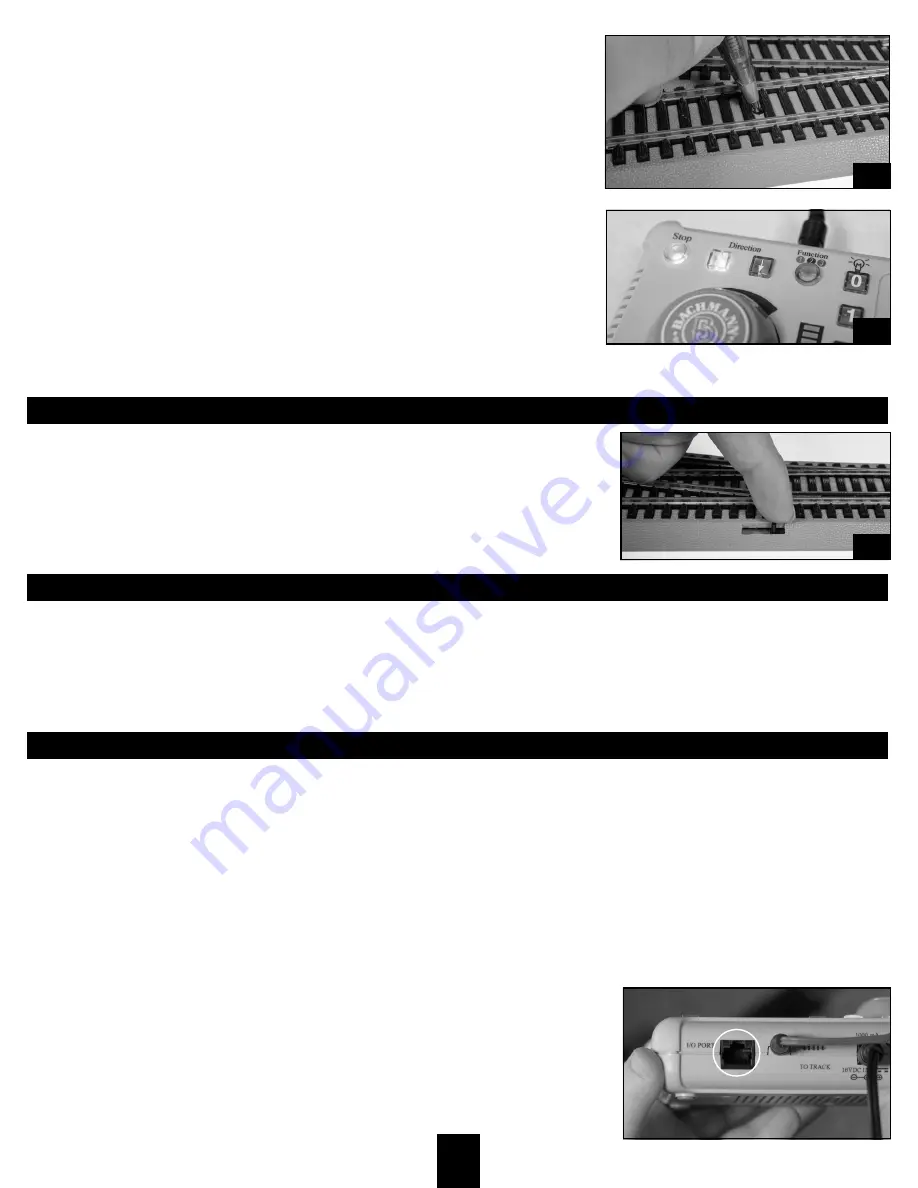
Bachmann, into the I/O port shown in this image. Other devices may have the same connector
but are not necessarily compatible. If any device not designed for this port makes contact with the
I/O port, it could damage your control center.
2
3
4


