background image

Instruction 24-9450

7

IrDA Printer 

Operation

4.  Press the SEL button to print the next parameter, and then use the 

FEED button to change that parameter to the desired value.

5.  Repeat Step 4 as necessary to change all desired parameters.

6.  Once all parameters have been set, press and hold down the SEL button, 

and then press the FEED button to save the new settings; after which, 

the message “Data Keeping, Setting mode END !!” should be printed.
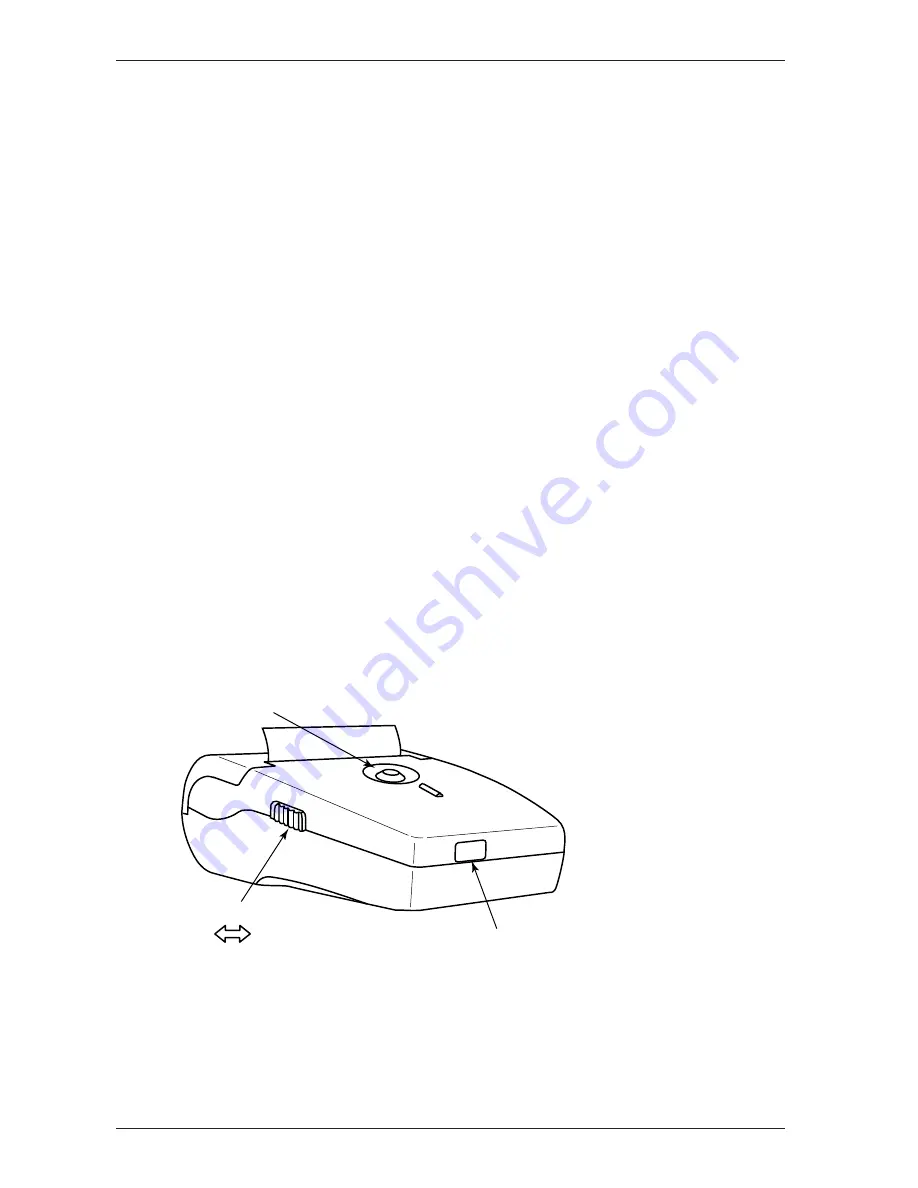
Using the Printer

See Figure 2. Turn ON the printer and observe that the Power LED should 

glow green.

Align the printer’s infrared sensor to the infrared output of the external 

instrument. The printer should not be more than 18 inches (45 cm) away 

from the instrument, at an angle of no more than 30 degrees.

Begin printing as described in the instrument’s instruction manual.

Tip:

 If the printer does not print, or if random characters 

are printed, then check that the baud rate and communi-

cation protocol (IrDA-SIR or HP-Ir) settings of both the 

printer and instrument are set to the same values.

Figure 2. Using the Printer

ON          OFF

Power

Power LED (Green)

Align the printer’s infrared sensor to the 

infrared output of the external instrument. 

The printer’s sensor should not be more 

than 18 inches (45 cm) away from the 

instrument, at an angle of no more than 

30 degrees.

Summary of Contents for Portable Wireless Infrared Printer

Page 1: ...Product Leadership Training Service Reliability Portable Wireless Infrared Printer w Disposable Batteries Part No 24 1400 Instruction 24 9450 Operation Maintenance Rev 1 December 2004...

Page 2: ...RRANTIES OF MERCHANTABILITY AND FITNESS FOR A PARTICULAR PURPOSE AND II ANY OBLIGATION LIABILITY RIGHT CLAIM OR REMEDY IN CONTRACT OR TORT WHETHER OR NOT ARIS ING FROM BACHARACH S NEGLIGENCE ACTUAL OR...

Page 3: ...dicator LEDs 2 Pushbuttons 2 Sensors 2 Technical Characteristics 4 Operation 5 Precautions 5 Self Test 5 Set Up Mode 6 Using the Printer 7 Maintenance 8 Battery Installation 8 Paper Installation 8 Cle...

Page 4: ...IrDA Printer Instruction 24 9450 ii Notes...

Page 5: ...consists of a main cavity into which a paper roll is dropped for load ing The thermal print head is at the front of the cavity and a rubber roller is attached to the lid of the mechanism When the lid...

Page 6: ...ON OFF switch is used to start the printer s self test function refer to Section Self Test When the printer is in its set up mode this button is used to modify the selected printer parameter refer to...

Page 7: ...its Set Up Mode press to change value of printer parameter as selected by the SEL button Error LED Red Flashes when Out of paper Paper cover is open Set up mode is selected Buffer is full Print head...

Page 8: ...ne Pitch 0 1 in 4 0 mm Paper Width 2 25 in 57 5 mm Interface Infrared Protocol IrDA or HP International Characters U S A Turkish Denmark2 Norway Japan Spain Italy Sweden Denmark1 U K Germany France Bu...

Page 9: ...tup parameters software version and print quality 1 Before running the self test make sure there is sufficient paper to run the test 18 46 cm the paper cover is closed and that the printer is switched...

Page 10: ...all of the printer s current parameter settings are printed followed by the first parameter that can be modified Note If no button is pressed within 15 seconds the set up mode is automatically termina...

Page 11: ...printer s infrared sensor to the infrared output of the external instrument The printer should not be more than 18 inches 45 cm away from the instrument at an angle of no more than 30 degrees Begin pr...

Page 12: ...of paper as indicated by the front panel red LED ashing install a new paper roll as follows 1 Lift up paper cover latch and then open paper cover as shown in Figure 3 2 Remove spent paper core 3 Drop...

Page 13: ...ance Figure 3 Maintenance Print Head Paper Roller Paper Cover Paper Cover Latch Close Paper Cover so that paper is pinched between the Paper Roller and Print Head Paper Roll Battery Cover bottom of pr...

Page 14: ...once a month if the printer is used heavily The print head should be cleaned immediately however if the print becomes visibly fainter due to contamination of the print head Material Required Isopropyl...

Page 15: ...6176 Fax 856 665 6661 Email njservice bacharach inc com Pennsylvania 621 Hunt Valley Circle New Kensington PA 15068 Phone 724 334 5051 Fax 724 334 5723 Email help bacharach inc com Canada Bacharach o...

Page 16: ...Headquarters 621 Hunt Valley Circle New Kensington PA 15068 Ph 724 334 5000 Fax 724 334 5001 Toll Free 800 736 4666 Website www bacharach inc com E mail help bacharach inc com Printed in U S A...

Reviews: