background image


Charging the System                                                            


1. Evacuate and pressure test the system. This can be

                accomplished by charging with nitrogen to 75 lbs 
 

    and checking your gauges for any sign of a leak.

                Evacuate the system to 500 microns.
 

2. Charge the system with R134A until the sight 


    glass goes clear. Initial charge will be 6.3 pounds

                of 134A; the pumpdown capacity of the receiver.
                It is very important not to over charge this system.  
                As soon as the bubbles in the sight glass disappear,
                discontinue charging. Over-charge will result in an 
                ice block in the evaporator.


3. Adjust the TXV to 12-14 degree’s of superheat. 

                Take your suction pressure and temperature reading at the condenser,
                and add two pounds to it for the pressure drop. 
                Take the difference between actual temperature and
                your reading from a PT chart to calculate.
 

4. System Start up. Before replacing stainless steel 

                enclosure cover, power up the system to make sure
                water solenoid is opening correctly. The misting 
                nozzle will be open. Remove power and replace the 
                cover. Power up the evaporator, and let the system 
                pull down. At temp set point the refrigerant solenoid
                will close and the system will pump down and shut 
                off the condensing unit.
 

5. Check level of safety float.


Breakers. We recommend a 30a fused disconnect.

Maintenance and Troubleshooting                                                          

Have your system checked each year by a certified refrigeration technician.

He should:
1.  Clean the indoor and outdoor coils
2.  Change the water filter on the Humidification models, and change out
     the humidification mister head
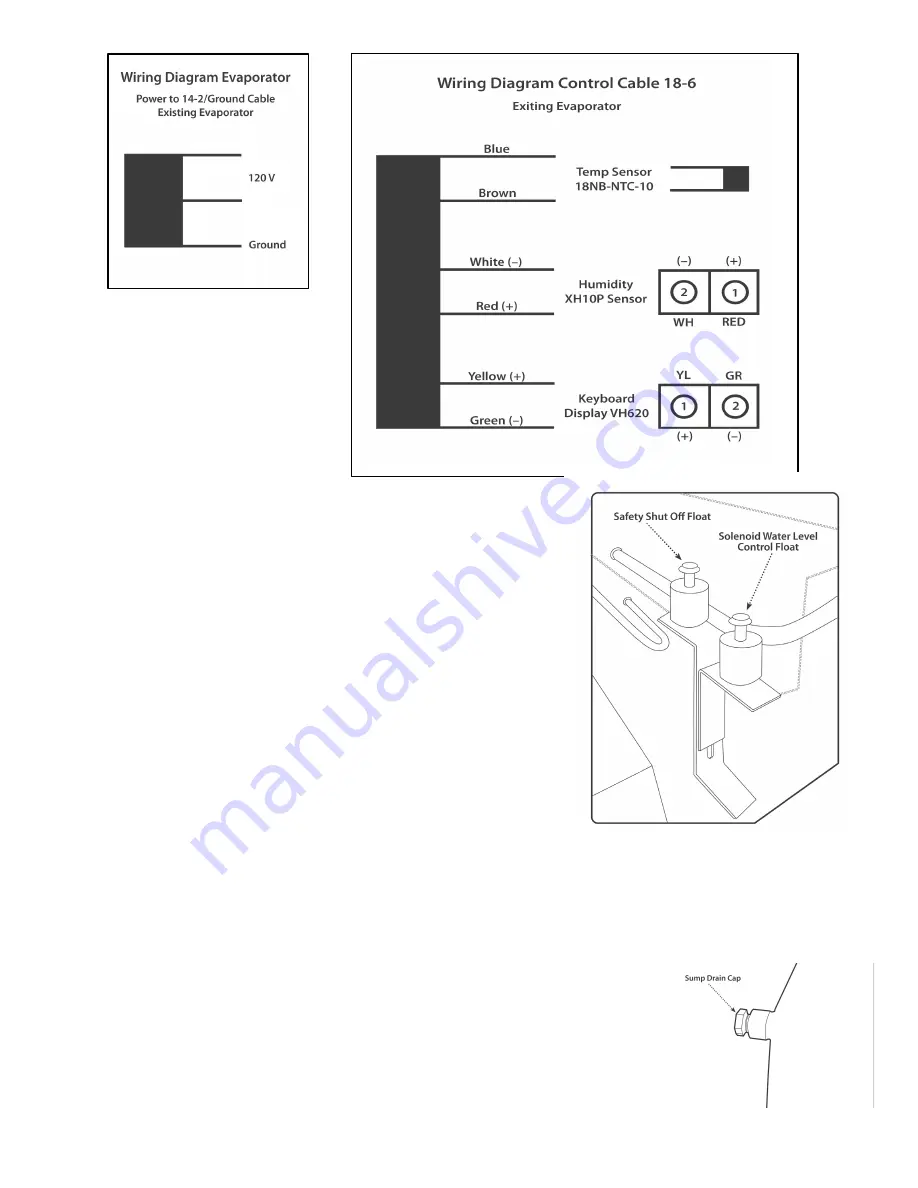
3.  Drain the Stainless steel sump (diagram #3), and clean it if necessary.

6

Summary of Contents for BCS2000

Page 1: ...yboard and master to slave control jumper 6 Condensing unit pad Condensing Unit Set Up 1 Place a suggested model on a firm level location pad for outdoor applications or add 4 anti vibration pads to each corner of the condensing unit for indoor use Place in an area with adequate air flow 2 Braze in suction and liquid lines to condensing unit 3 Bring 3 8 copper tubing from the liquid line of the co...

Page 2: ... the back wall for adequate air distribution 2 Run the 1 4 drain line from the pump in the evaporator through the ceiling cap and out to a suitable location Heat tape any portion susceptible to freezing 3 Attach template to the ceiling Remove the stainless steel outer enclosure from the base of the unit Attempt to locate any mounting holes below ceiling joists for secure attachment with 8 wood scr...

Page 3: ...th outlets hold each 14 6 jumper cable that is also color coded These run to each evaporator slave module inside of each stainless steel enclosure 6 Make sure that the unit is covered tightly with each cover Slave Control Module 7 From left to right The first two terminals should be connector to the 18 2 leads from port one in the master control module Terminals 3 4 5 one white lead 7 8 9 and 10 w...

Page 4: ...of the green condensate pump in each evaporator 11 For indoor applications run 1 4 vinyl condensate drain tube from the evaporator to a suitable location 12 Do not replace cover until unit test is complete Controller Display Set Up 1 Install double gang box and cut out the blank plate to accept the Bacchus Temp Humidity Keyboard VH620 The keyboard can be mounted inside or outside of the room Run 1...

Page 5: ...d and are not intertwined or crossed XH10P Humidity Sensor 8 The microprocessor has been preprogrammed for 55F and 50 RH To change either setting E Depress the up and down v keys together for more than three seconds to unlock the keyboard F Push the Temp or Humidity Set Key and immediately Release 18NB1 G Use the up and down v keys to change the value H Push the appropriate set key again and wait ...

Page 6: ... pressure drop Take the difference between actual temperature and your reading from a PT chart to calculate 4 System Start up Before replacing stainless steel enclosure cover power up the system to make sure water solenoid is opening correctly The misting nozzle will be open Remove power and replace the cover Power up the evaporator and let the system pull down At temp set point the refrigerant so...

Page 7: ...e could be bad Compressor fans controller or Pump Alarm Signaling Message Cause Outputs P1 Thermostat probe failure compressor and heating outputs off on dehumidification system only P3 Humidity probe failure humidity regulation off HA High temp alarm outputs unchanged LA Low temperature alarm outputs unchanged HHA High humidity alarm outputs unchanged HLA Low humidity alarm outputs unchanged In t...

Page 8: ...tage 208 230 1v Electrical compressor rla 10A 11A 8A 12 1A compressor lra 53A 51A 43A 49A cond Unit MFS 20A 30A 15A 17 6A cond Unit mca 13 4A 13 4A 11 3A 12 1A BTU capacity 40F 4857 6250 10200 100 amb 12 185 suc 110 amb Phone 937 665 0424 Fax 937 890 6664 8 ...

Reviews: