2
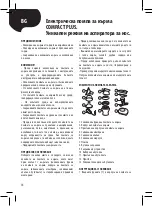
INTENDED USE
• Expressing milk from a woman’s breasts
• Expressing excess milk from overfilled breasts
• Storage of excess milk to be used later
NOTE!
• Before using the breast pump for the first time make
sure you read the user manual and warnings. Keep the
user manual for future reference.
• Use the breast pump in accordance with its intended
use described in the user manual.
• Do not use the breast pump if it is physically damaged.
• Do not place the breast pump near devices generating
a strong magnetic field.
• Do not expose the breast pump to direct sunlight.
• Keep the breast pump out of reach of children.
• Keep the pumping unit of the breast pump in a dry
place and do not immerse it in water.
• Before each use, check all the elements visually for
cracks, chips, tearing, stains, discolouration and signs
of wear since they may affect the efficiency of the
device. If the breast pump is damaged it cannot be used
until the damaged parts are replaced with new ones.
• Keep the breast pump clean.
BEFORE EACH USE
Find a quiet place and make sure that all the elements
of the breast pump coming in direct contact with the
food (silicone breast funnel, breast pump body, silicone
membrane, silicone valve and bottle) have been
sterilised and correctly assembled.
• Wash your hands thoroughly with soap and warm
water before touching any element of the breast pump.
• After taking a comfortable sitting or semi-recumbent
position, gently massage the breasts and heat them
with a warm towel.
• Before using the breast pump make sure that all the
parts have been cleaned, sterilised and dried.
• Make sure there is no liquid in the tubing. Do not
switch the breast pump unless the tubing is empty.
EN
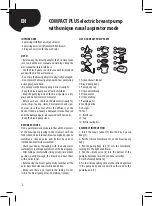
COMPACT PLUS electric breast pump
with unique nasal aspirator mode
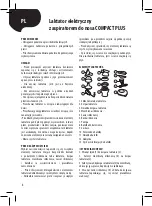
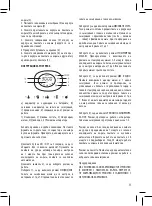
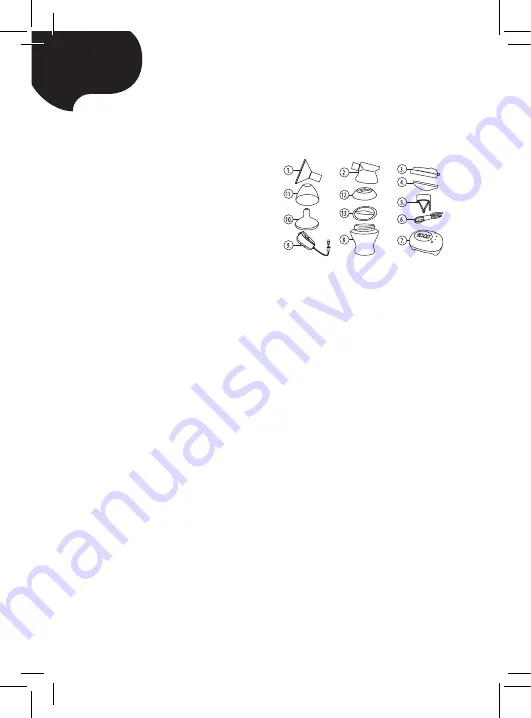
LIST OF BREAST PUMP PARTS
1. Silicone breast funnel
2. Breast pump body
3. Pump body cap
4. Silicone membrane
5. Silicone valve
6. Silicone tubing
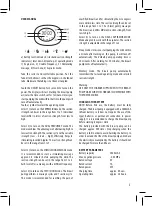
7. Pumping unit
8. Feeding bottle
9. Charger
10. Teat
11. Bottle cap
12. Cap
13. Bottle sealing disc
ASSEMBLY INSTRUCTION
1. Insert the breast funnel (1) into the breast pump
body (2).
2. Put the silicone membrane (4) on the breast pump
body.
3. Put the pump body cap (3) over the membrane,
turning it to the right until it locks.
4. Put the silicone valve (5) into the bottom of the
pump body (make sure it’s been done correctly).
5. Fix the feeding bottle (8).
6. Fix the silicone tubing (6) onto the splined aperture
in the pump body and connect the other end to the
pumping unit (7).
Summary of Contents for COMPACT PLUS
Page 14: ...14 BG COMPACT PLUS 1 2 3 4 5 6 7 8 9 10 11 12 13 1 1...
Page 16: ...16 2600mAh 500 6 2600 mAh 0 04 MPa 5V 1A 5W 5 2 5 5...
Page 17: ...17 24 NATURAL NURSING Natural Nursing 1 2 EN 14350 Babyono...
Page 19: ...19 e f g 7 1 2 3 4 5 6 7 8 9...
Page 50: ...50 GR COMPACT PLUS 1 2 3 4 5 6 7 8 9 10 11 12 13 1 1 2 2 4 2 3...
Page 51: ...51 3 4 5 5 8 6 6 7 1 2 3 4 5 ON OFF 2 1 1 1 7 2 1 7 3 2 5 1 5 4 8 1 1 7 5 1 3 1 30 30...
Page 52: ...52 2600mAh AA 500 6 2600 mAh 0 04 MPa 5V 1A 5W 5 2 5 5...
Page 53: ...53 24 NATURAL NURSING Natural Nursing 1 2 EN 14350 Babyono 50 C...
Page 55: ...55 1 2 3 4 5 6 7 8 9...
Page 104: ...104 RU COMPACT PLUS 1 2 3 4 5 6 7 8 9 10 11 12 13 1 1 2 2 4 2 3 3...
Page 106: ...106 2600 500 6 2600 0 04 5 1 A 5 5 2 5 5...
Page 107: ...107 24 NATURAL NURSING Natural Nursing 1 2 EN 14350 Babyono...
Page 109: ...109 g 1 2 3 4 5 6 7 8 9...
Page 122: ...122 UA i COMPACT PLUS 1 2 3 4 5 6 7 8 9 10 11 12 13 1 1 2 2 4 2 3 3...
Page 124: ...124 2600 500 6 2600 0 04 5 1 A 5 5 2 5 5...
Page 125: ...125 24 NATURAL NURSING Nat ural Nursing 1 2 EN 14350 Babyono...
Page 127: ...127 1 2 3 4 5 6 7 8 9...
Page 128: ......
Page 129: ......
Page 130: ......
Page 132: ...Cat No 971...


